This post may contain affiliate links, meaning I make a commission if you purchase through my links, at no extra cost to you. Disclosure here.
Maybe you’ve just started your blog or maybe you’re considering starting one. And you’re thinking:
How do I even begin to use all these platforms?
Do I need a Pinterest?
How do I create a pin for Pinterest?
Can I create them for free?
Answer?
Yes, you absolutely need a Pinterest account to grow your audience. It is the easiest platform to get traction on, along with more views and readers.
That’s why today I’m showing you a super easy and FREE way to create your pins in no time using Canva, an amazing tool.
Canva is a free service that you can use to create beautiful pins or any other visual graphics, blog headers, infographics, charts etc. So go ahead, open it up and let’s create an easy pin together.
Ready to start your own blog? I use and recommend Bluehost for your blog. If you have no idea where to begin, use my free ultimate guide on how to start a blog and make money blogging.
Step by Step Guide for Beginners
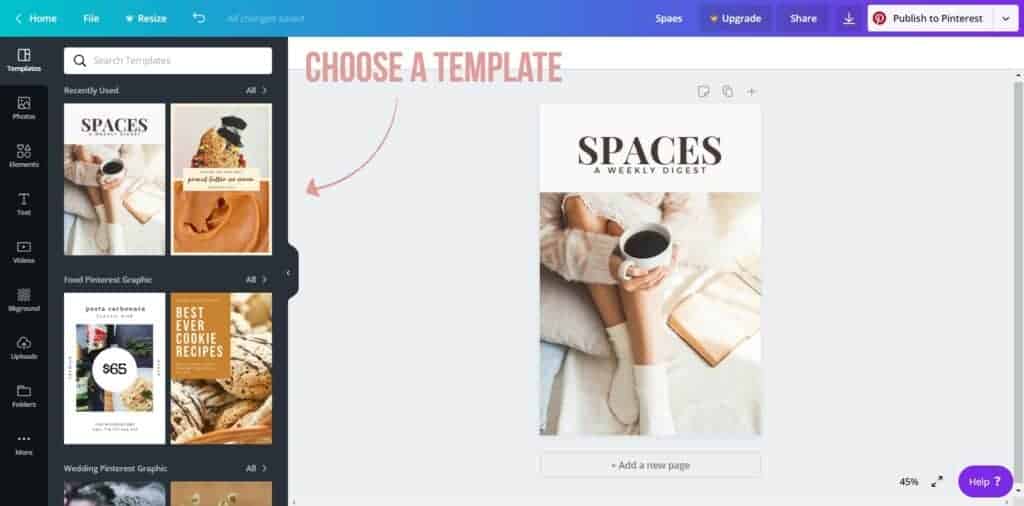
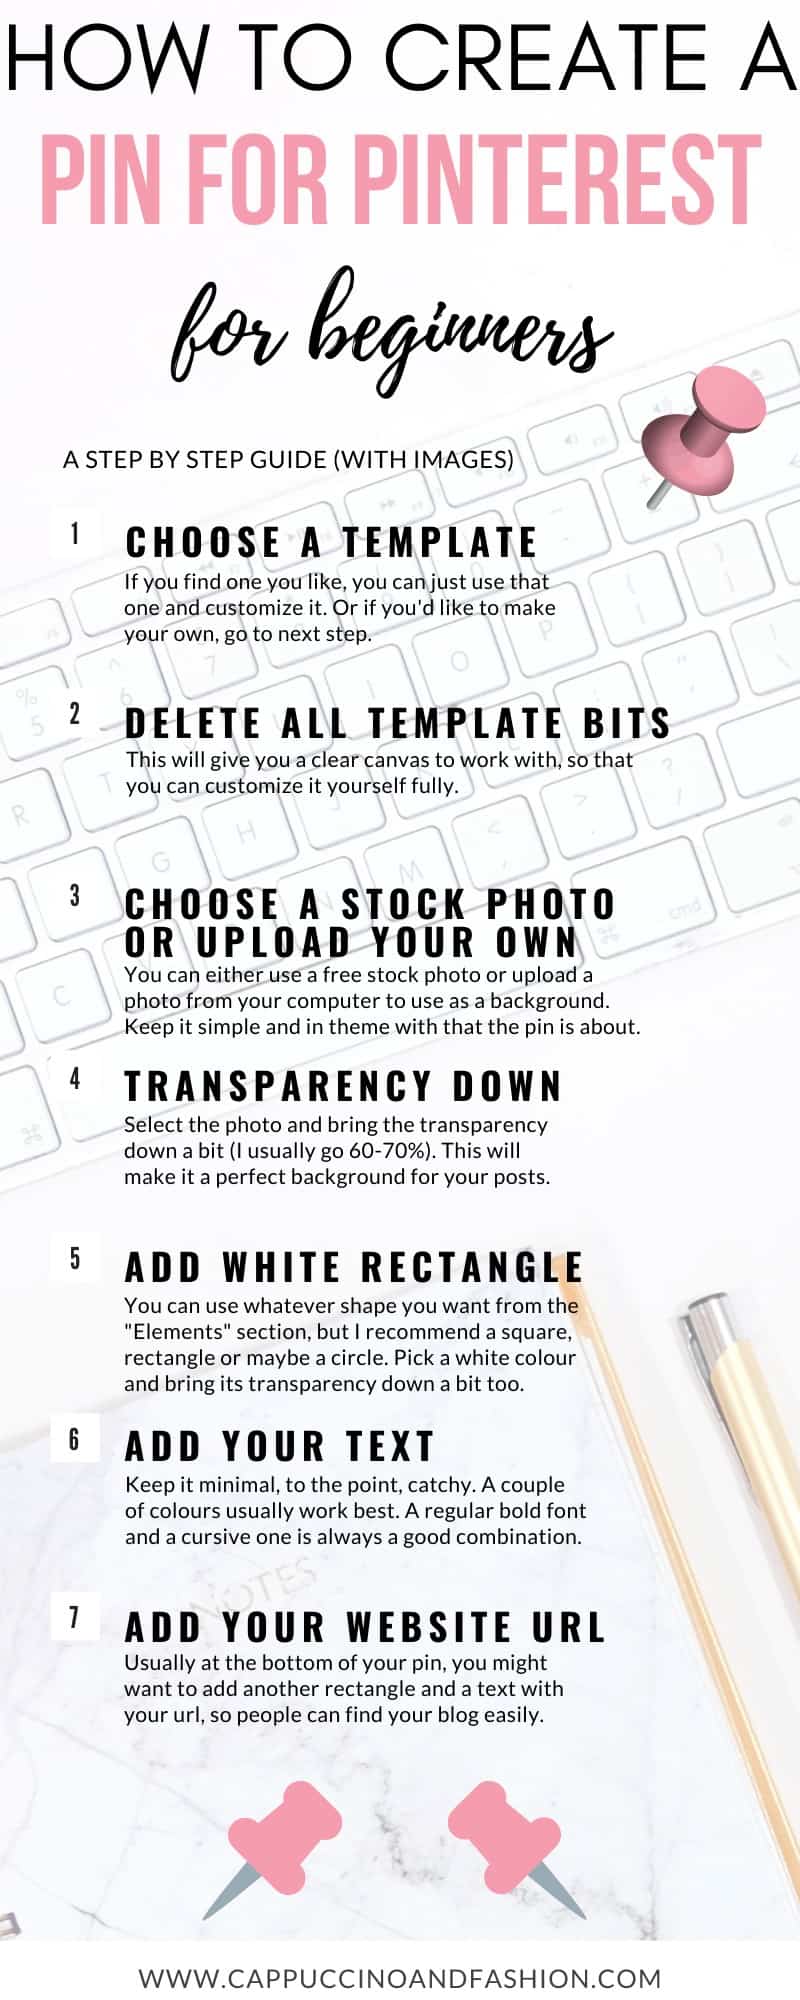
1. Choose a template
You will need to create a free account on Canva to access it. Once you are logged in, you can pick a template size from the Create a Design section. Pick the Pinterest Graphic one. That will give you the perfect size for a pin, so you don’t have to worry about that.
Then from the left side, you can either pick a template you like and just customize that one with your own photos and text. Or go ahead to the next step in this guide to see how to make it your own.
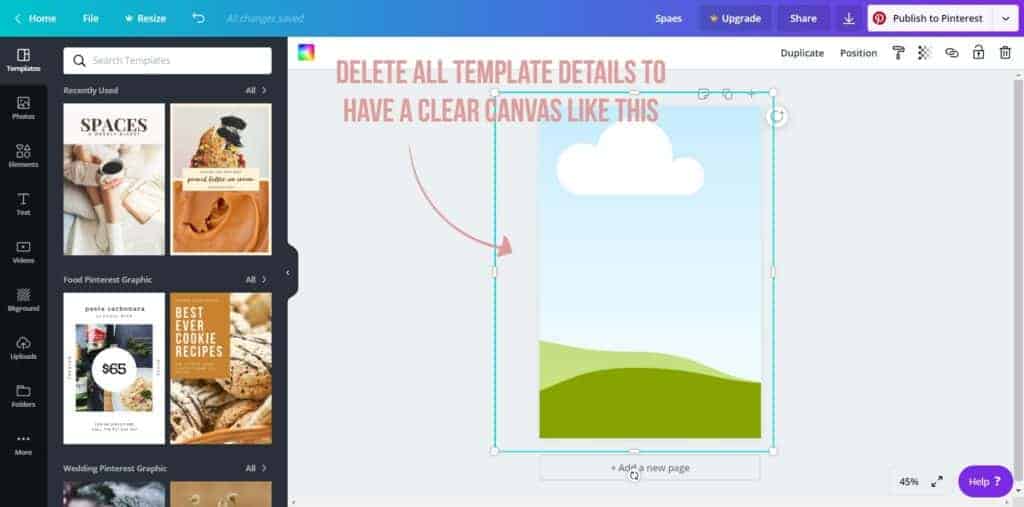
2. Delete all template bits
Simply click on each photo or text in the template and hit delete. You will then have a clear canvas like the one pictured below. Now you can add your own elements to it.
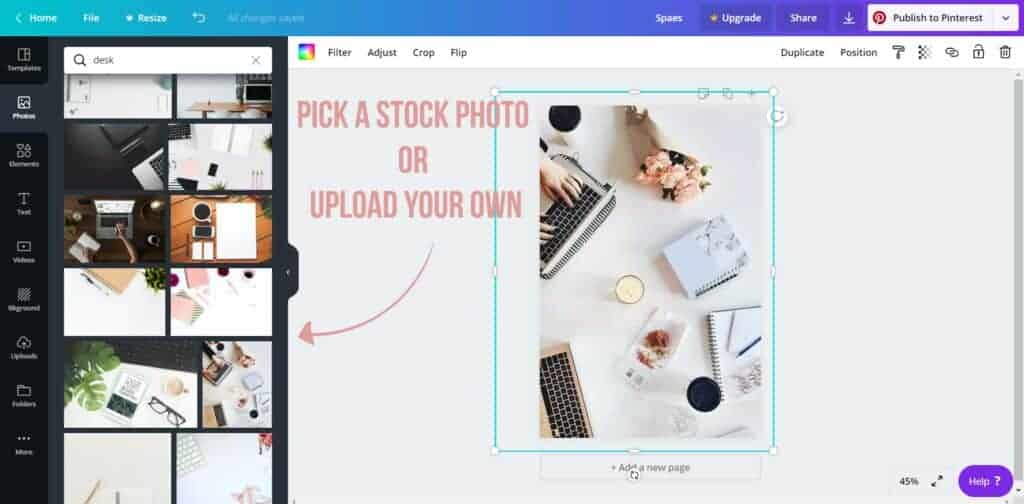
3. Pick a stock photo or upload your own
In the Photos section on the left, you can find stock photos and a lot of them are free to use. You can even search through them by writing a keyword at the top. For example, here I searched for “desk” ones. You can just click and drag them onto your canvas. Then drag their corners to resize however you want them to fit in there.
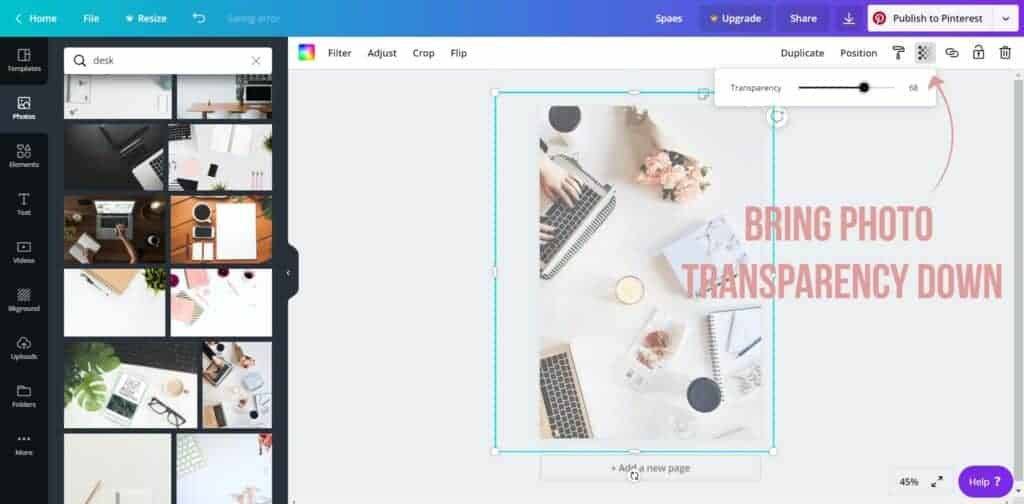
4. Bring photo transparency down
This is optional, but I find that it helps to make the text stand out. If it’s a busy photo with lots of details, I recommend bringing the transparency down a bit (I usually go for around 60-70%). If it’s quite a minimal photo, then you can probably get away without this step.
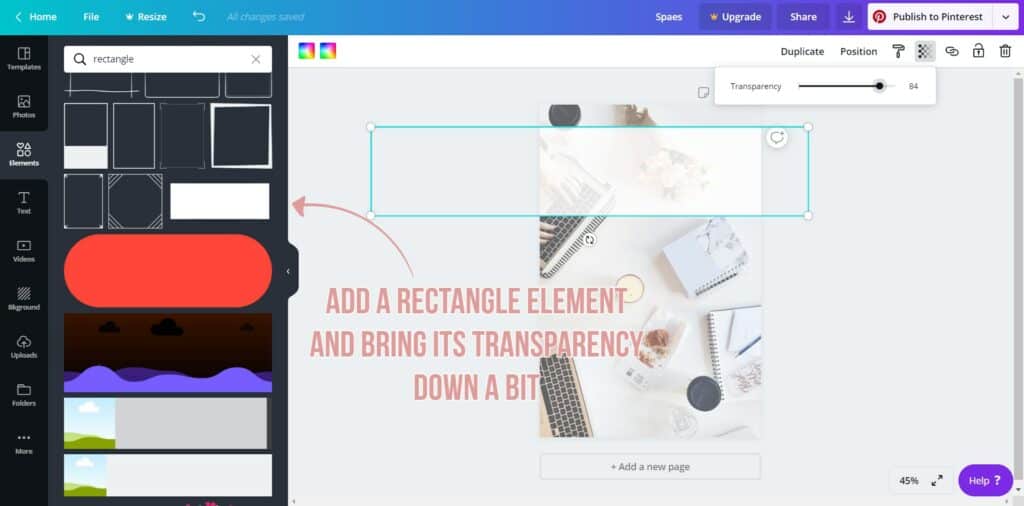
5. Add a shape element and bring its transparency down
A few shapes that work best are a rectangle, a square or maybe a circle. I usually pick a simple white rectangle (although you can change its colour too). Resize it to however you want to it look and bring its transparency down a bit too.
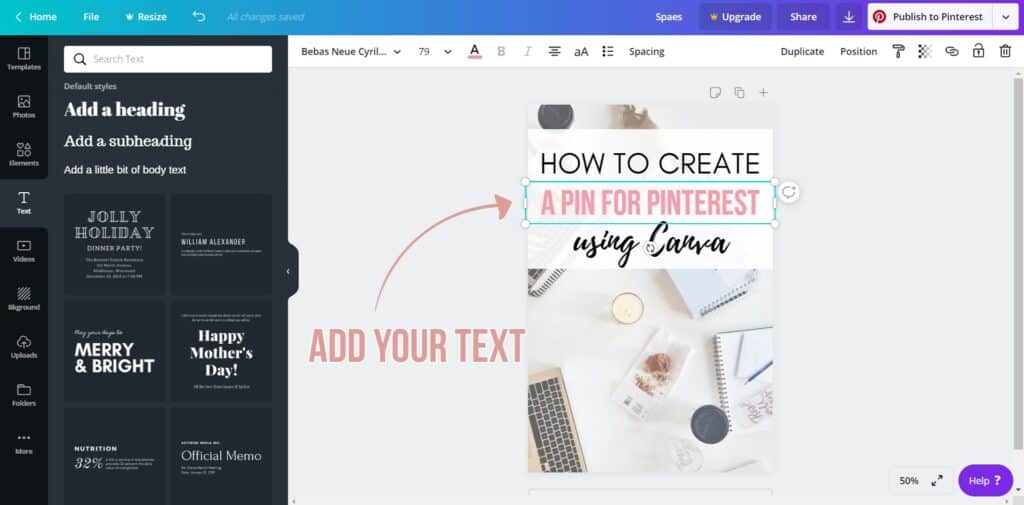
6. Add your text
Your text should be easy to read, quite large on the canvas and have a high contrast to the background. It needs to stand out. Best practices say the best combination is a regular uppercase font and a cursive / script font.
It can be challenging to find good font combinations, so I have put together 10 best font pairings you can use for FREE right away.
As far as colour goes, a maximum of two is best. I usually go for black and pink, but you do whatever suits your brand/website.
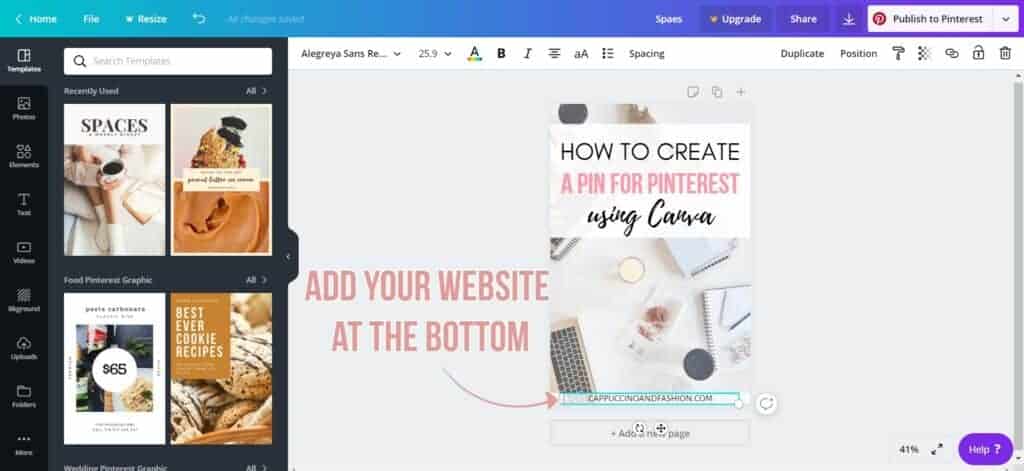
7. Add your website or logo at the bottom
Use another rectangle at the bottom of your pin and add a text with your website or upload your own logo.
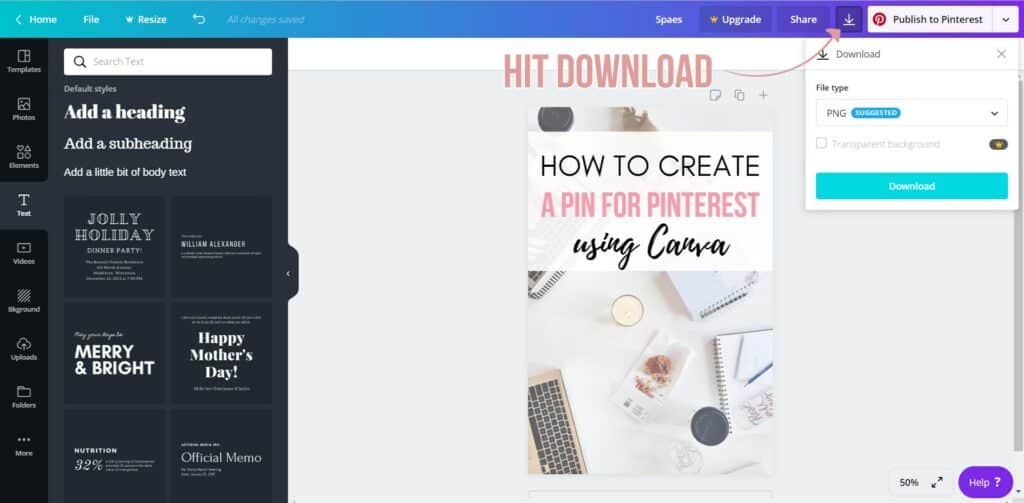
8. Download your preferred format (usually PNG or JPG)
And there you have your pin for Pinterest all ready to go in a few easy steps. You can now get more tips straight to your inbox, so you don’t miss out on any info that can help you grow your blog.
Now you know how to create a pin for Pinterest easily. Hope you found this helpful!
What is currently your biggest challenge when it comes to Pinterest or blogging?


Thank you. This post was helpful :).