This post may contain affiliate links, meaning I make a commission if you purchase through my links, at no extra cost to you. Disclosure here.

I mentioned recently that I decided to switch from Convertkit to Flodesk, for a number of reasons.
I wrote this blog post where I answered why I think Flodesk is a better choice than Convertkit for me.
And I thought today I will walk your through the process of switching over. It took me a few hours to complete, but simply because I have lots of opt-in forms and workflows that I use.
It’s not a difficult process though, so let’s see how to get it done easily!
Flodesk is fairly new and they are still in development – which means they will be adding more features to it – but I find them a perfect fit for me.
Ready to start your own blog? I use and recommend Bluehost for your blog. If you have no idea where to begin, use my free ultimate guide on how to start a blog and make money blogging.
I love their pricing scheme, because it’s very simple and it doesn’t ever increase.
You pay only $38 per month (or $19 per month with referal, you can use mine here), regardless of how many subscribers you have. Their plan includes unlimited emails and unlimited subscribers, without the price going up.
Basically you will only ever pay $19 monthly (with referal) and not have to worry about reaching another milestone and having to figure out a new monthly budget.
Unlike most of the other platforms of this sort.
Here are the steps I followed to switch from Convertkit to Flodesk:
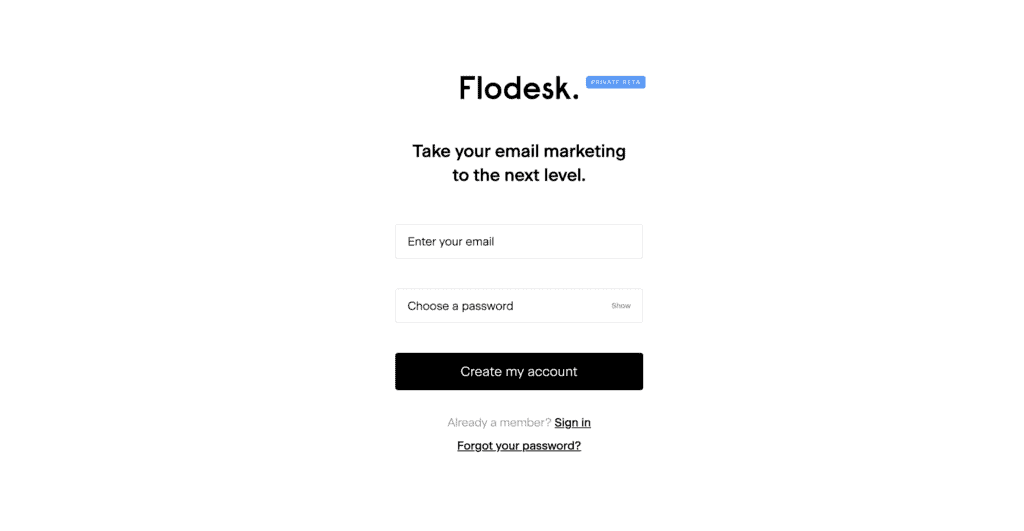
1. Create an account
Flodesk have a 30-day free trial. You can create your account using my Flodesk coupon code to get 50% off: CAPPUCCINOANDFASHION
You will need to input an email address and password, and then we can get into setting everything up.
2. Authenticate your domain
If you have a custom domain for your blog, then you can now authenticate your domain, which will give your emails more credibility and higher deliverability rates. It basically proves even more that the emails sent are actually from you and not spam.
Go to Domain setup in the left bar.
It is super simple to do, you will need to follow the steps given in Flodesk – it’s just a few copy-paste tasks that are quick to get done.
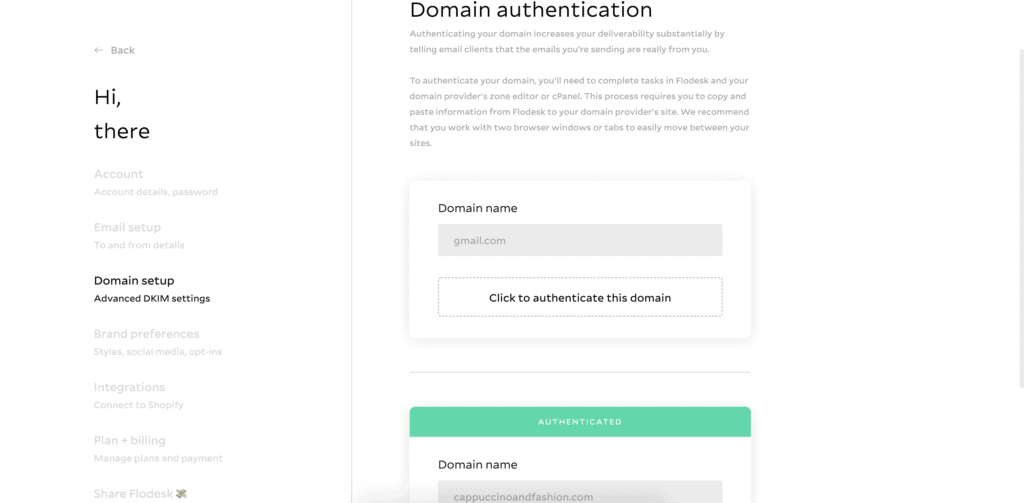
Note: You cannot authenticate a gmail.com email address, you can only authenticate a custom domain email address. For example, I authenticated cappuccinoandfashion.com.
3. Insert your brand details (colours, social media etc.)
Go to Brand preferences in the left bar.
You can customize here a lot of things for your emails.
Add an image logo which will appear at the top of every email. Even if you choose one of the Flodesk email templates, they will automatically insert your own logo at the top of the emails, which makes the whole process so much easier.
Also add here your blog name and website link.
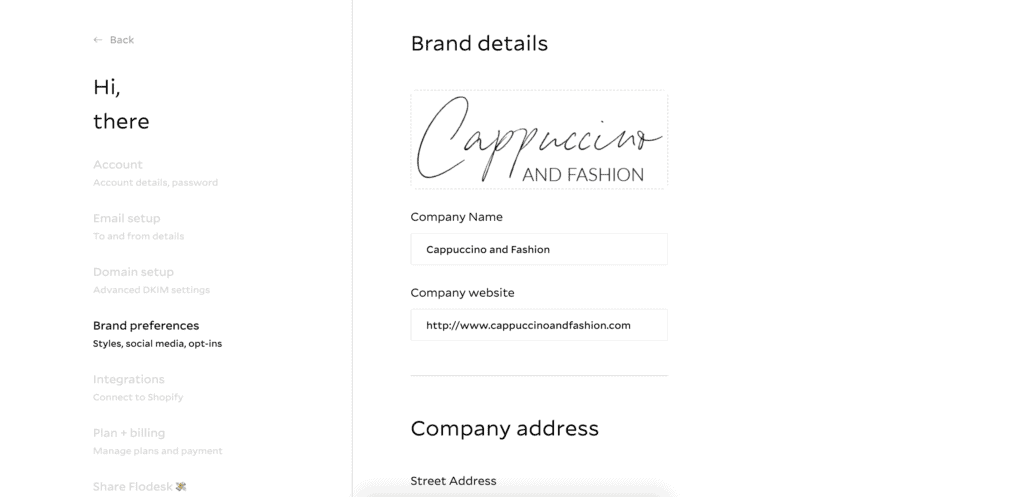
You will need to use a physical address in your emails, as that is a legal requirement. I would suggest you don’t use your home address for privacy reasons, as that address will appear in every email you send out.
Instead, you can get a PO box or use a different address you are comfortable with. I personally got a basic PO box for this.
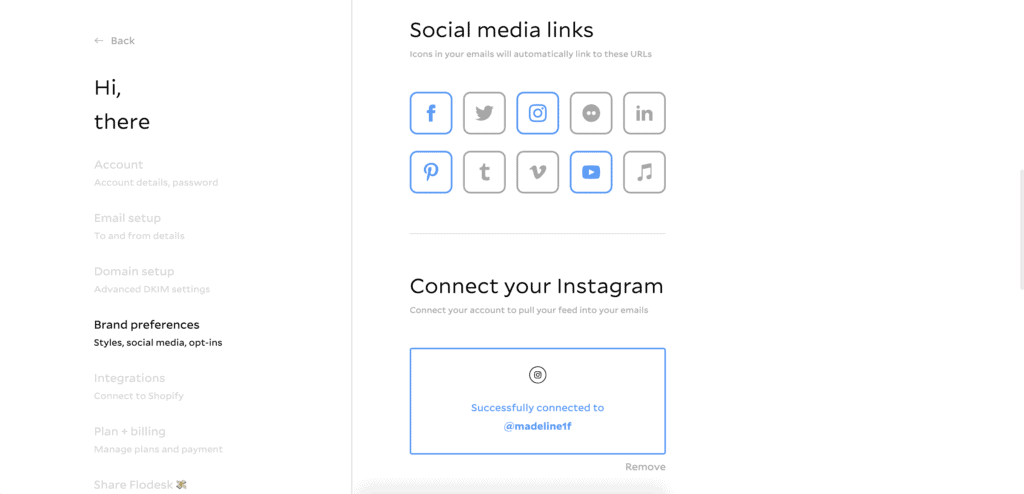
Next, you can add your social media links and you can also connect your Instagram in order for your feed to appear in your emails. I think this is awesome because it also helps you build up your Instagram account along with your emails.
You can also add your favourite brand colours if you want to, which will help you out when you’re designing your emails.
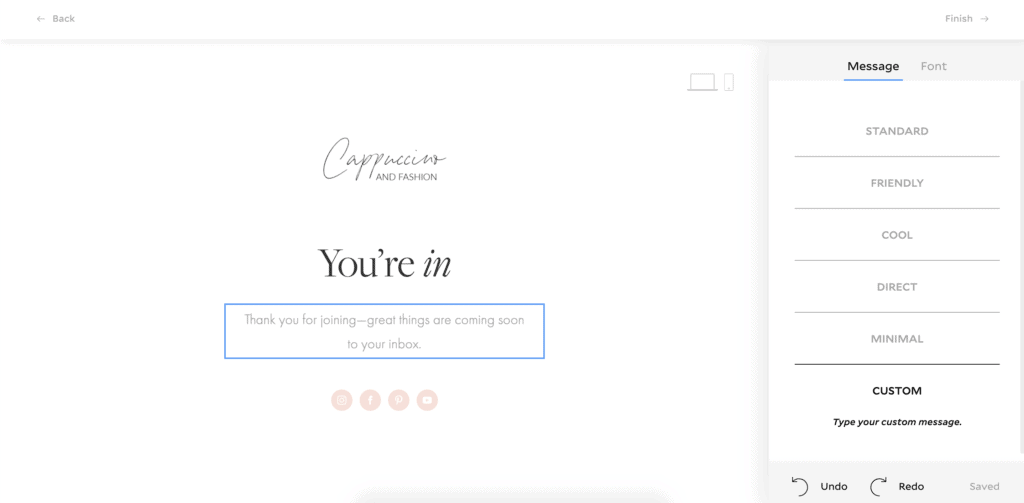
4. Set up your double opt-in + thank you message
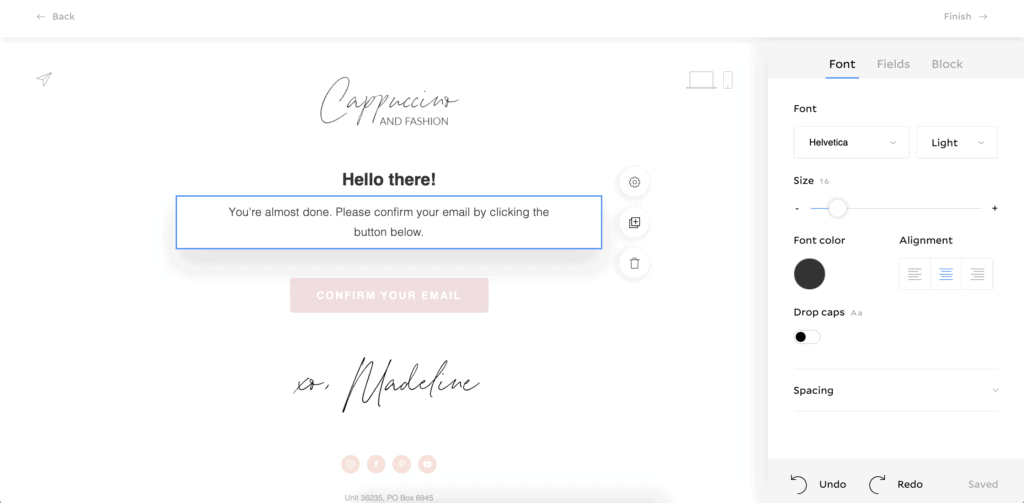
In the same branding tab, you can set up double opt-in which I think is essential to keep a spam-free list. Basically, people will need to confirm their email address before they are signed up onto your list.
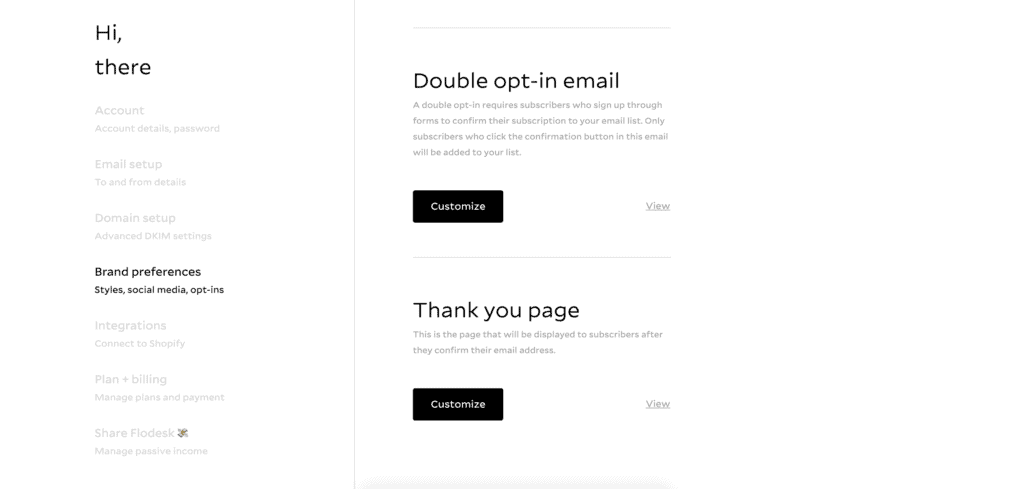
Click on customize and then you can edit your opt-in email here. I would suggest keeping it simple.
And then along with this, you can set up a thank you page that people will see after they click to confirm their email. Again, try to keep it simple.
5. Create an email template
As you can see, the Flodesk interface has four main tabs: Emails, Audience, Forms and Workflows.
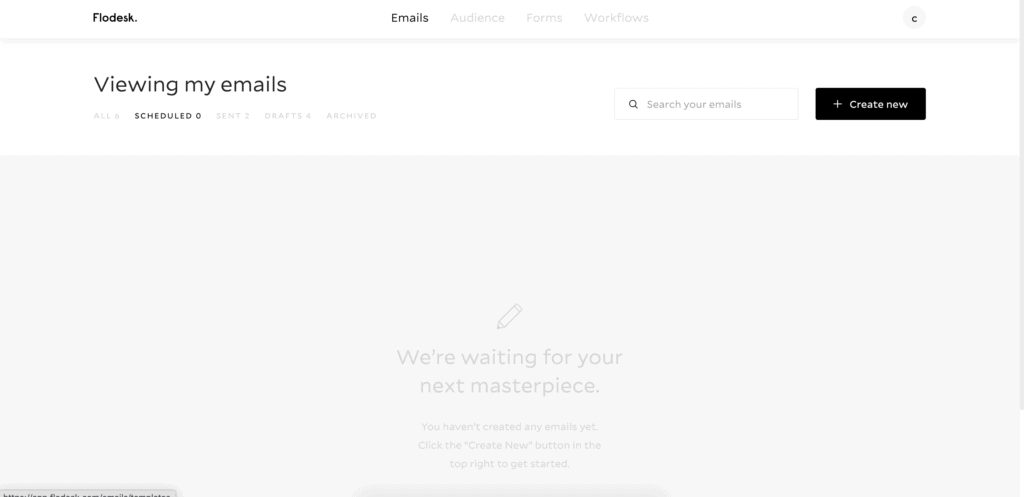
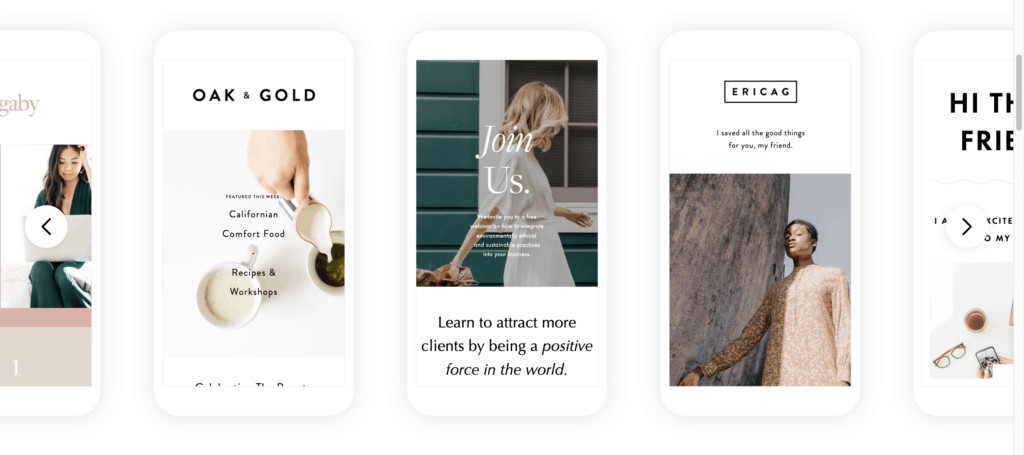
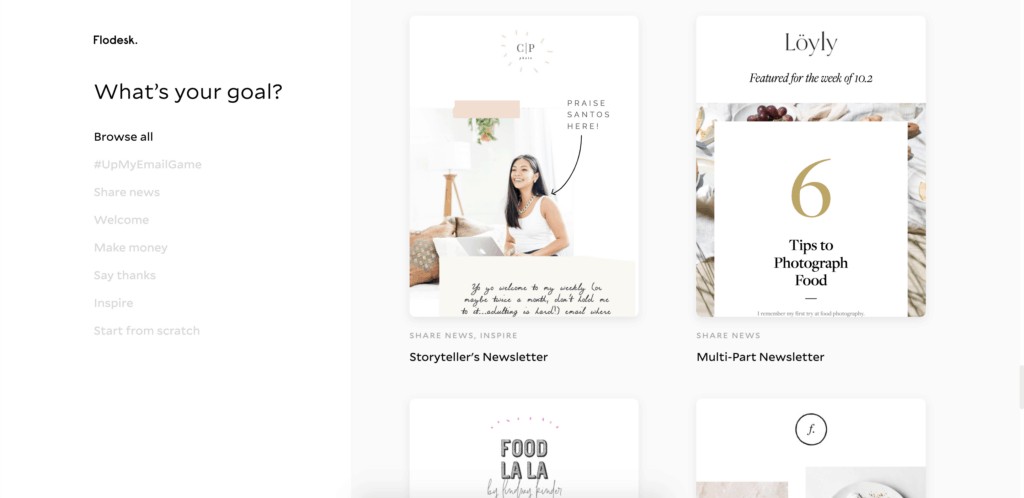
If you go into Emails and Create New – you will be able to create a template or choose from the ones Flodesk has already beautifully designed. Just have a look at these gorgeous minimalist templates.
Here you can play around to figure out what each email setting does. It’s so easy to customize an email in Flodesk.
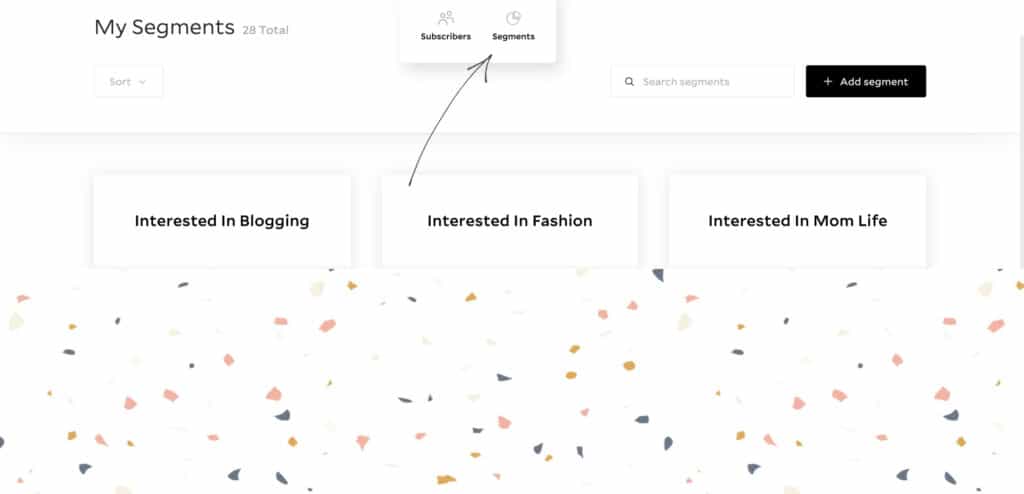
6. Create segments
Next step is to create your segments. You can find this at the top, in the Audience tab>Segments.
I think of segments kind of like labels. You can use segments as labels for different things, like what opt-in form people signed up on, what they are interested in, and it helps you create workflows.
It might sound like a lot, but we’ll break it down into easier steps.
You don’t have to set up all your segments now, as we will create them as we go along. But it would be useful for you to think of what main categories you will need.
For example, for my lifestyle blog niche, I have quite a few main categories and I have created segments like: Interested in blogging, Interested in Instagram tips, Interested in fashion, Interested in motherhood.
This really helps me understand my audience better and it ensures that I only send out emails people are actually interested in, depending on what form they opted-in.
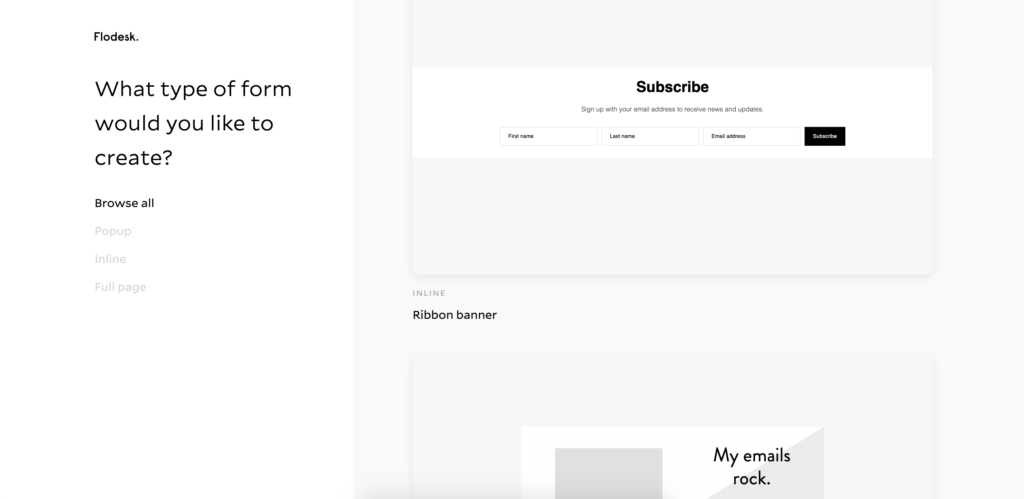
7. Create opt-in forms + a segment for each
At the top of the page, in Forms, you can create the opt-ins you’ll need for your blog. I have multiple ones on my blog, but I will take one as an example for these steps.
If you click on Create new form, you will find a few templates you can choose from. I usually go for the ribbon banner, as I find it blends more seamlessly into my content, but you can choose whatever fits your blog best.
When you create a new form, you will be asked to type in a segment to help you keep track of the forms people signed up on.
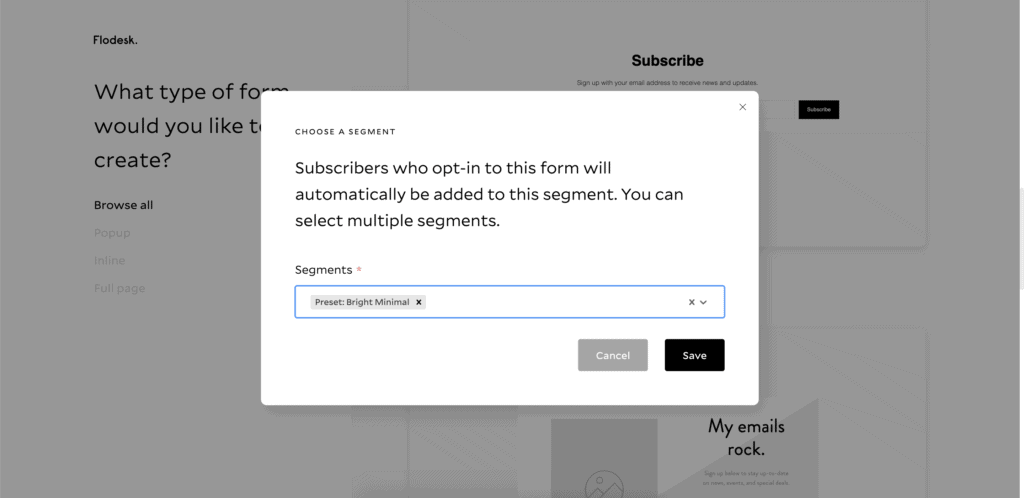
For my Bright Minimal Preset Download, I created a segment called Preset: Bright Minimal, so that I can label what people downloaded.
You can customize it and then later embed it into your website, where you want it to appear. Flodesk makes these steps really easy for you.
8. Create workflows
In workflows you basically set up what emails each subscriber will receive after they’ve signed up and in what order.
Keeping with the example above for the preset download, I will walk you through how I’ve set up my workflow for this.
I basically have two workflows for this preset: one in which the subscriber receives the freebie, and then another workflow in which they receive a series of welcome emails.
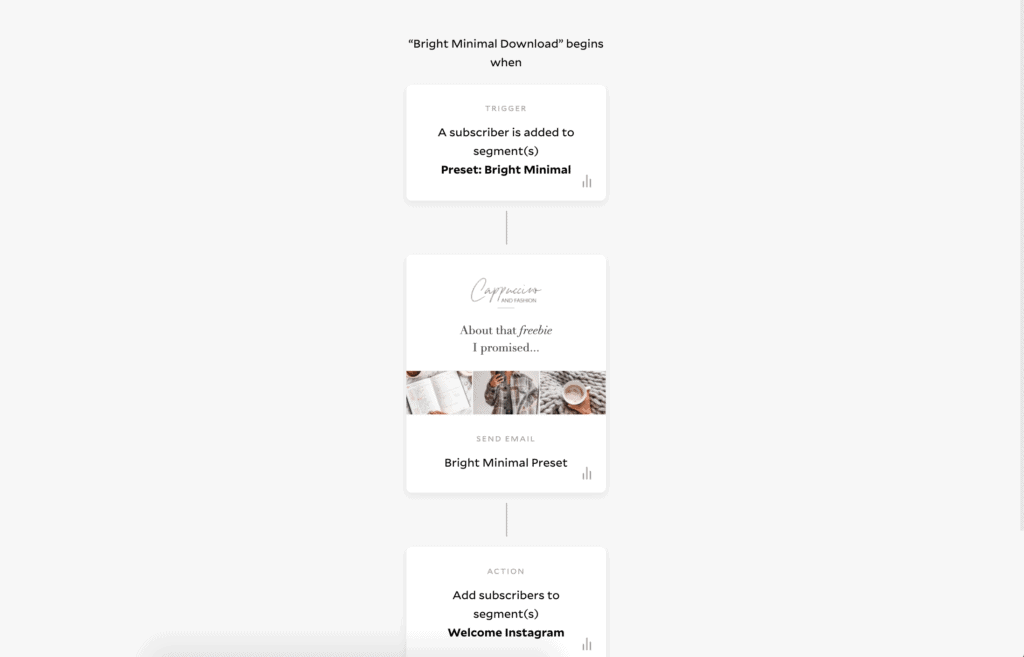
Here is what my freebies download workflow looks like:
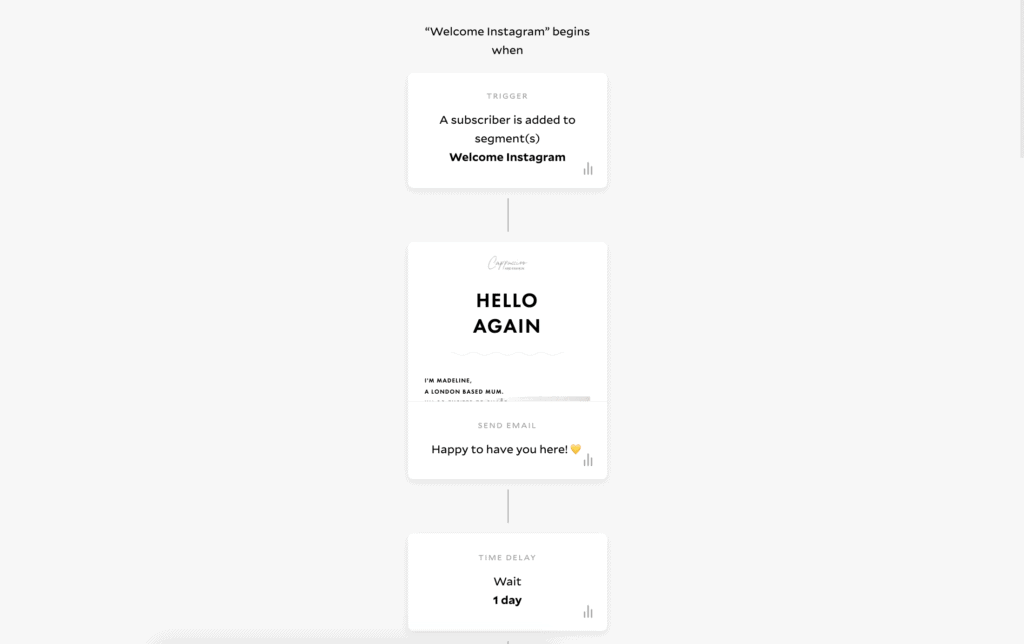
And this is an idea of what (part of) the workflow for the welcome series of emails looks like:
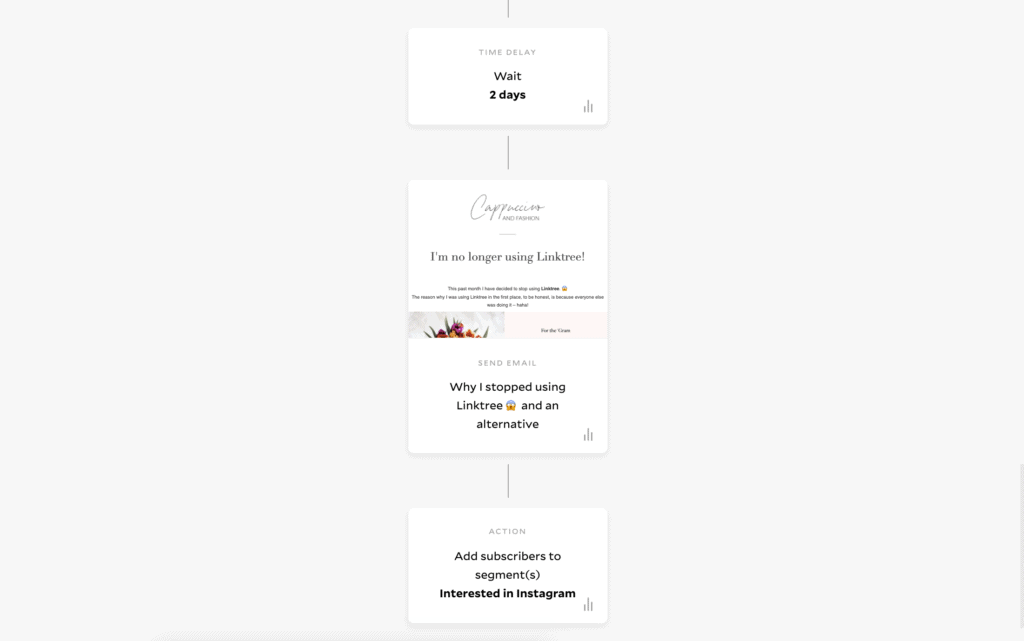
Here is the rough outline of the entire flow a subscriber goes through:
- A subscriber joins using the Bright Minimal form.
- Subscriber gets added to the Preset: Bright Minimal segment.
- Subscriber automatically enters the Bright Minimal Download workflow.
- They receive the freebie email and then they are added to the segment Welcome instagram.
- When they are added to the Welcome Instagram segment, they start the Welcome Instagram workflow.
- In this workflow they receive a series of emails spread days or weeks apart, and then at the end, they are added to the general Interested in Instagram segment.
And that’s how I’ve set up my workflows.
Once someone finishes the workflows, they will just receive my weekly newsletters when I send them out.
Tip for importing subscribers from Convertkit: don’t publish your workflows until after you’ve imported them.
This will prevent them from going through the workflows again, as they have already received those welcome emails in Convertkit.
9. Import your subscribers from Convertkit
Again, don’t publish your workflows until you’ve imported the subscribers from Converkit, this will prevent them from receiving the welcome emails again.
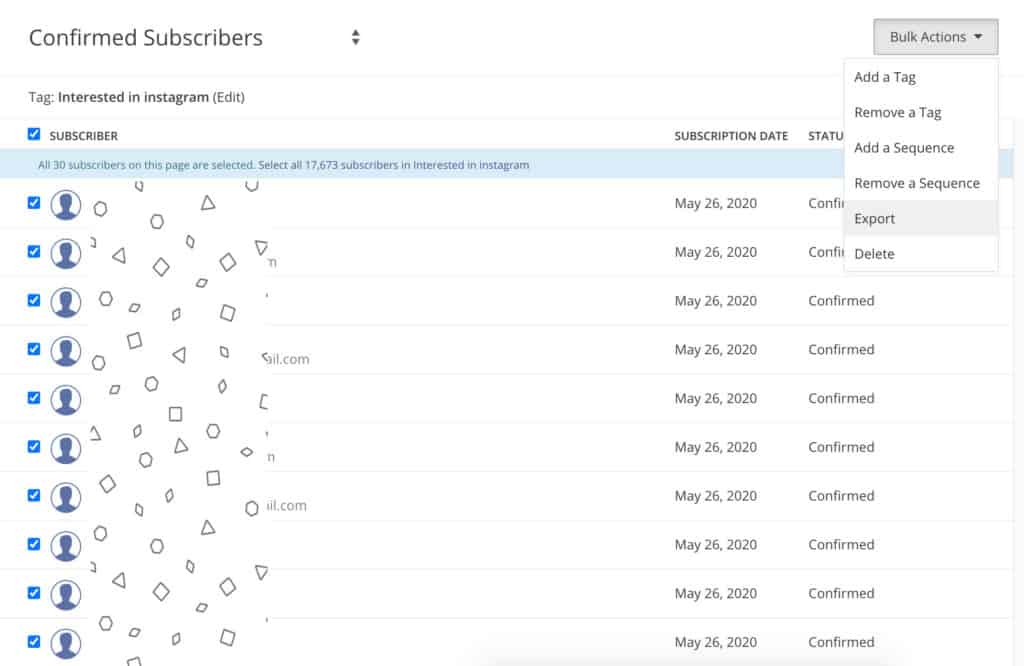
In order to keep the tags you where using on Convertkit, you will need to export them into separate lists.
For example, I selected the Interested in Instagram tag in Convertkit, select all subscribers (make sure you click on Select all xx subscribers in tag) > Bulk Actions > Export.
In a few minutes you will receive the list to your email. Download the list and then go into Flodesk, Audience>Subscribers>Add New>Upload CSV.
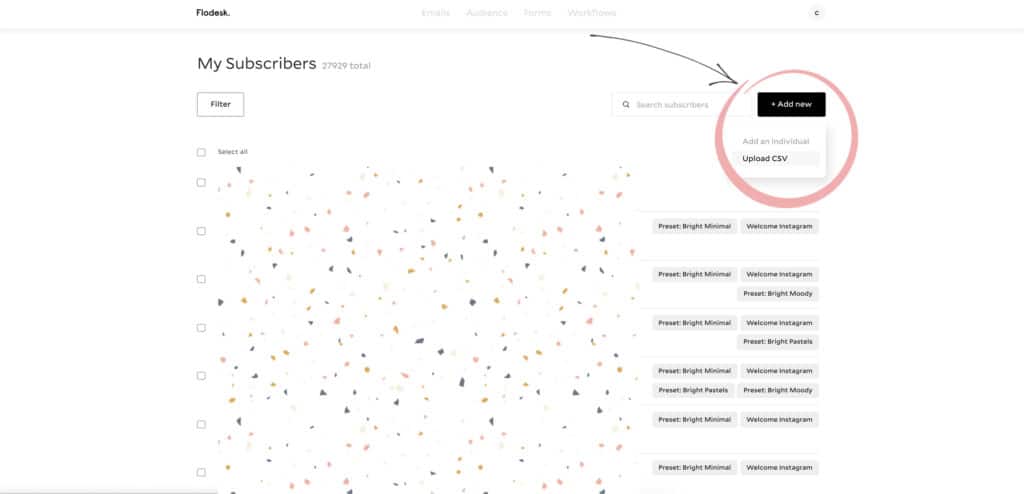
You will need to adjust the formatting, to make sure the First name and Email address are properly formatted, although it is mostly automatically done. And make sure you add the appropriate segment to these newly imported subscribers.
I added my imported subscribers to Interested in Instagram segment, as well as the not-yet-published welcome workflow (by adding them to the Welcome Instagram segment).
Repeat the process for each of your tags in Convertkit. I did the same for my subscribers Interested in fashion, Interested in motherhood etc.
You have now moved all of your Convertkit subscribers into Flodesk.
I personally have not cancelled Convertkit right away, I am waiting until it expires, so that I can have a buffer to go back in case I realize I forgot something. Although with these steps, you should be set and can cancel the Convertkit subscription when you feel ready.
10. Change opt-in forms on your blog
Now you can publish all your workflows and change all your opt-in forms on your blog with Flodesk ones.
You will need to delete all the Convertkit ones and then follow Flodesk’s instructions to embed each form where you want it to appear.
And you’re all done! You have successfully switched your email list from Convertkit to Flodesk.
If you need any further help, don’t hesitate to comment below and I’ll do my best to help you out! 🙂