
This post may contain affiliate links, meaning I make a commission if you purchase through my links, at no extra cost to you. Disclosure here.
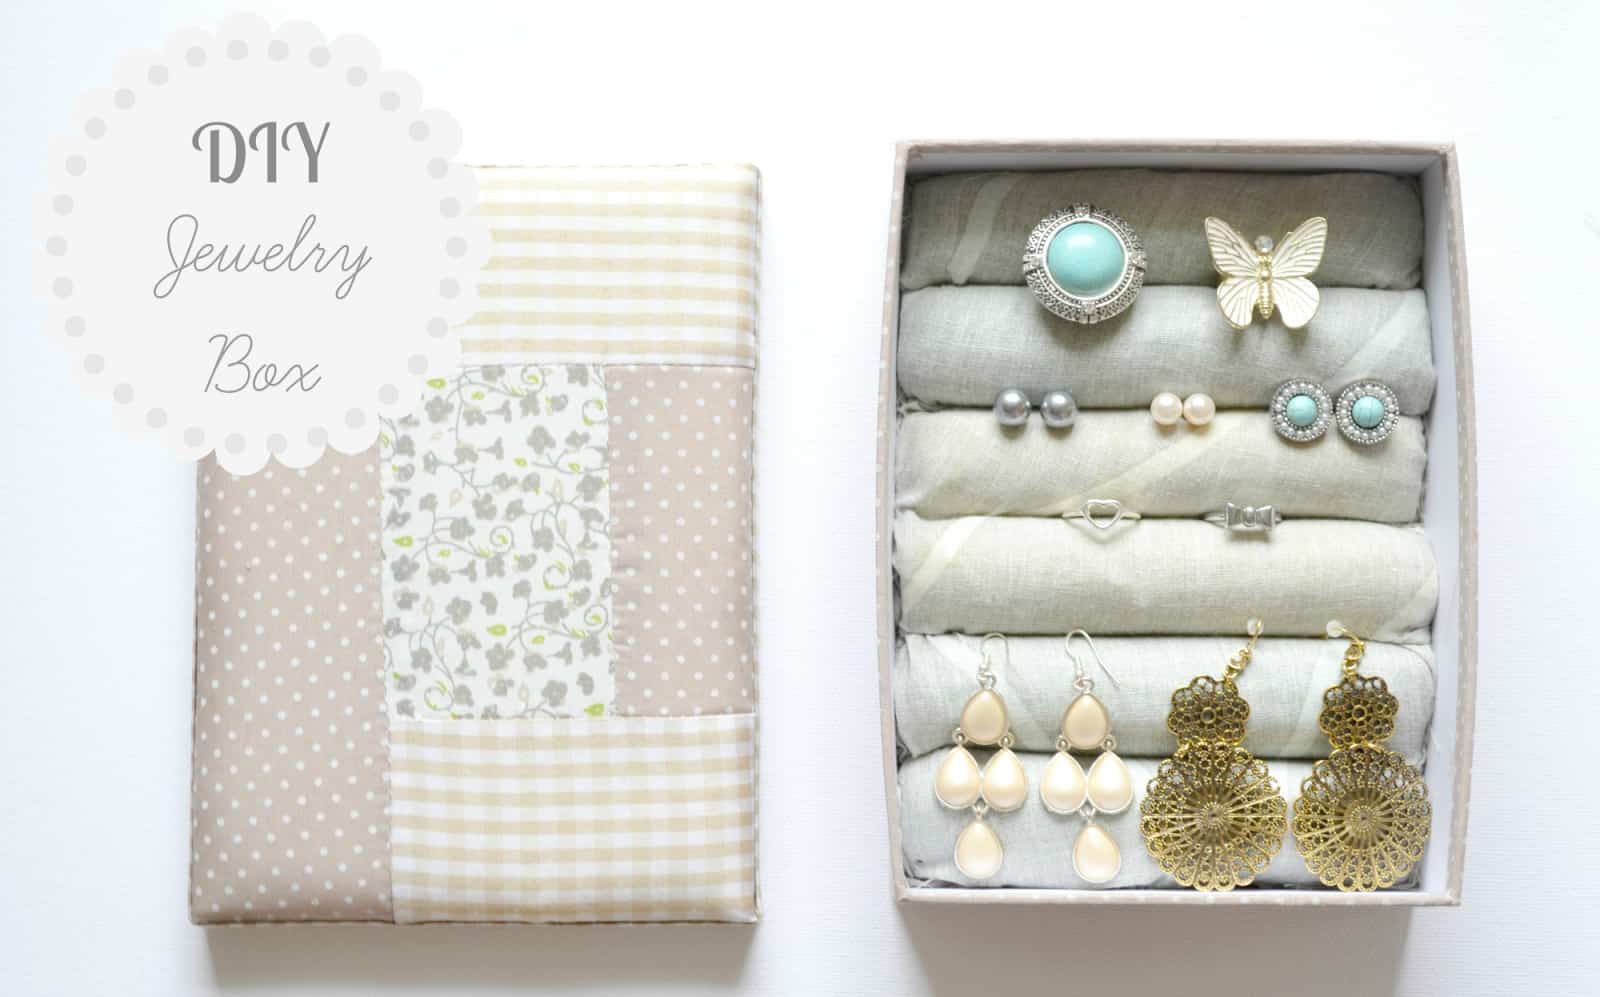
If you’re looking for the easiest EVER jewelry box DIY that you can make with items you probably already own – you’ve come to the right place.
Today I’m sharing a super quick and simple to do jewelry box that only requires a few household items or things you can buy for very cheap at stores like the Dollar Tree (if you’re in the US) or Poundland (if you’re in the UK).
A jewelry box like this will help you keep those earrings or rings organised, so that you can easily find what you’re looking for.
You know that moment when you find one earring, but not the other one?
Well put those days behind you with this cute jewelry box.
Let’s get started!
How to create an easy DIY jewelry box
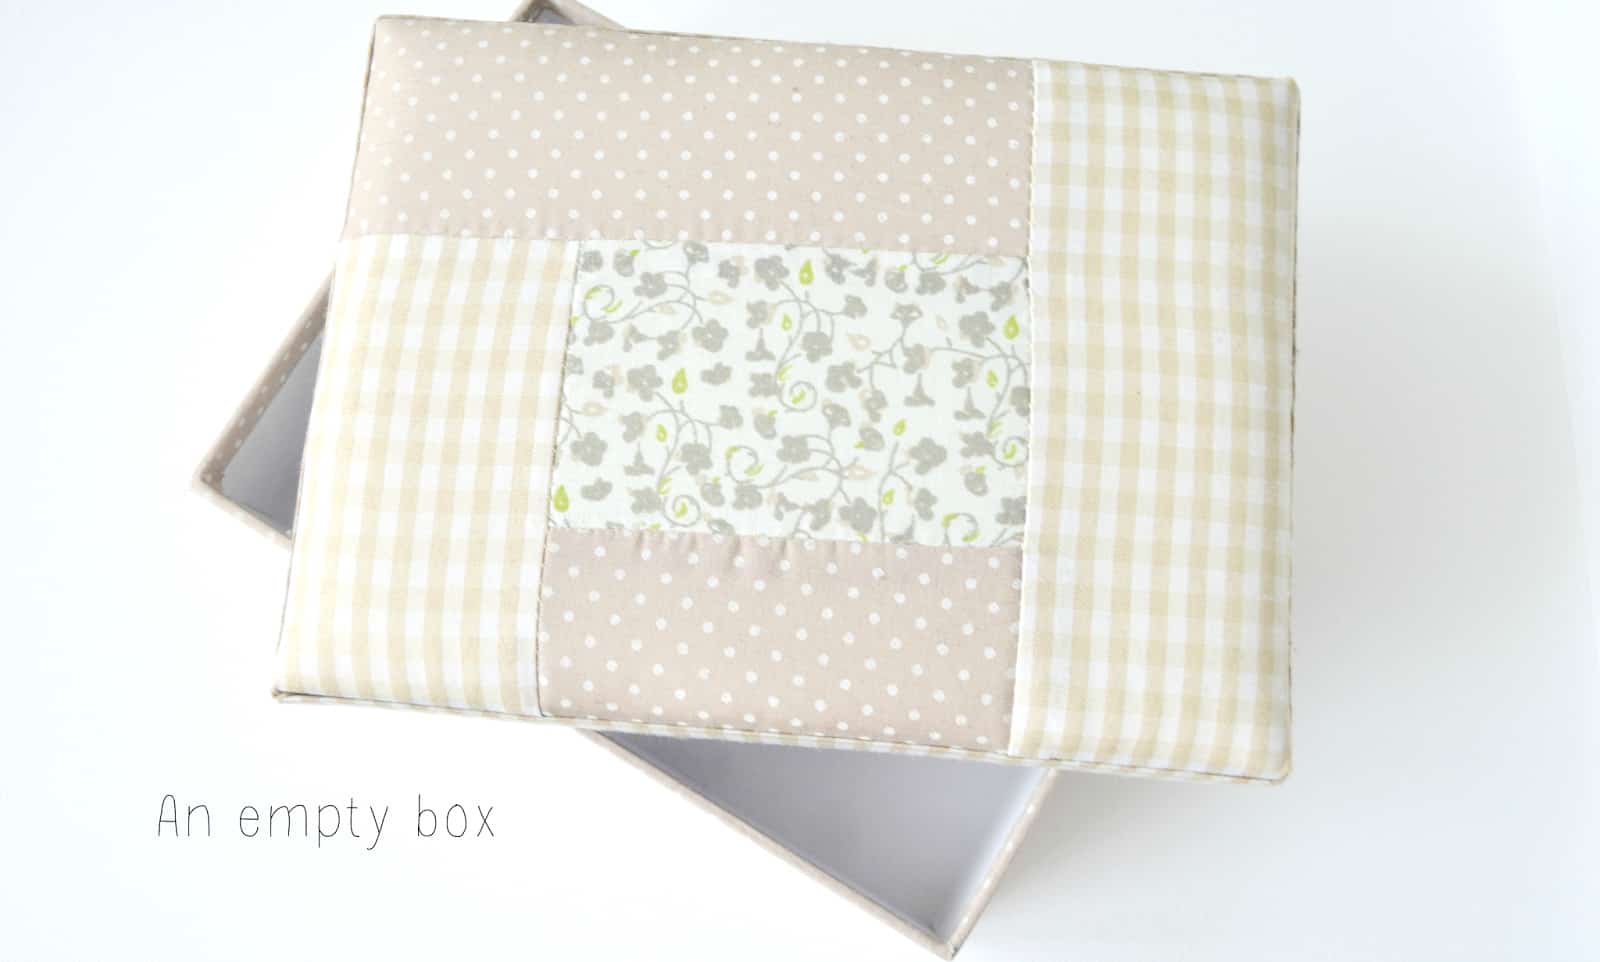
STEP 1: Grab an empty box
Any box of your choice will work for this. You can get whatever size or style you prefer.
You could use an old shoebox that you can upcycle and decorate on the outside. Or you can just buy a simple storage box like this one.
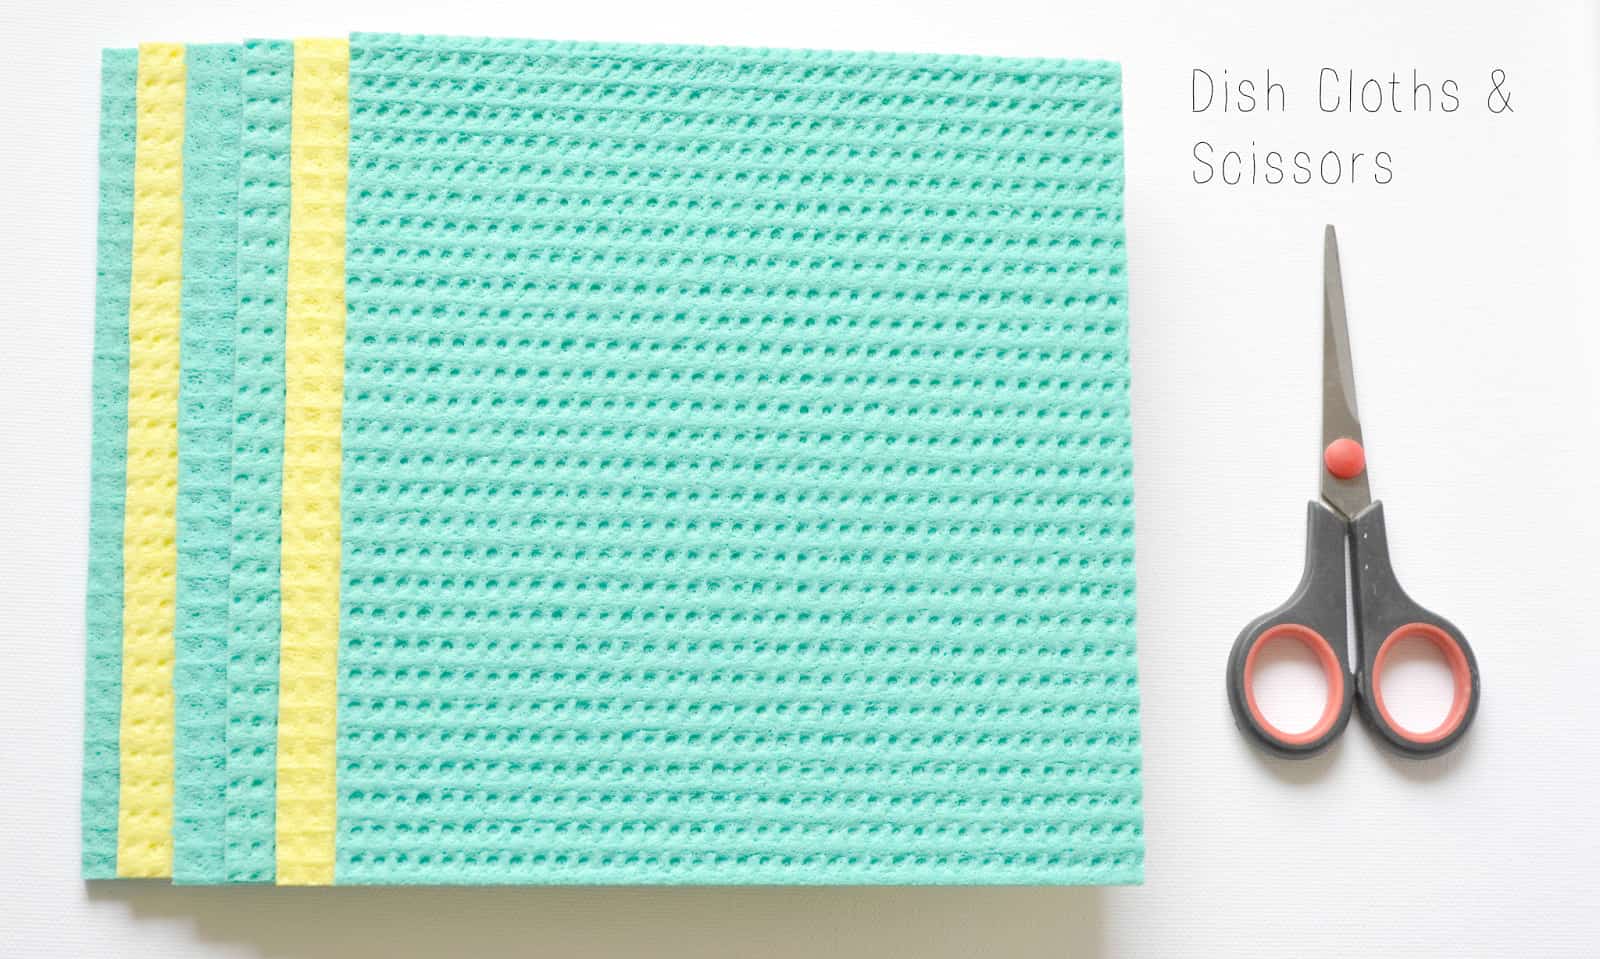
STEP 2: Get rubber dish cloths
You can buy a pack of rubber dish cloths at grocery stores or homeware shops. These will hold their shape quite well and they’re not slippery either.
The colour of the cloths doesn’t really matter, as you will be covering them anyway.
The number of dish cloths you will need depends on the size of your box.
You will also need to take out your scrissors and some tape.
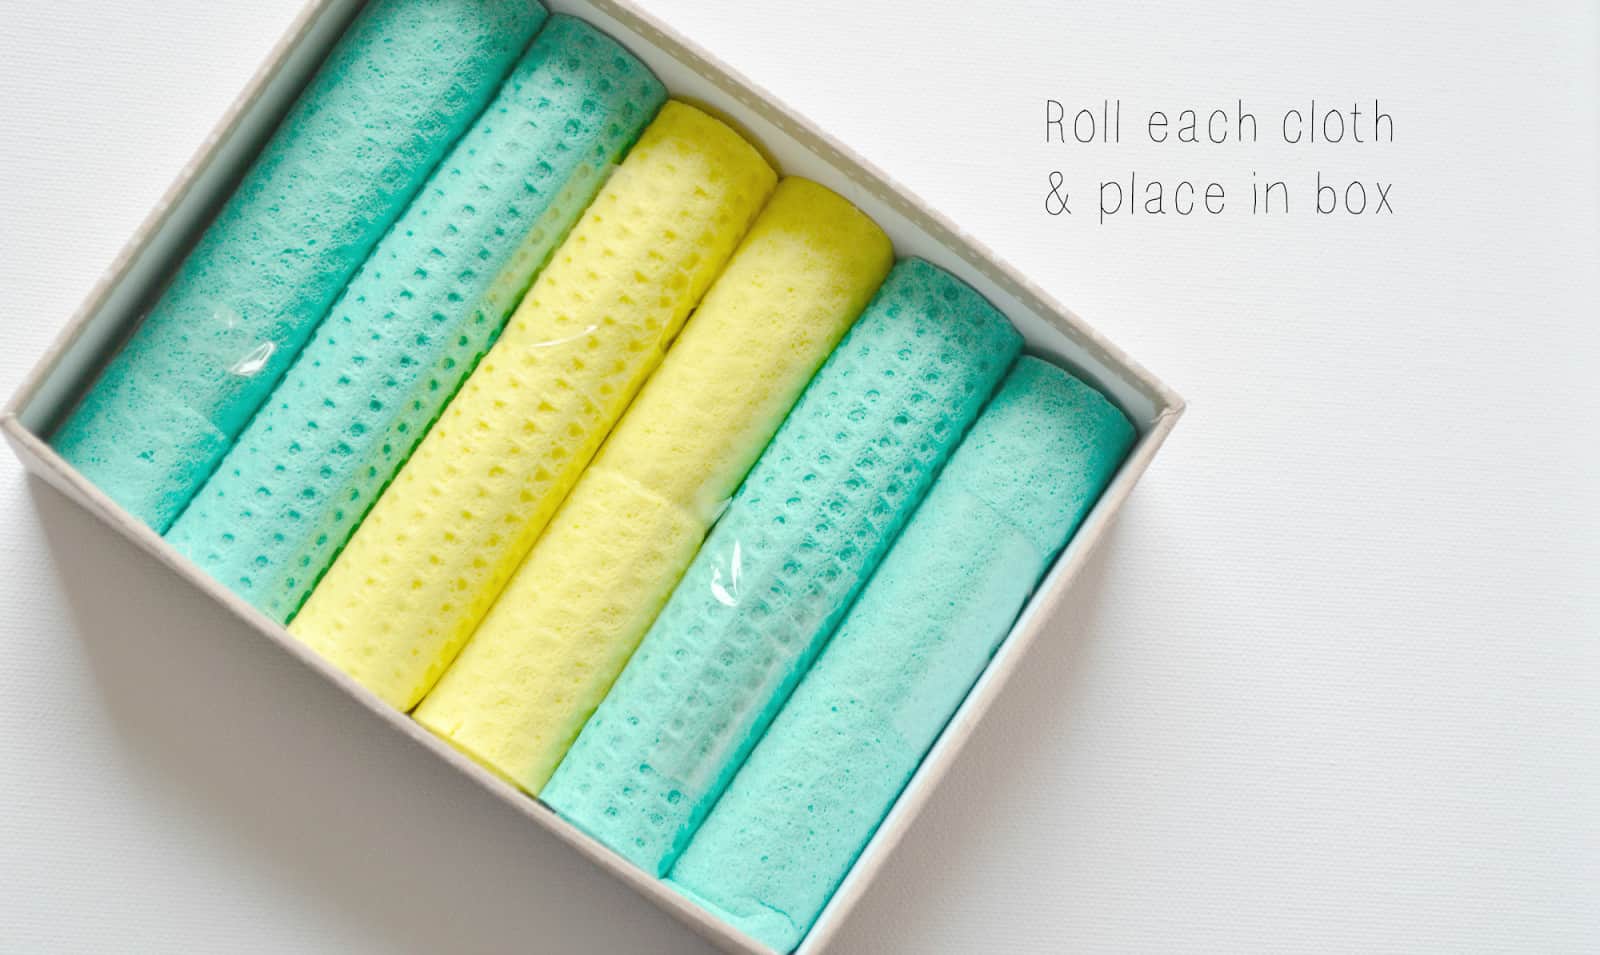
STEP 3: Cut the dish cloths to fit
You will need to grab your scissors and cut the dish cloths in order to make sure they fit inside the box horizontally.
STEP 4: Roll each cloth and place in the box
Take one cloth, roll it up and use the tape to fix it on one end. Just so that it doesn’t unroll while you work with it.
Then starting at the top, place each roll inside the box like this:
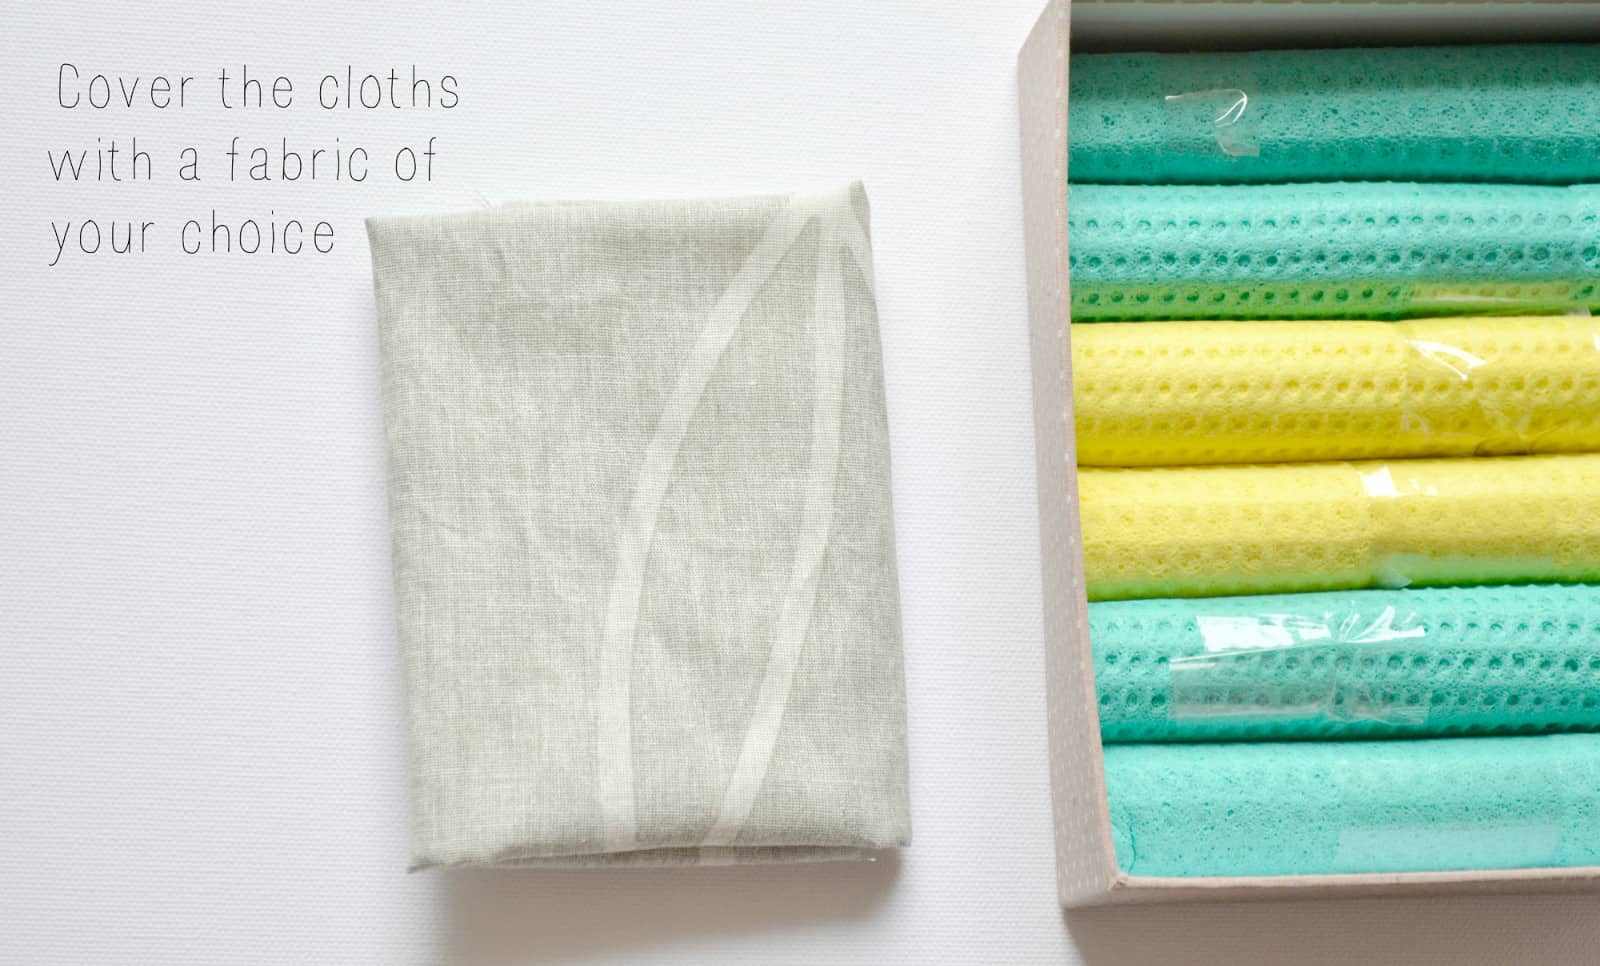
STEP 5: Grab a piece of fabric
Get a piece of fabric that you like. It can be an old bed sheet or it can be something new you can get for cheap at a store.
It does need to be a bit bigger in size than your box, as it will go all around the dish cloths.
Grab the fabric and place it on top of the rolled cloths. I used a nail file to get the ends to stick in.
STEP 6: Place your jewelry inside
And voila!
Now all you have to do is place your pretty jewelry inside and admire your masterpiece!
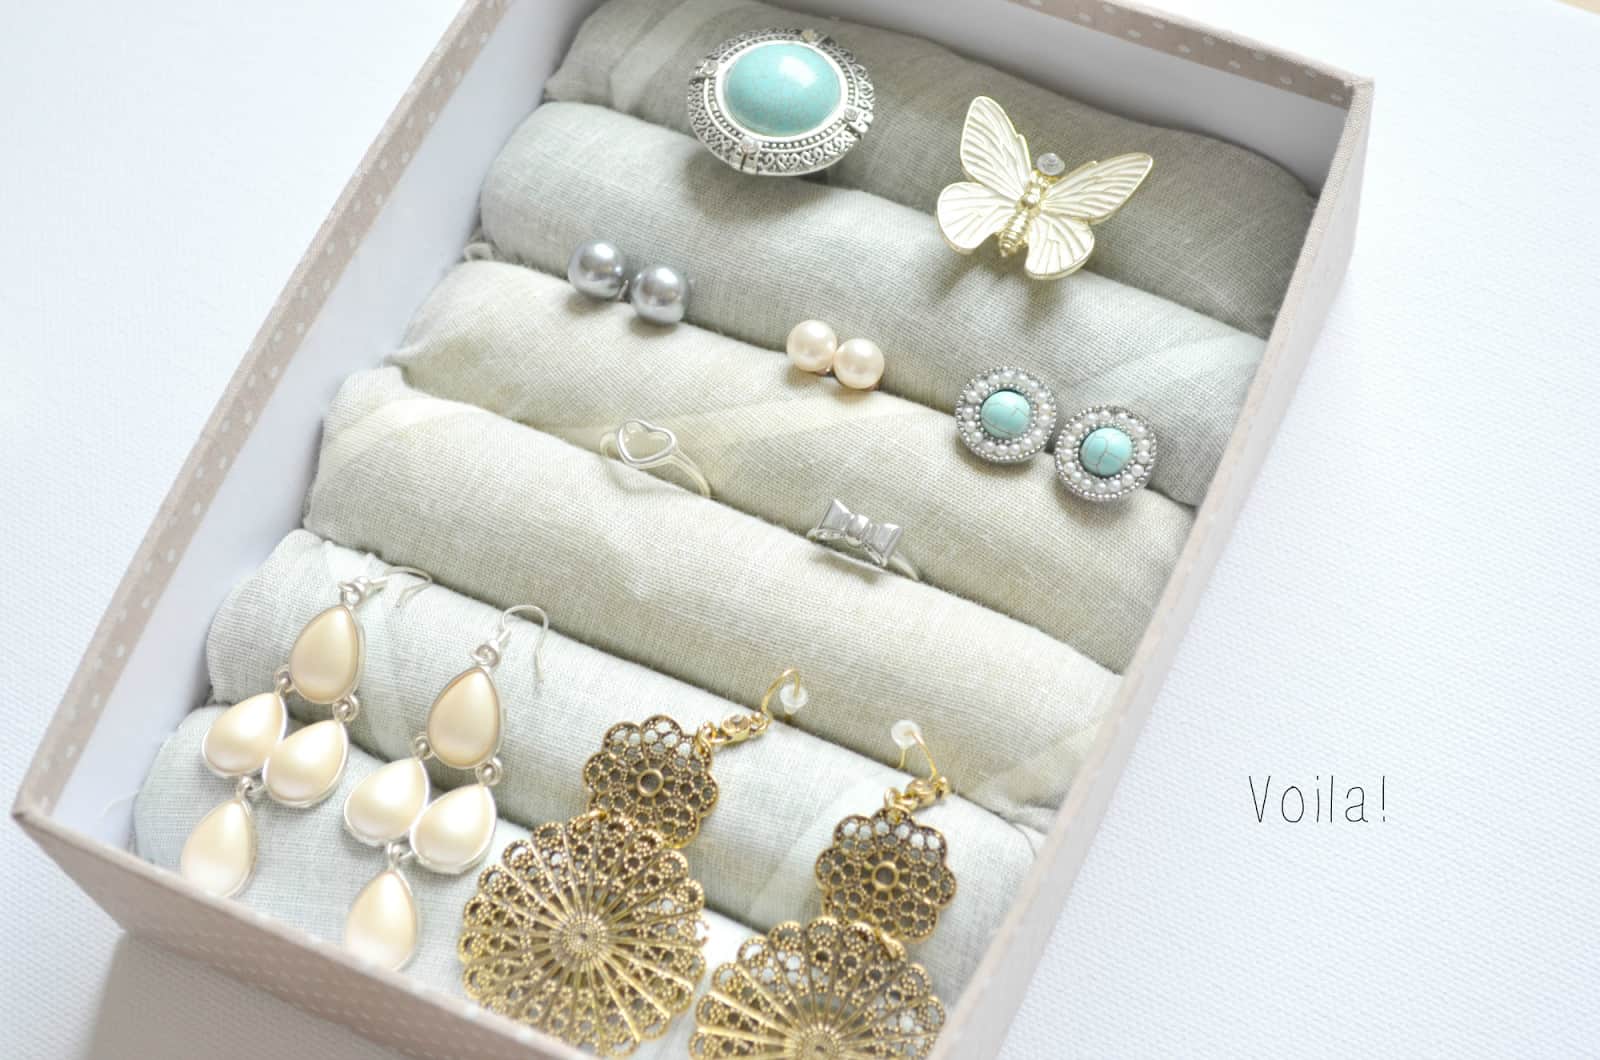
I enjoyed making this DIY project and am super happy with how organised it looks.
You can definitely fit in a lot more jewelry than I pictured, but I just quickly placed some random ones for the purpose of this blog post.
How do you store your jewelry?
Let me know if you have any other storage ideas!
Psst. You might like these Outfit Ideas.
Leave a Reply