This post may contain affiliate links, meaning I make a commission if you purchase through my links, at no extra cost to you. Disclosure here.
How do you turn a YouTube video into a blog post fast, easy and free?
Let’s dive into the exact process I use to transform my videos into blog posts that’s super easy and saves you a lot of time.
I recently got a comment on one of my YouTube videos about how they noticed one of my YouTube videos and one of my blog posts on the same topic had very similar wording.
They were wondering if there’s a process for that and how you can easily transform a YouTube video into a blog post.
I’m glad you asked.
Yes, I do have a process for this and it has made my life so much easier. This is what I do so that I can get blog posts done much quicker than I used to. Today I’m going to share with you the whole process.
I wrote recently on how to write a blog post super fast – 3,000 words in one hour.
The process I shared in that blog post made me realise that I could turn my YouTube videos into blog posts faster as well.

Can I use YouTube videos for my blog?
Absolutely, yes.
I highly encourage you to embed your own YouTube videos into the blog posts that you write because it gives them a boost in Google and it also brings more subscribers over from your blog to your channel.
It’s always a good idea to cross promote your content and to repurpose content as much as you can.
How do I turn a video into a blog post?
My process of turning a video into a blog post starts with, obviously, creating the video.
I film, edit and upload my video onto YouTube first.
Then I go into the process of transforming that video into a written article for my blog.
You can either watch the video here or keep reading below for all the deets:
How to turn a YouTube video into a blog post fast
Step 1: Open transcript on video page
The first thing that I do is open up my YouTube video that I want to turn into a blog post.
Once you have your YouTube video page opened up, you’re going to go into the three little dots below your video and click on Open transcript.
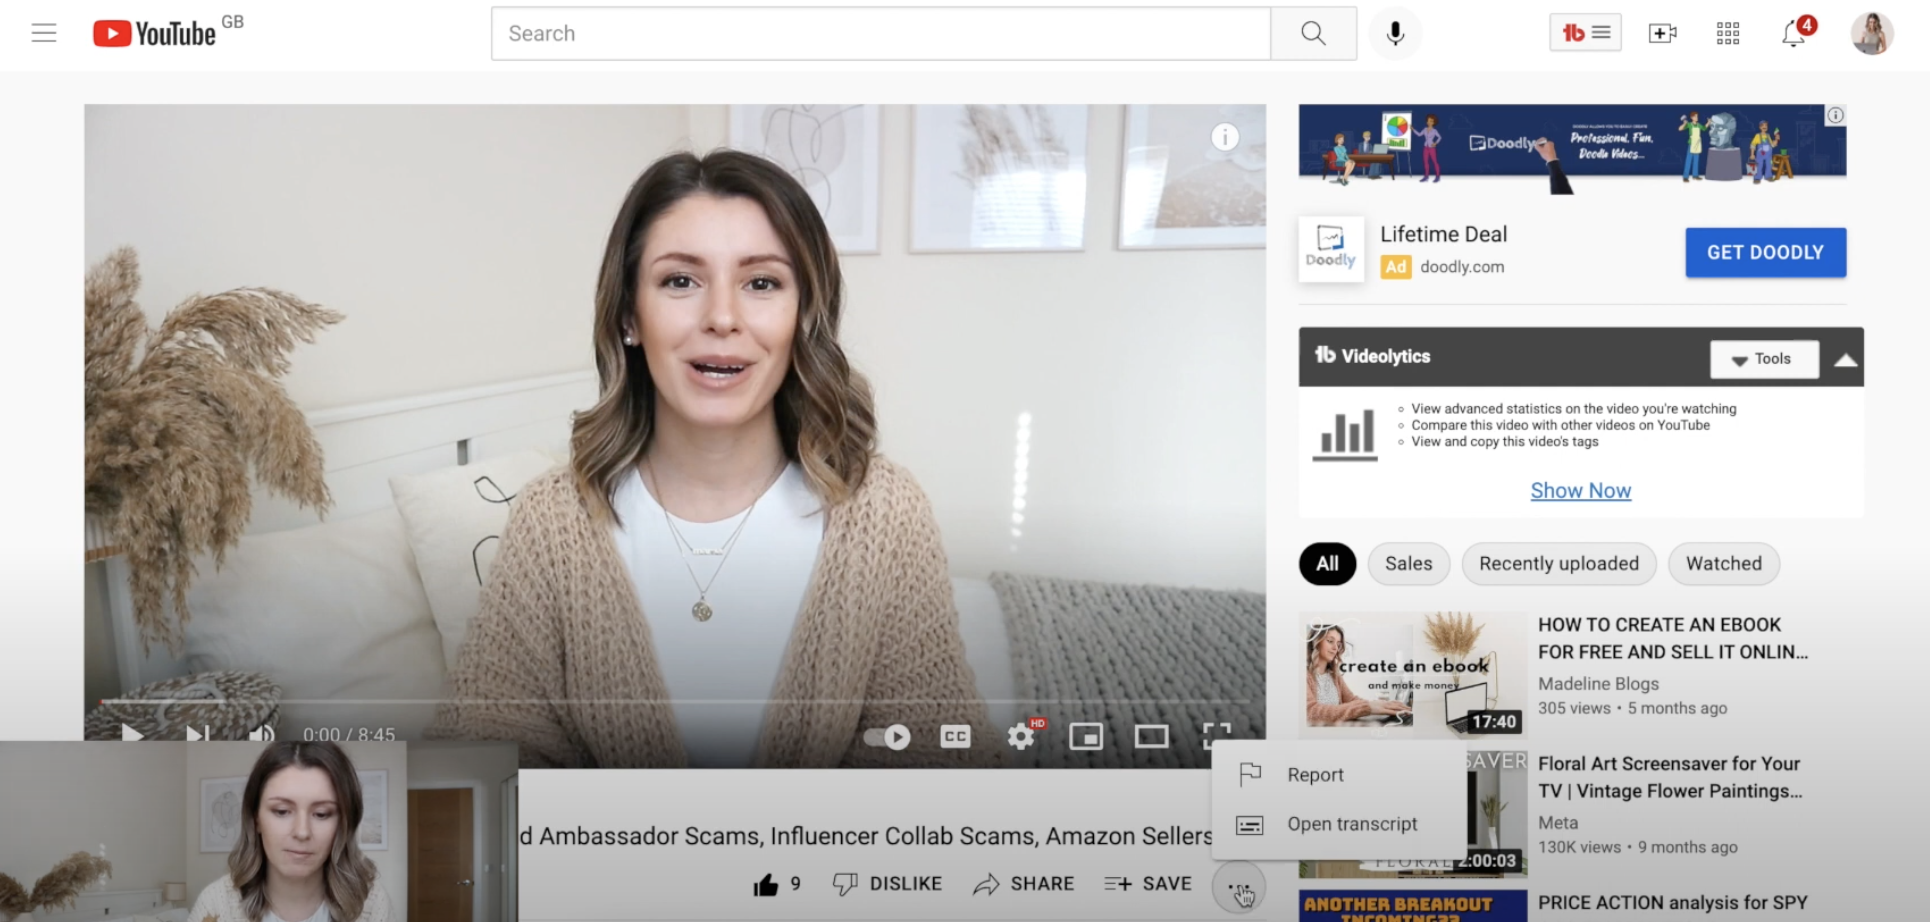
YouTube does a pretty good job at transcripting your video. It’s usually quite accurate, so it’s perfect for you to use. They might get a few words here and there mistaken, but for the most part it’s a really good transcript.
Step 2: How do I turn my transcripts into a blog post? Toggle timestamps and copy transcript
Your next step is to click on the three dots at the top right of the transcript and Toggle timestamps off.
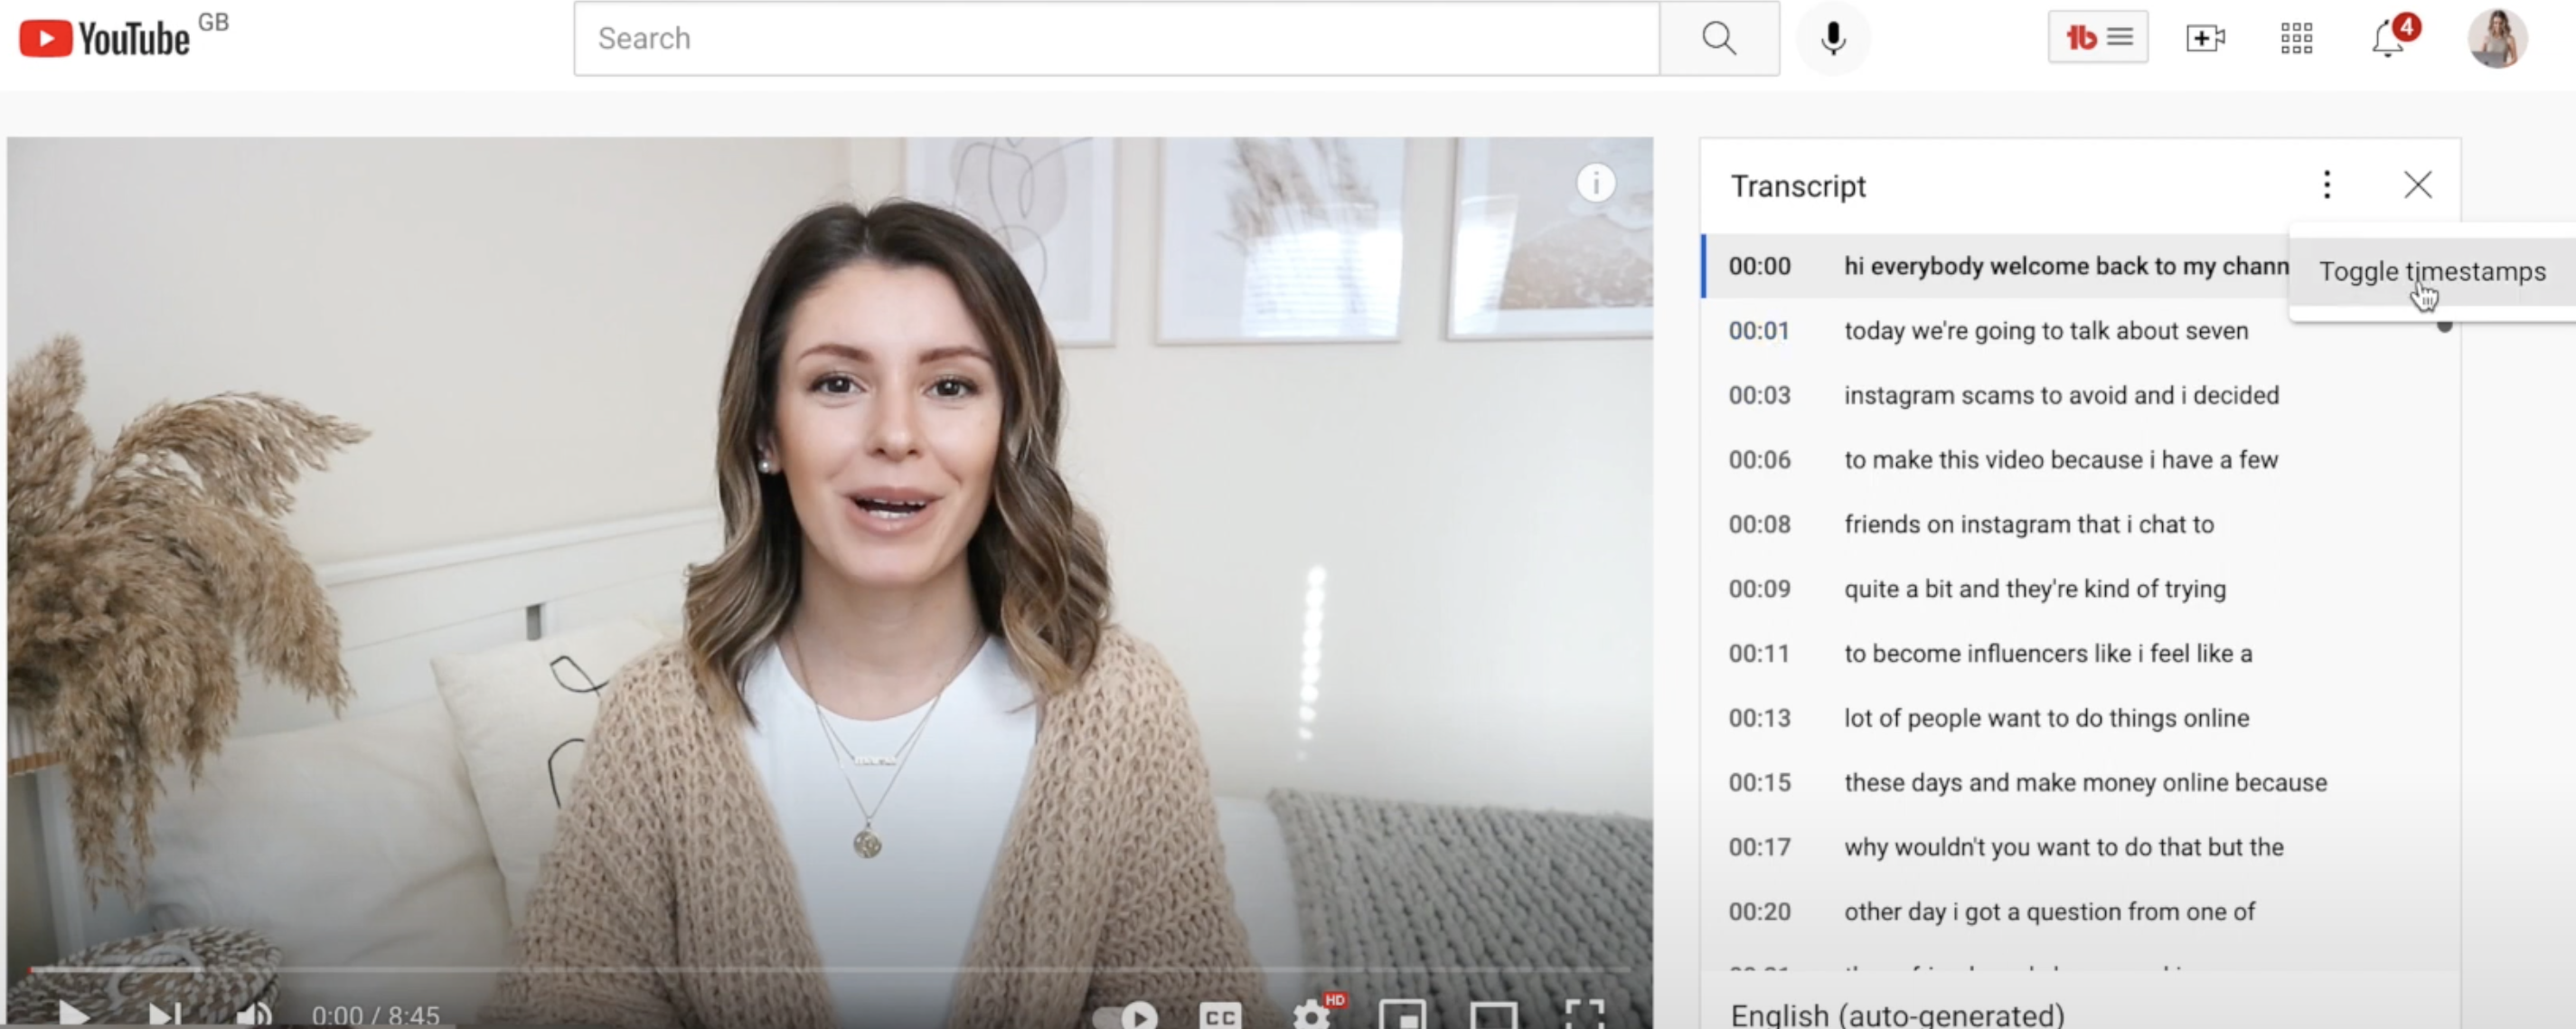
This means they won’t show the timestamps on your transcripts, which you won’t want in your blog post.
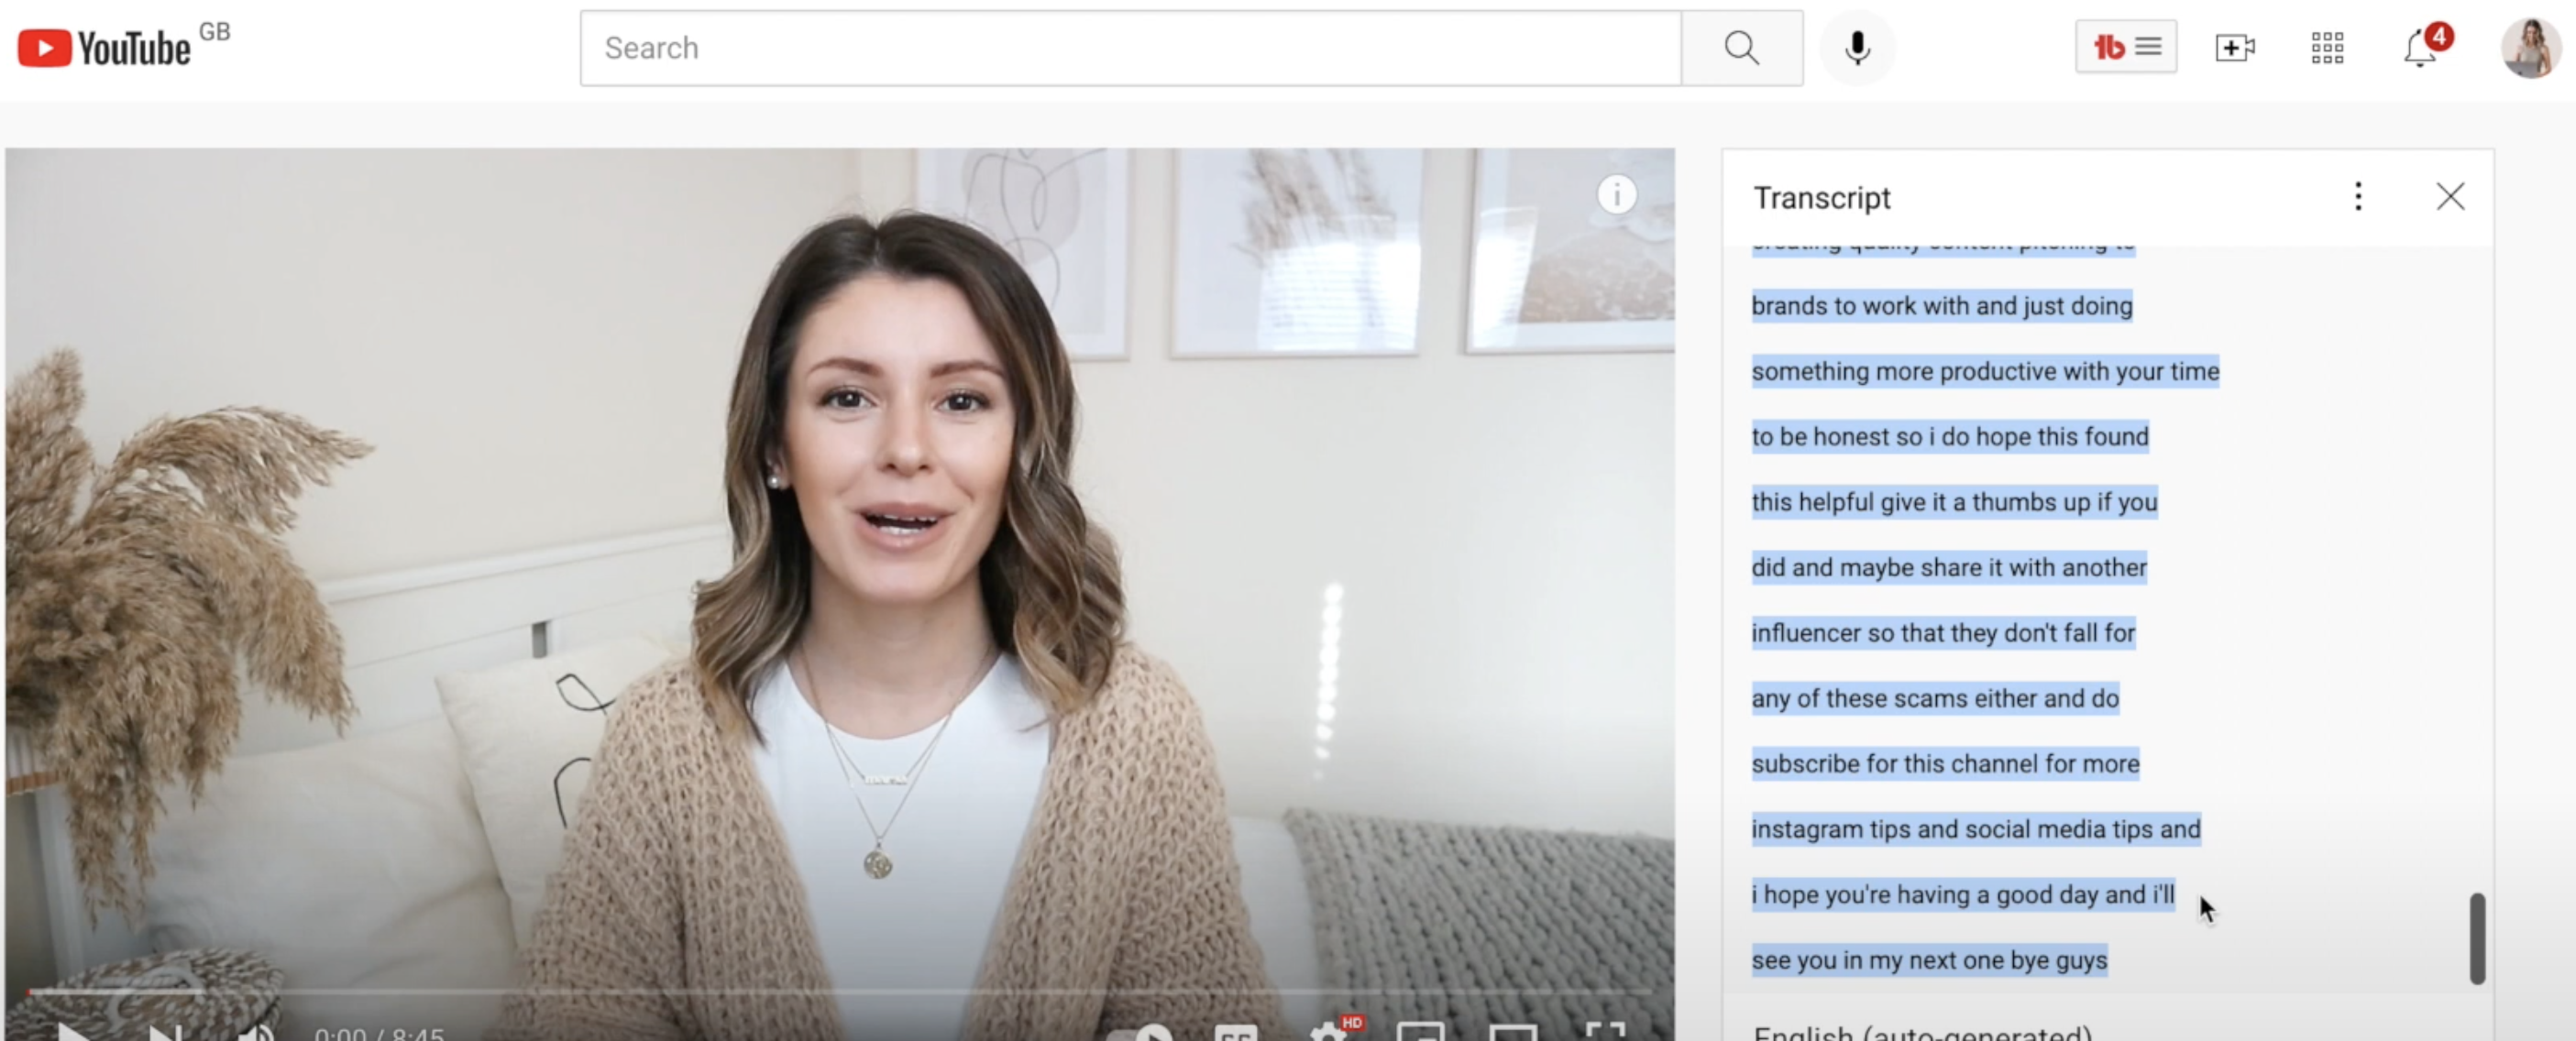
This transcript is now going to be the base for your blog post. Because you already have the content, you’ve already spoken it all in your video, so now you can just turn it into a blog post.
Then I’m just going to select all the text in this transcript and I’m going to copy it (Ctrl+C).
Step 3: Paste in a Google docs
Next you’re going to open up a blank Google Docs document.
Google Docs is really amazing for a lot of things and it’s free. I use it a lot in my business.
I’m going to right click and select Paste without formatting.
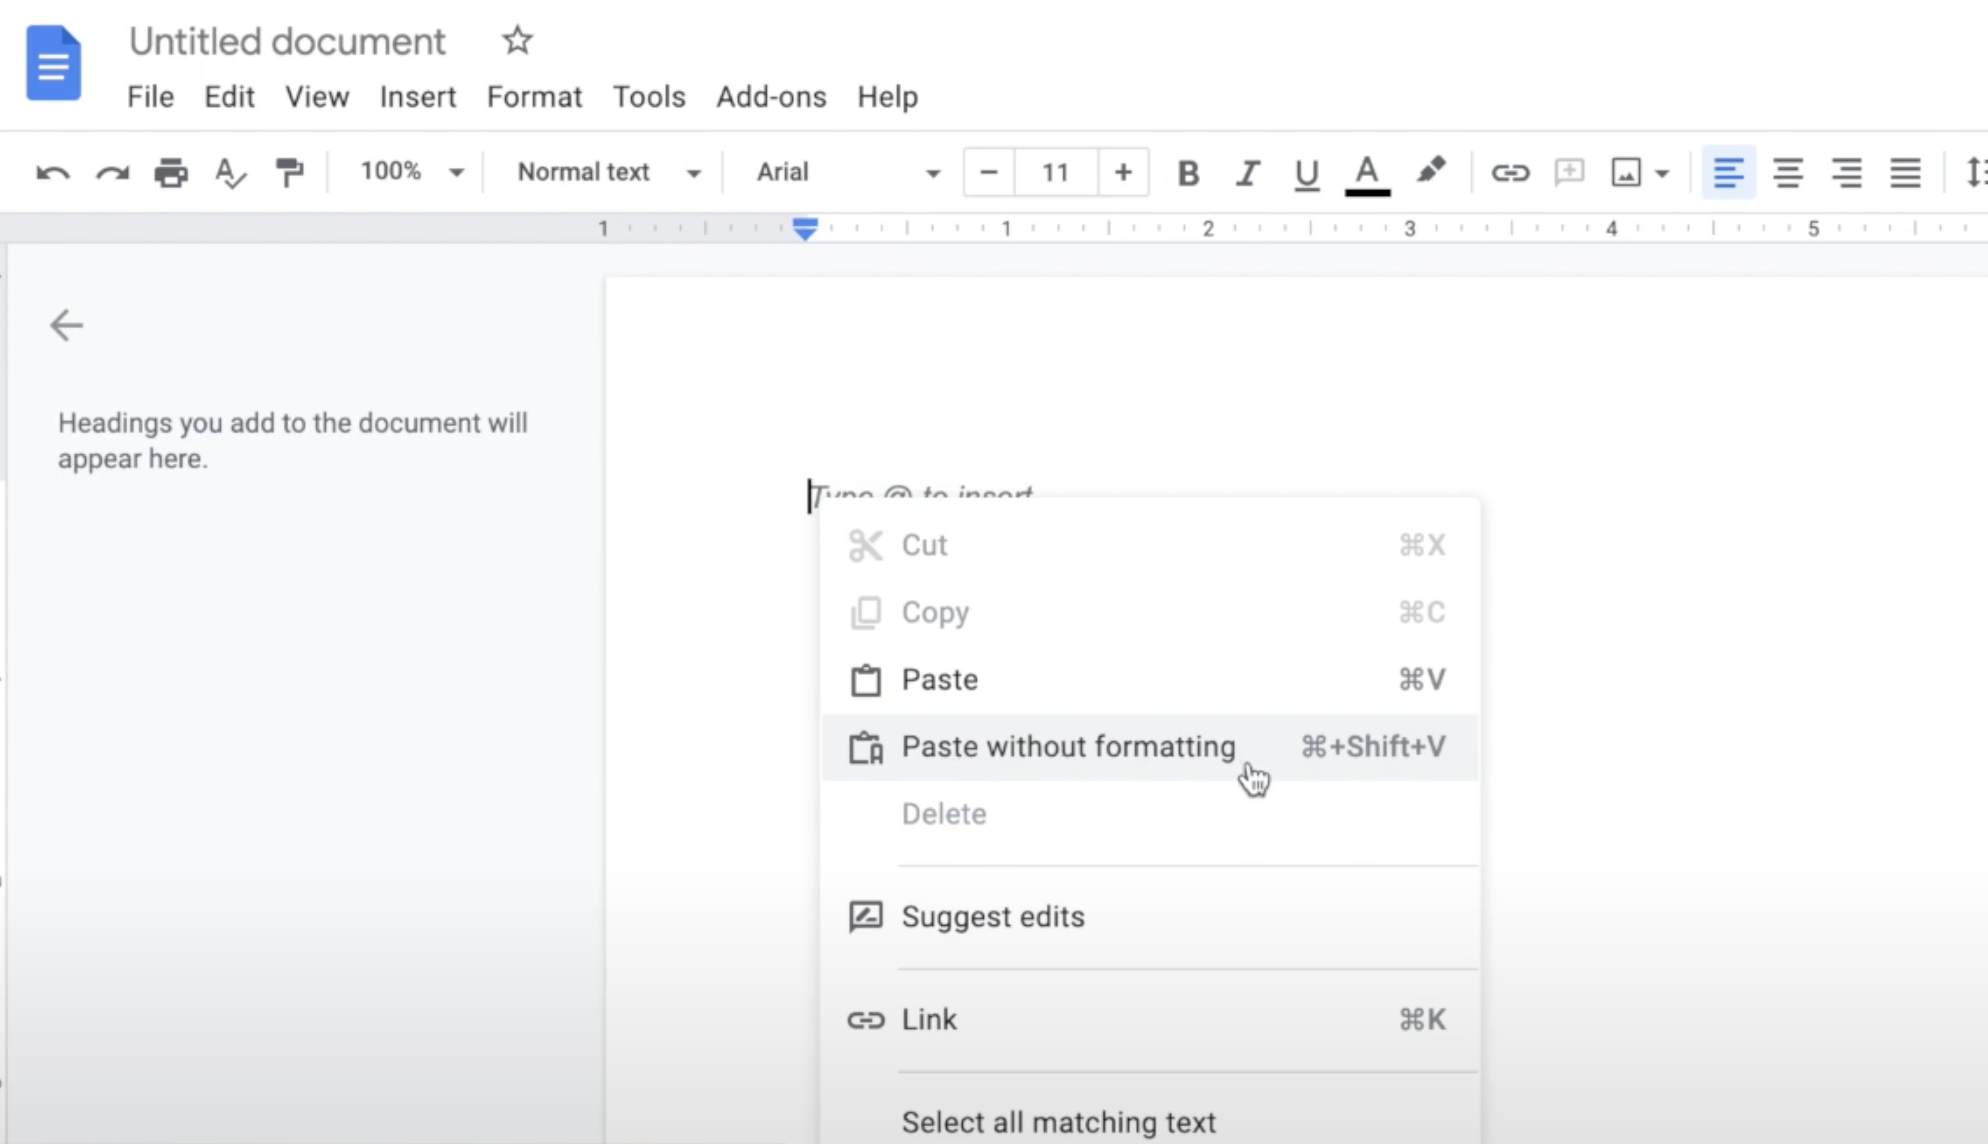
Now all of my transcript text is on this Google Docs.
Now we’re going to walk through how you can actually clean all of this text up easily.
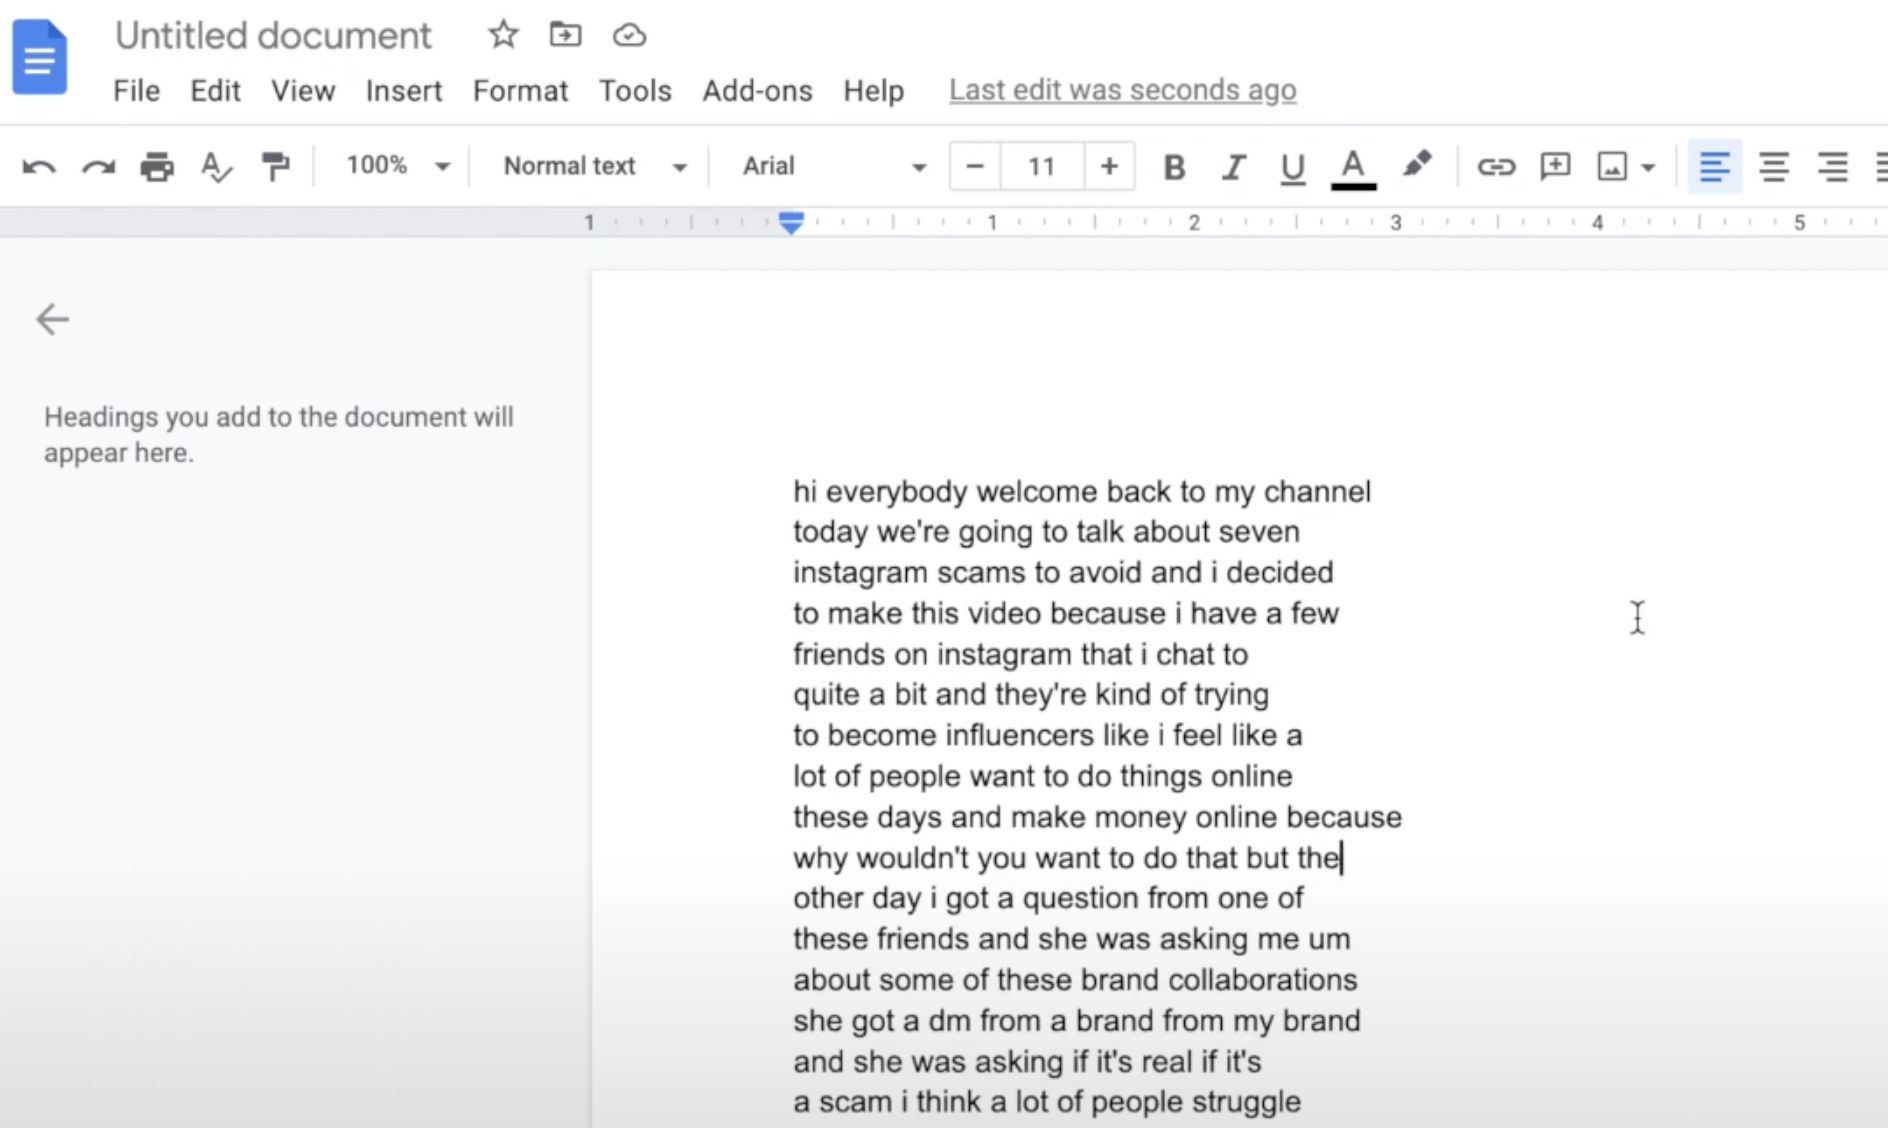
Because there are a lot of paragraph line breaks and you obviously don’t want those in your blog post.
Let’s see how you can clean the text up easily, so that it won’t take you hours upon hours to do this.
Step 4: Use this Add on to remove paragraphs
You will want to select all of this text. Then go into the top menu in Google Docs and select Add-ons.
Here you can click on Get add-ons, find the Text Cleaner add-on and install it into your Google Docs. It’s really easy to do this and it will help you clean up that text easily.
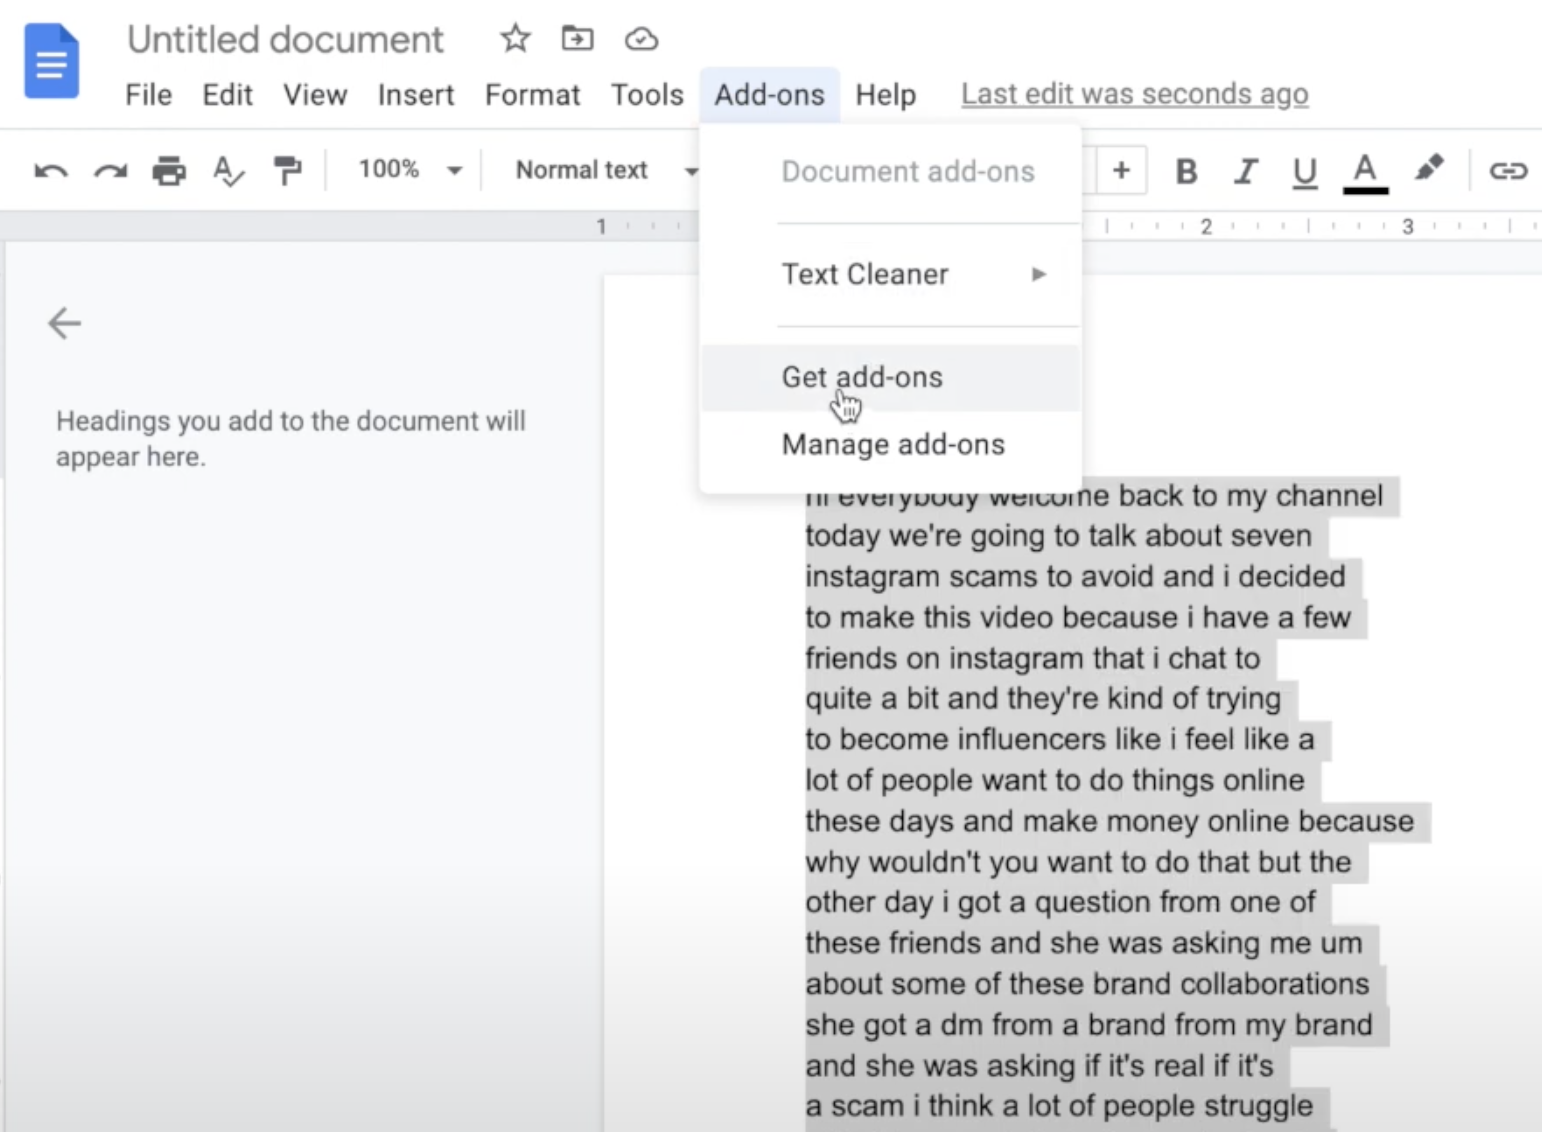
Otherwise you would have to go in the text and delete all of those paragraph lines, because they’re obviously not going to make any sense in a blog post.
This add-on makes it super easy to do that. Now that you have the add-on installed, you’re going to select your text and go to Add-ons, Text cleaner and click on Remove paragraph breaks.
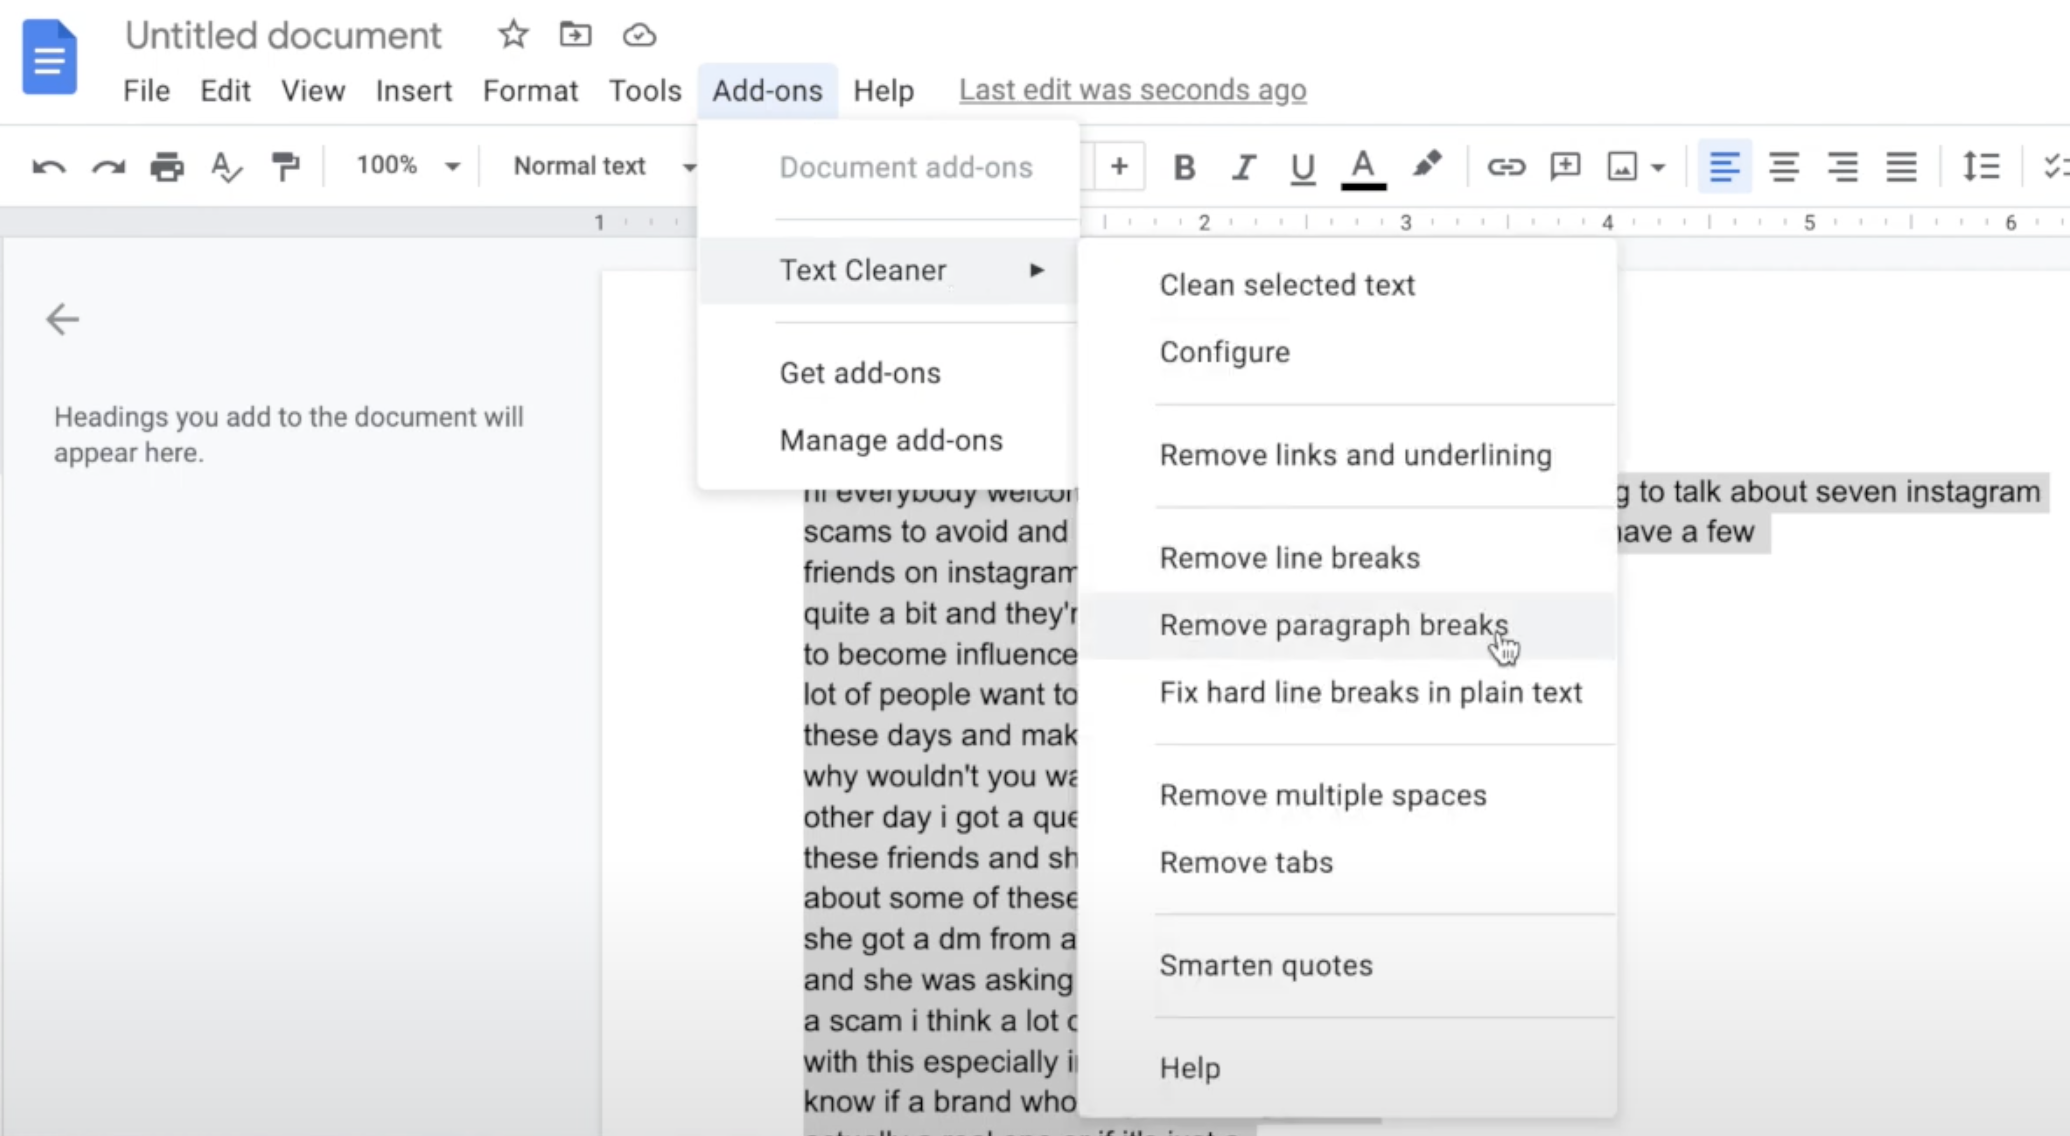
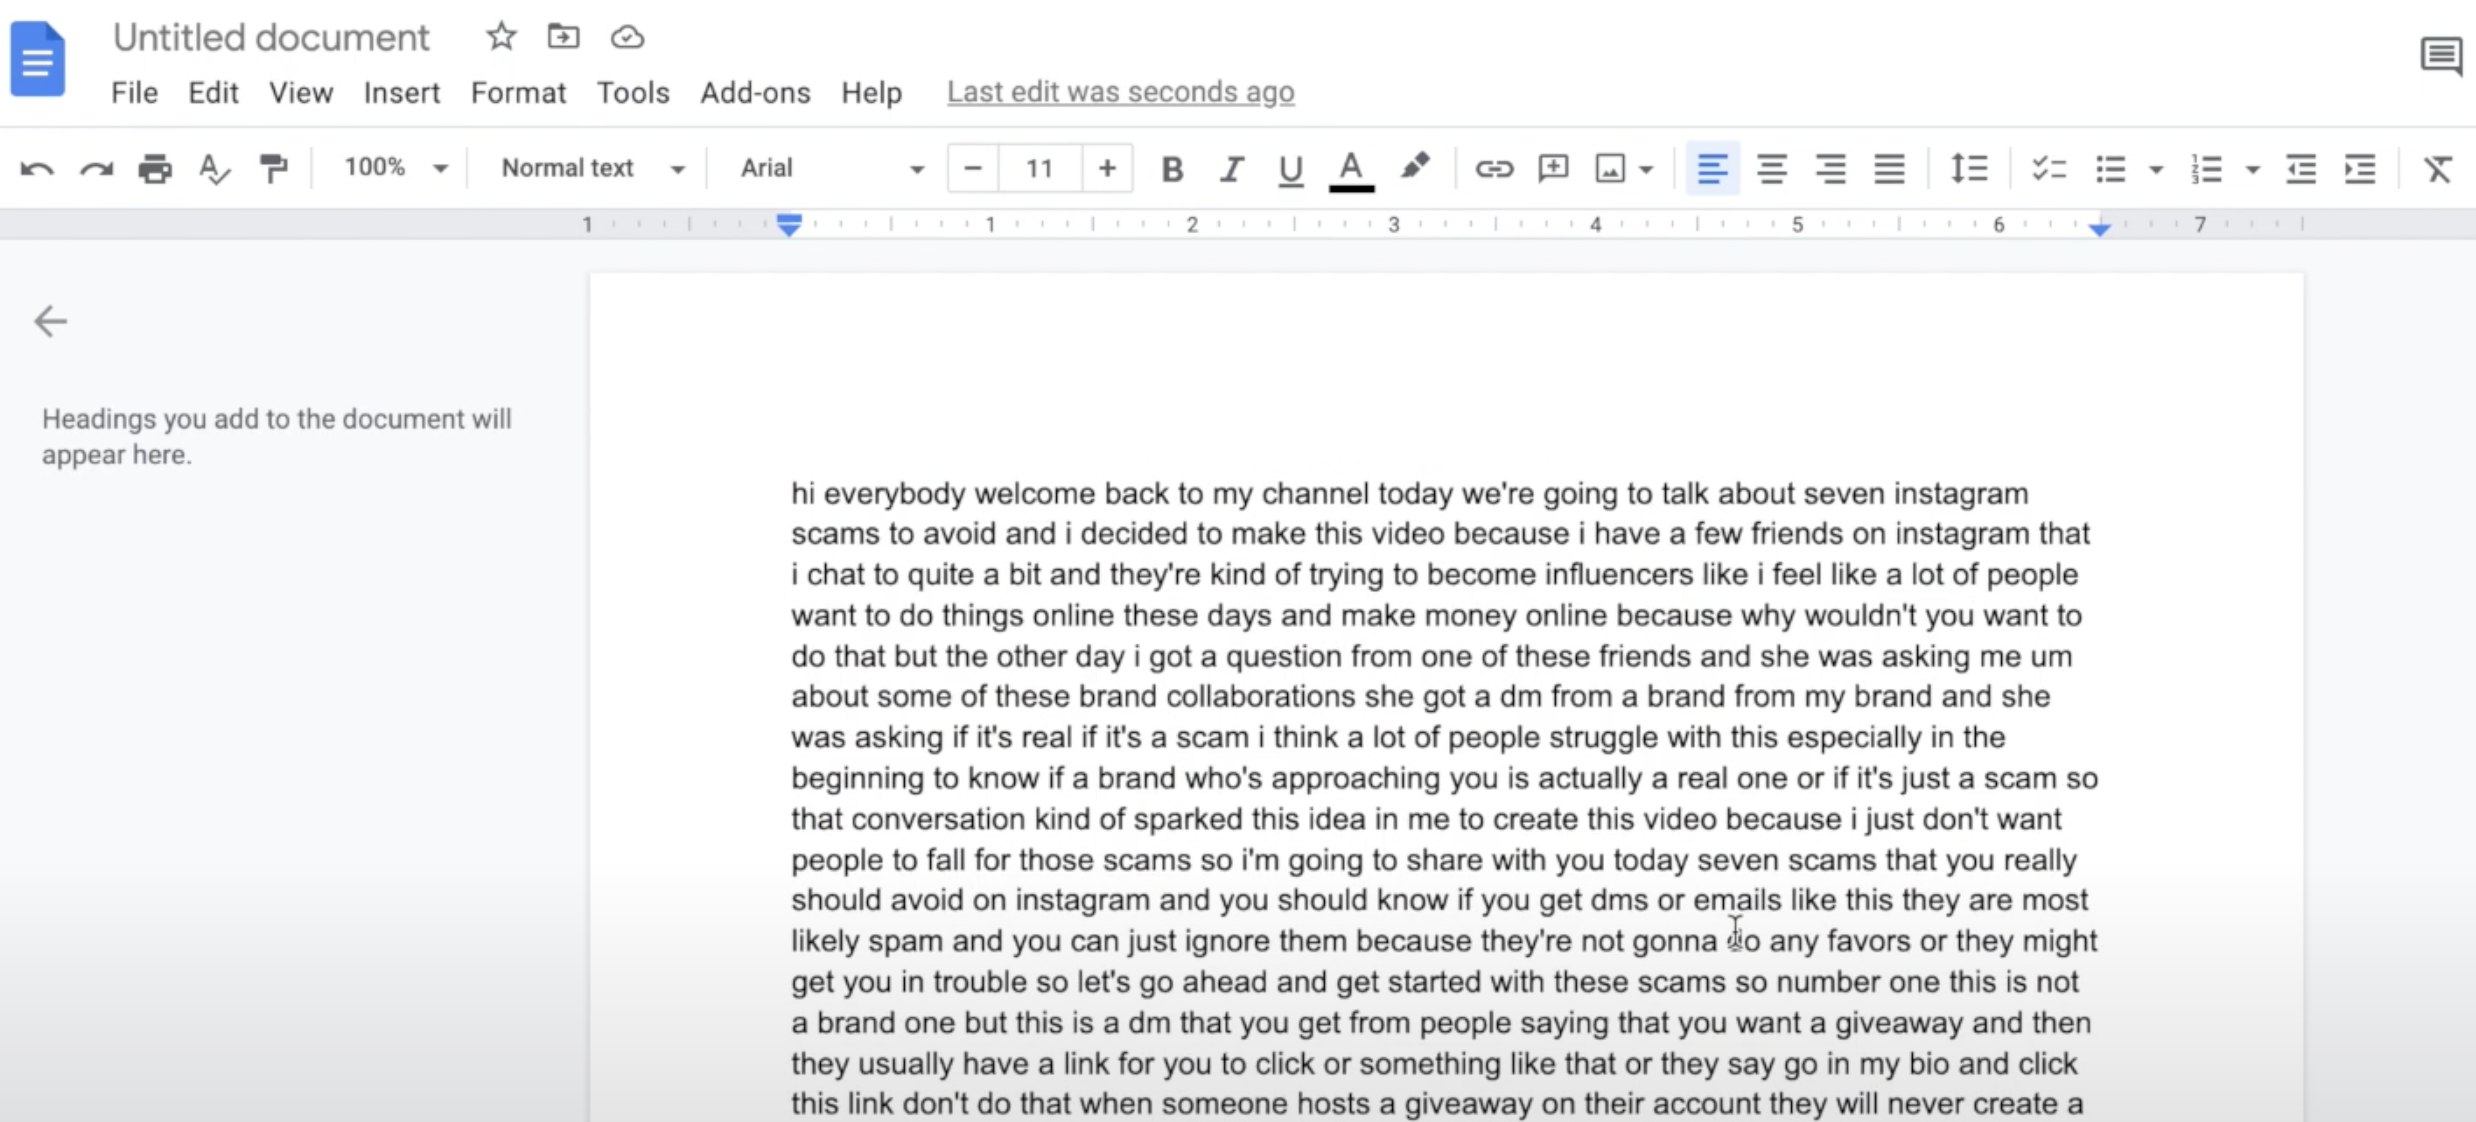
This will take a few seconds to do and then all of your paragraph breaks in the text will be gone. This is already a tad easier to work with.
Step 5: Use the find and replace function
Next that you want to do in order to save time is to use the Find and Replace function in Google Docs.
Type Ctrl+F or Cmmd+F and the find function will pop up.
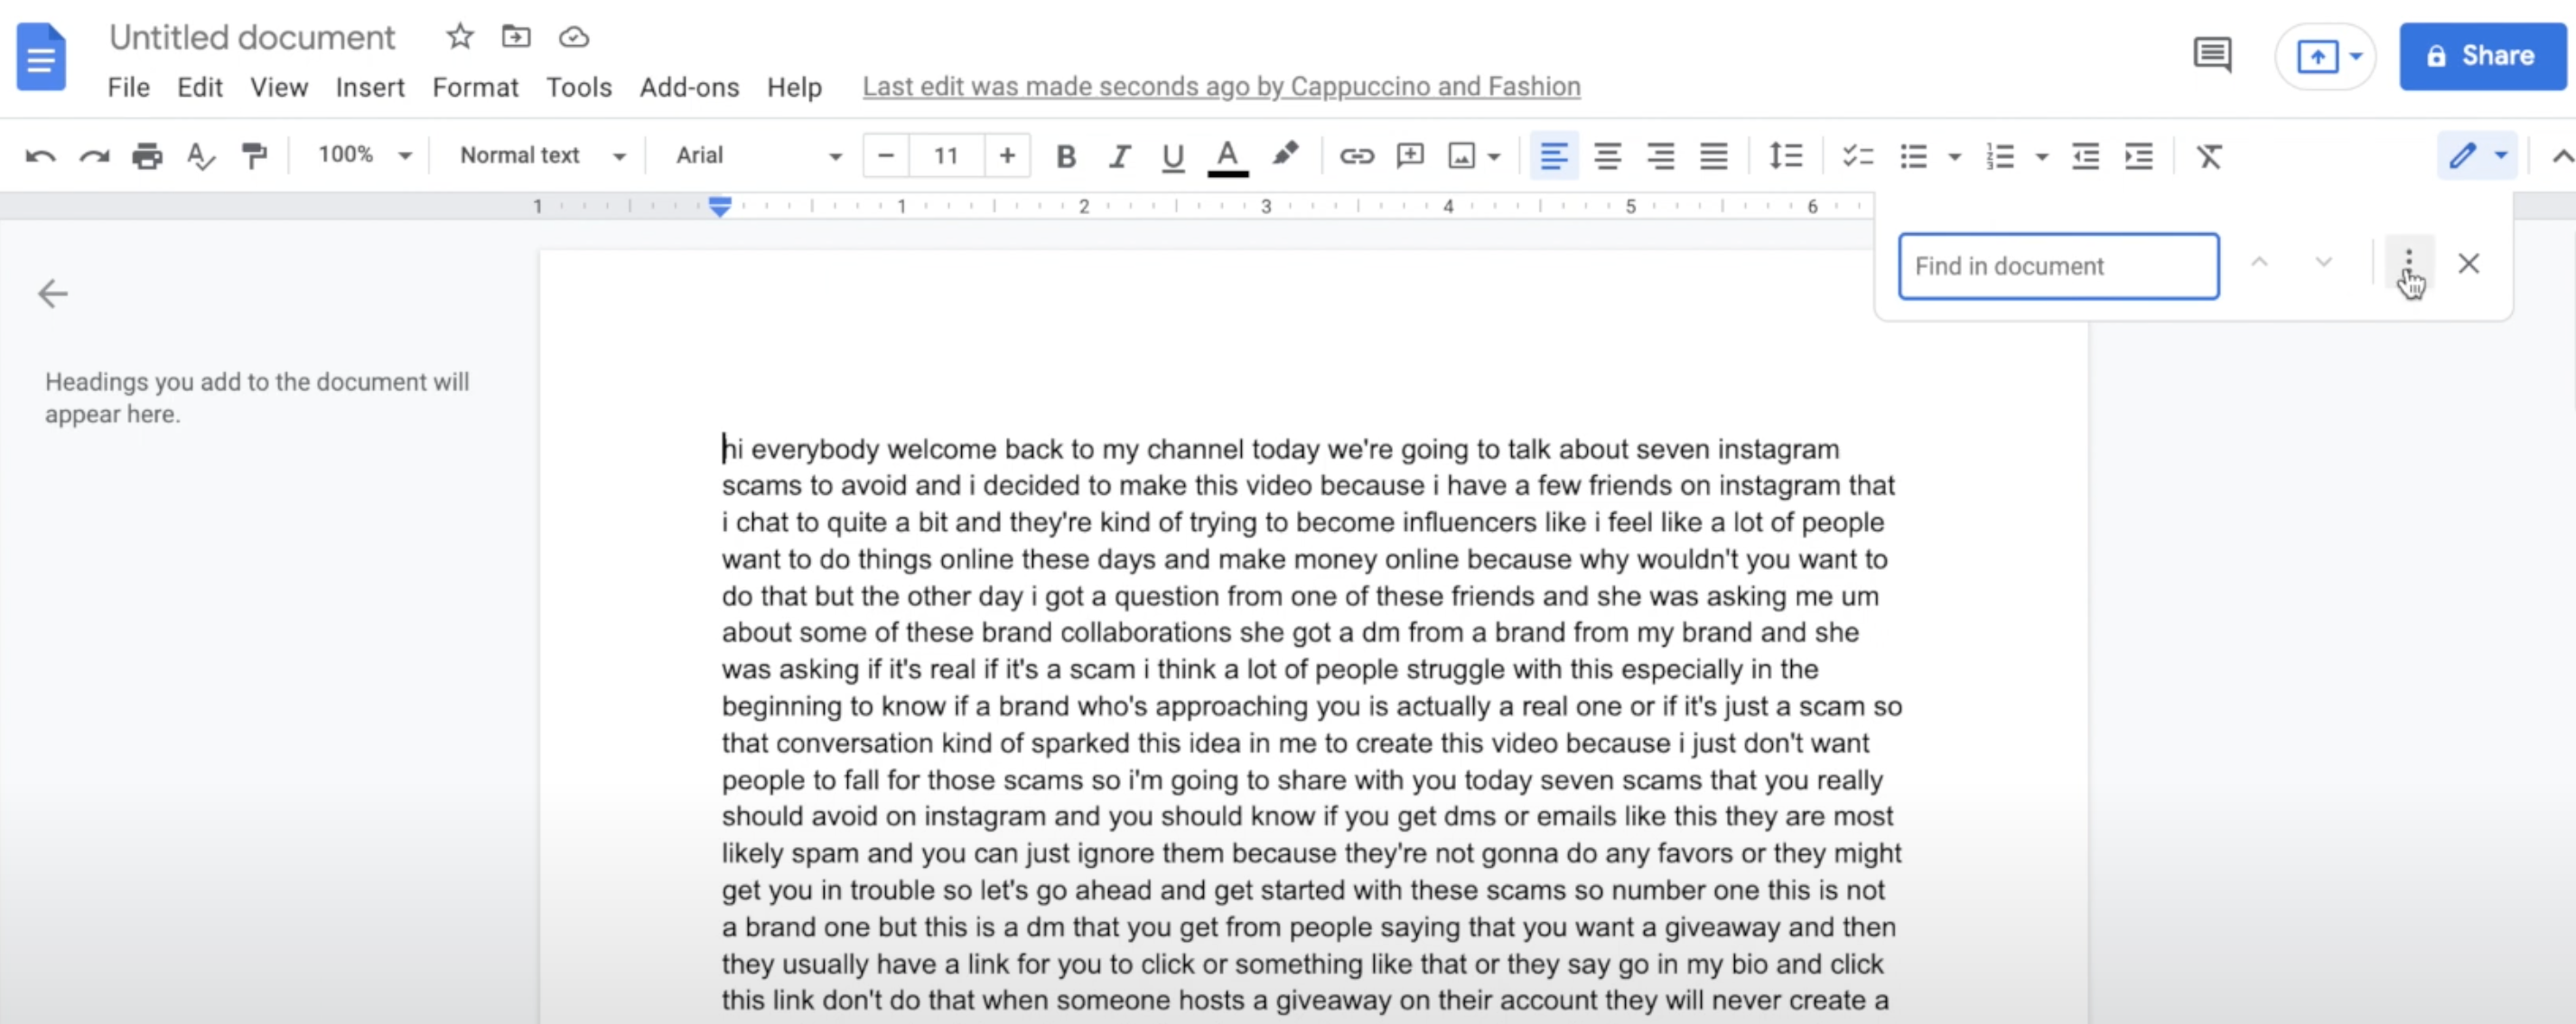
And if you click on the three dots on the Find popup, you will see Find and Replace.
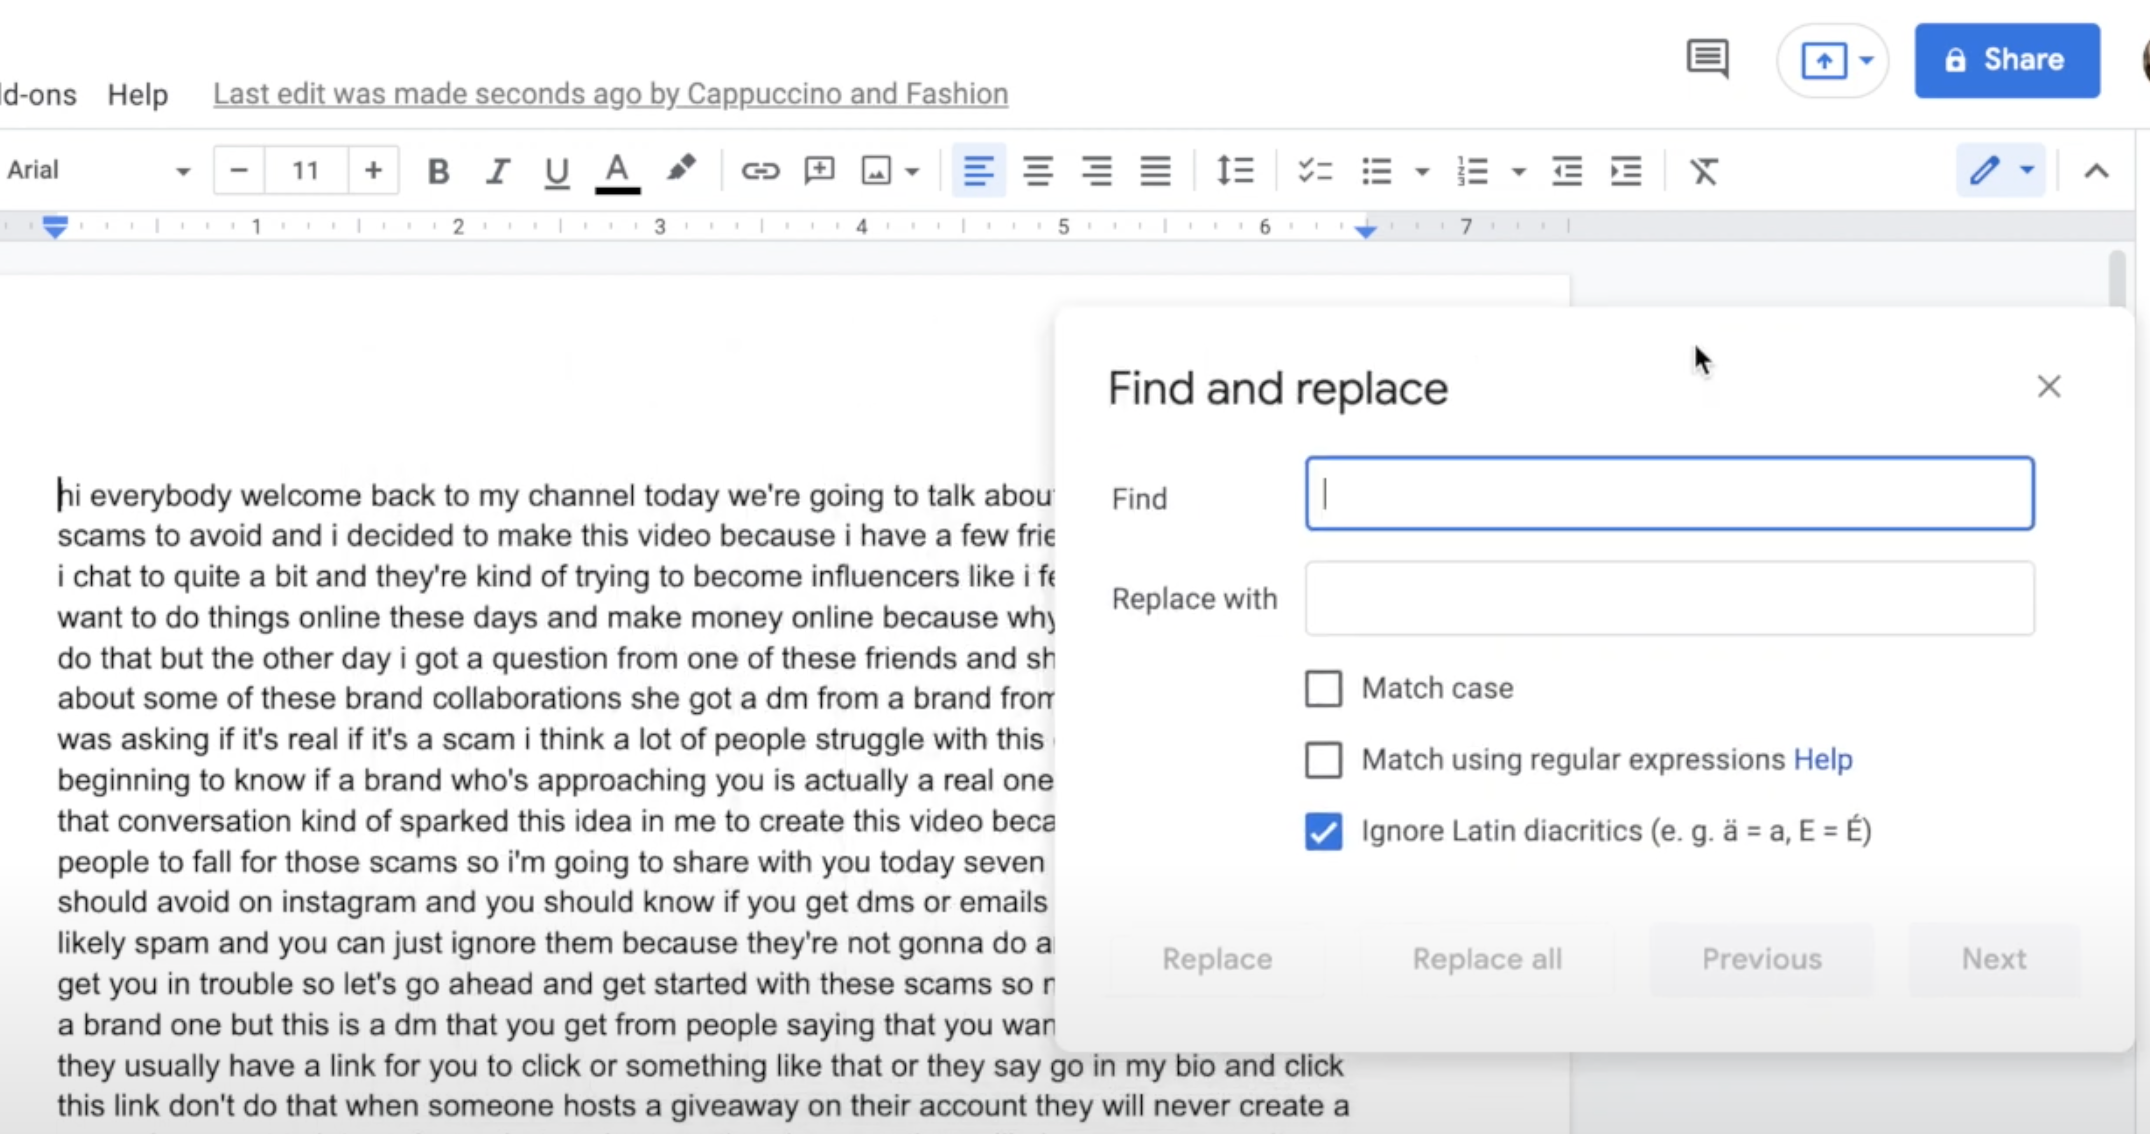
This is super useful, because there will be words in this text that you will want to replace with different ones.
Maybe because they’re the wrong words, maybe they’re not spelled right, maybe you need them to be uppercase or need them completely removed.
This will make it easier to go through all of the text and replace all of those in one go.
I’ll give you a few examples of what I mean here.
Replace “i” with “I”
One thing I replace here is the lowercase i’s with uppercase I’s. I type in space-i-space and then you can see highlighted in the text all of the i’s.
Obviously you want these to be uppercase, so in the replace bar you’re going to type space-I-space.
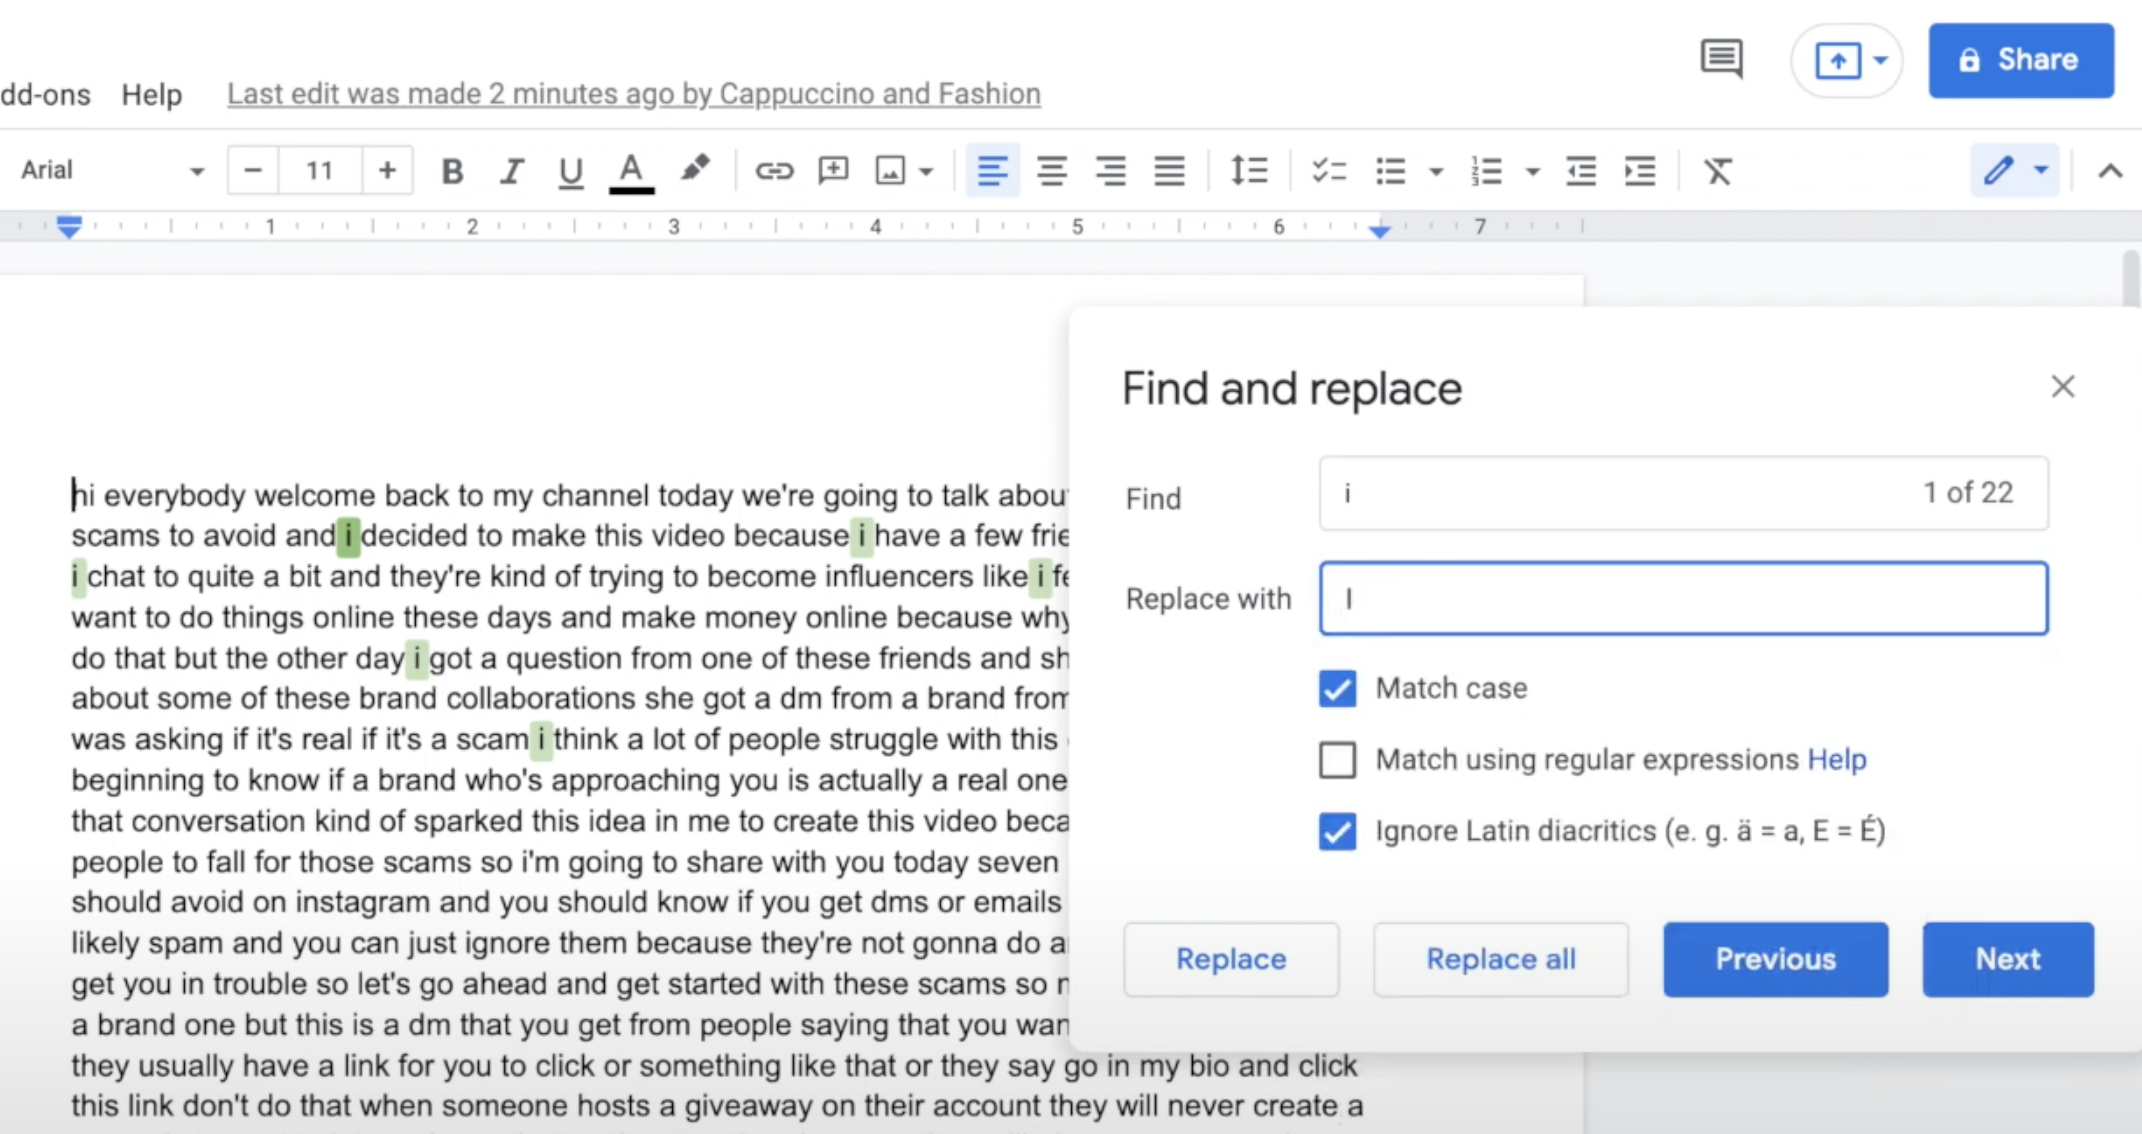
Then once you hit replace, all of those will be replaced instantly in the entire text.
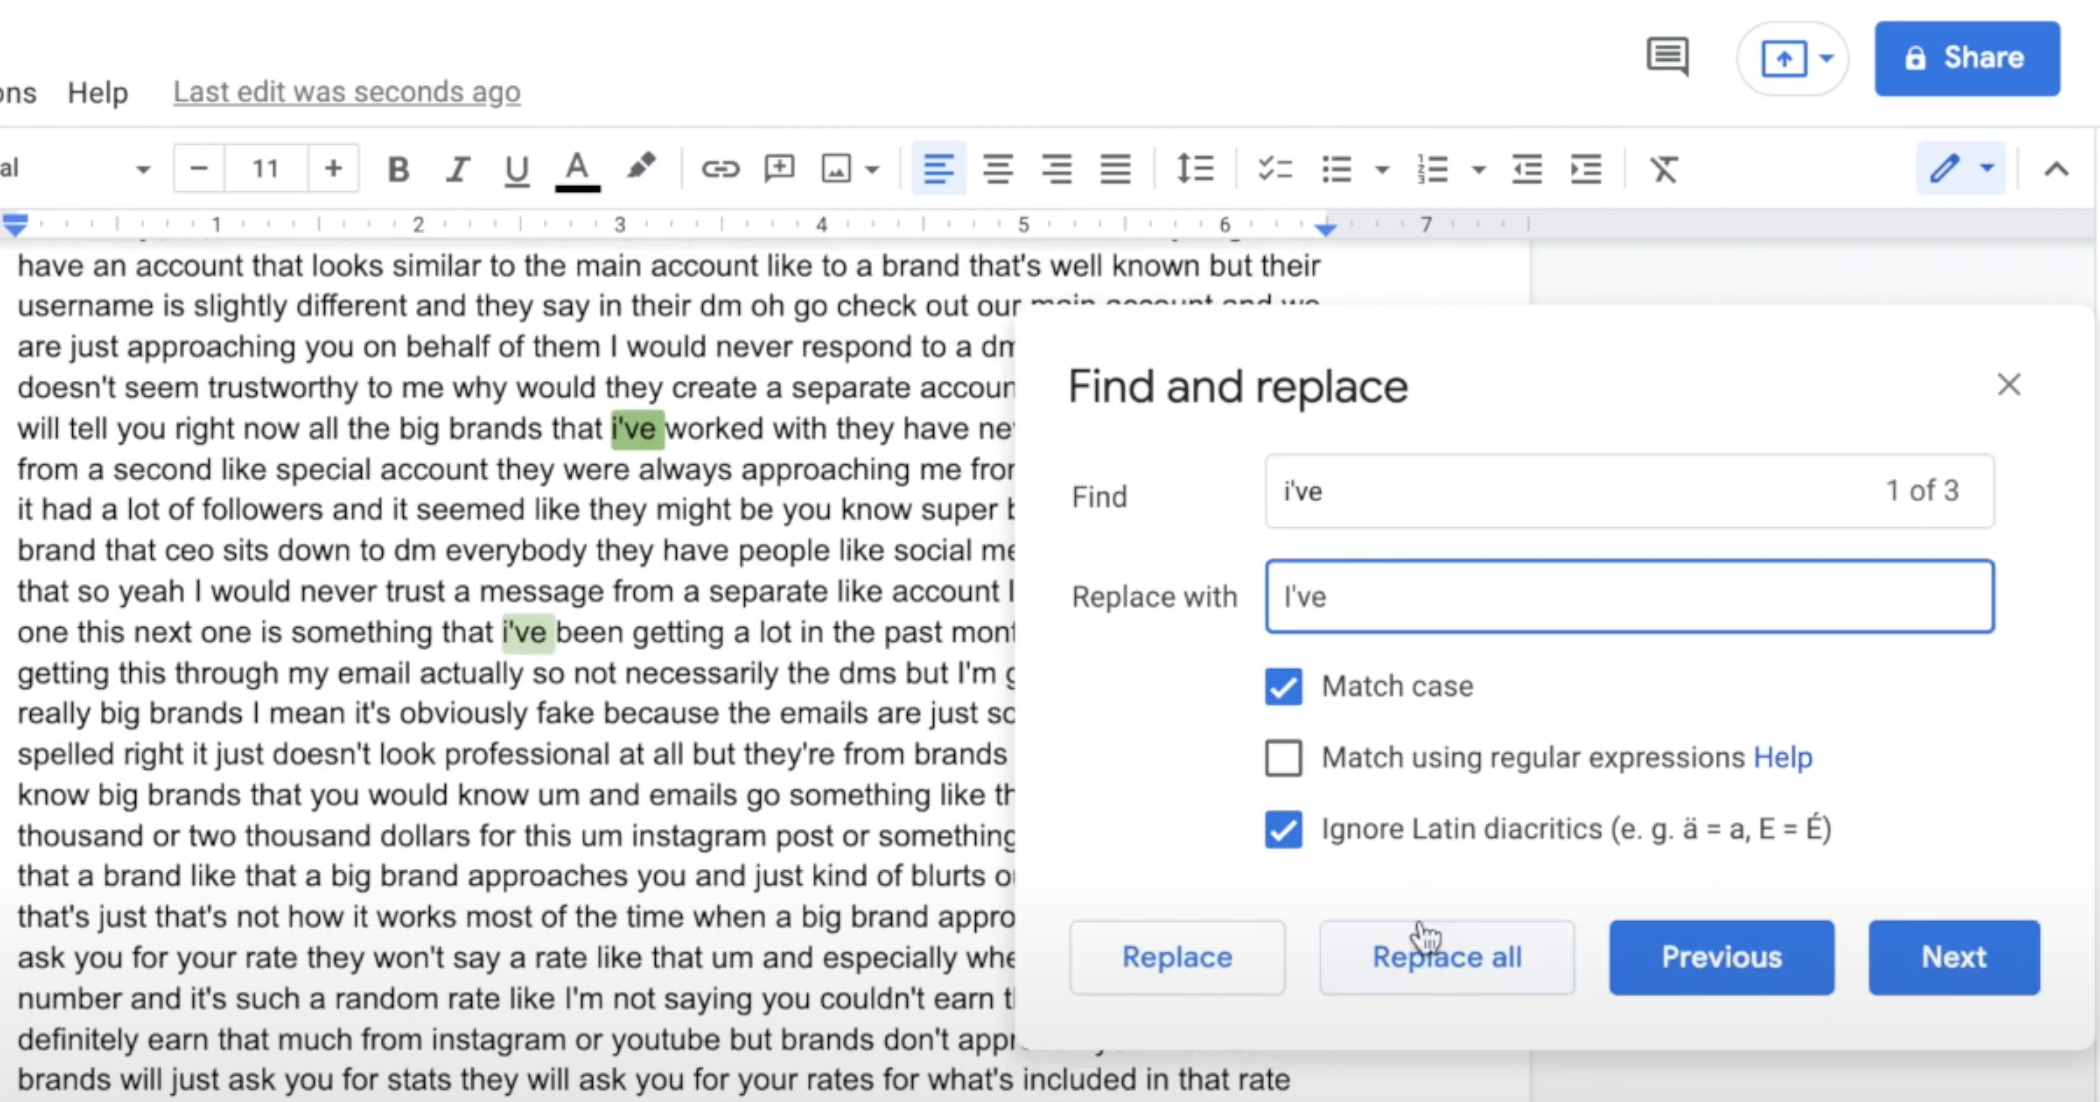
Replace “i’m, i’ve” with “I’m, I’ve”
I’m also going to do this for words like “I’m” and “I’ve, because obviously you want that to be uppercase too.
Replace “youtube, instagram etc” with “YouTube, Instagram etc.”
For example, I know I’ve mentioned YouTube in this text, or sometimes Instagram or Google. So I use the find and replace function here to quickly replace all of those with the proper case letters.
Edit out um’s
One thing that I also edit out – which is usually kind of embarrassing to be honest, haha – it’s the um’s. For example, I said 20 ums in this video.
In order to get rid of these um’s, I’m going to just type “um” in the find bar and then leave the replace bar blank.
That way all the um’s will be gone from the text.
Sometimes you might not be able to think of all the words that you need to replace here at the top of your head. But once you go through the text, you will kind of realise a few words that keep repeating and then you can use this function really easily to replace them all. It takes you less time to edit the text using this function.
Step 6: Separate into main points and headings
My usual next step is to get my script.
Now I say script, but it’s not actually a full-on script. It is more of an outline.
For me, the script I make for my YouTube videos is more like bullet points of what I want to mention in the video, so I don’t forget.
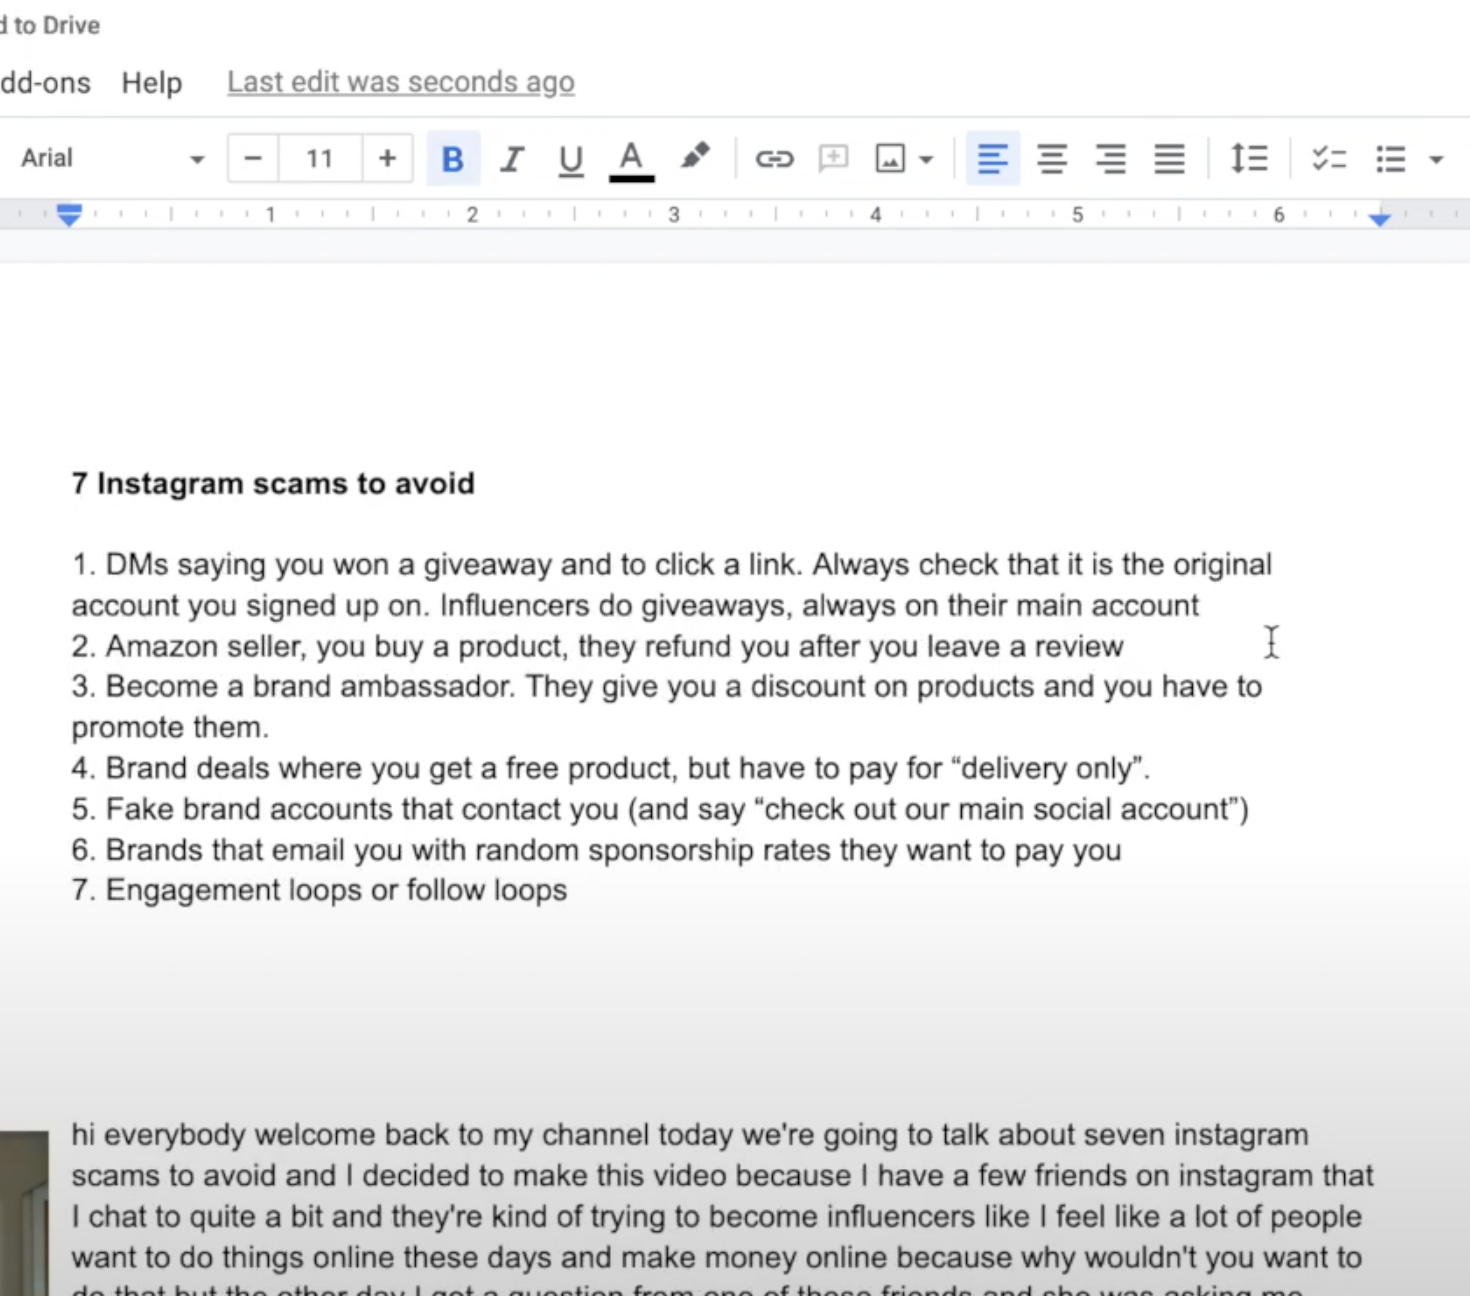
What I do now is I just copy this outline and then paste it in the Google Docs I’m working on.
Now that I have this outline, it’s going to make it easier for me to edit the text. Because honestly looking at that big chunk of text is a bit overwhelming.
So now my bullet points will become the main headings of my blog post.
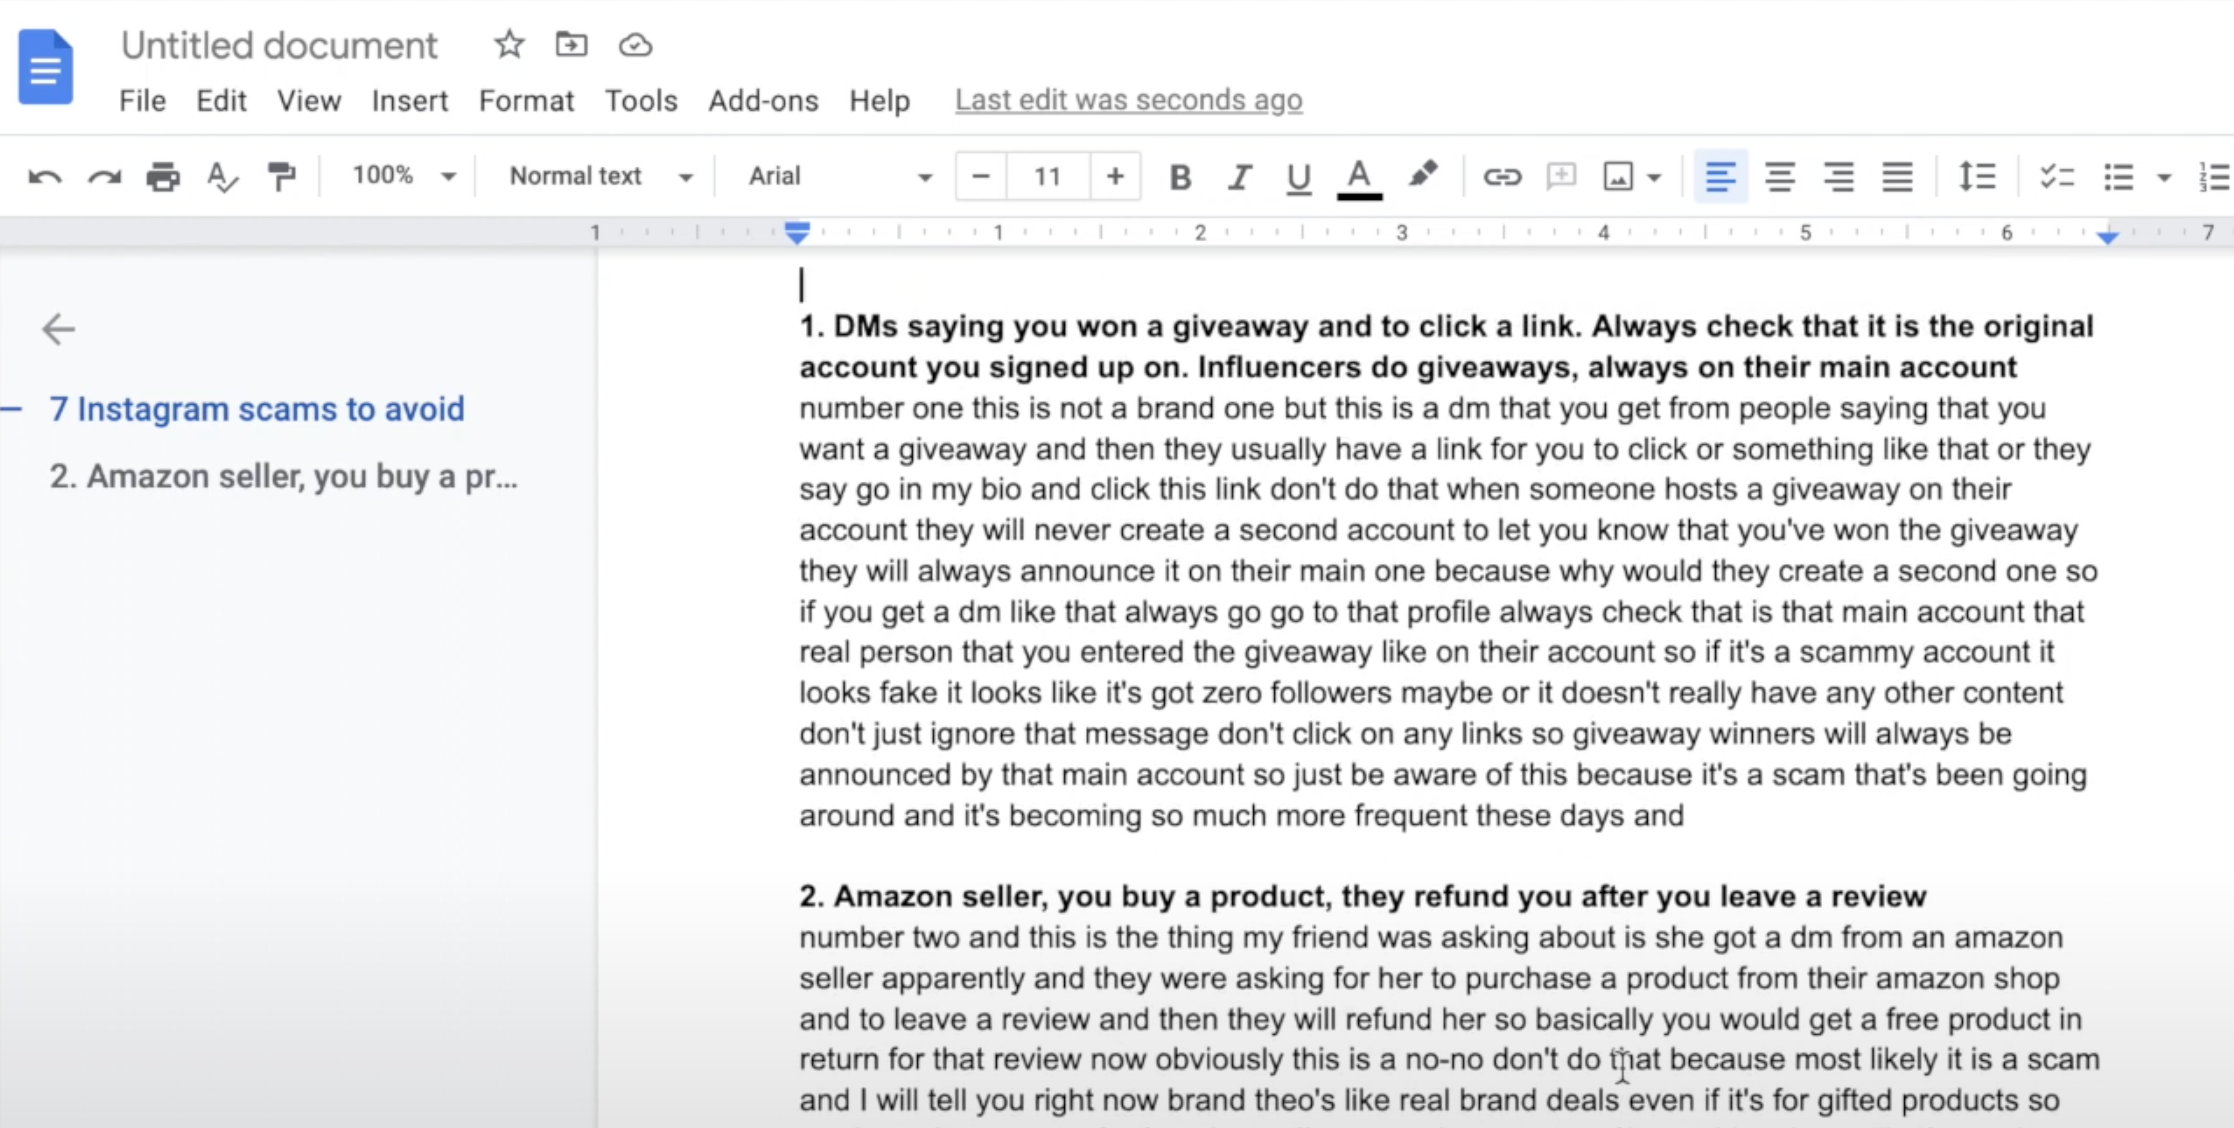
I will then go through the text and try to find where my intro is, then where my first point is, then the second one and so on. I copy-paste each bit of text to the corresponding heading.
Now that I’ve broken it down into each point and each heading, it’s going to be easier to go through and edit it, because it’s not going to be as overwhelming and daunting as looking at that big chunk of text.
Step 7: Go through the text and clean up paragraphs
Next you will want to go through all the text and separate it into sentences and paragraphs as you want them to look like in your final blog post.
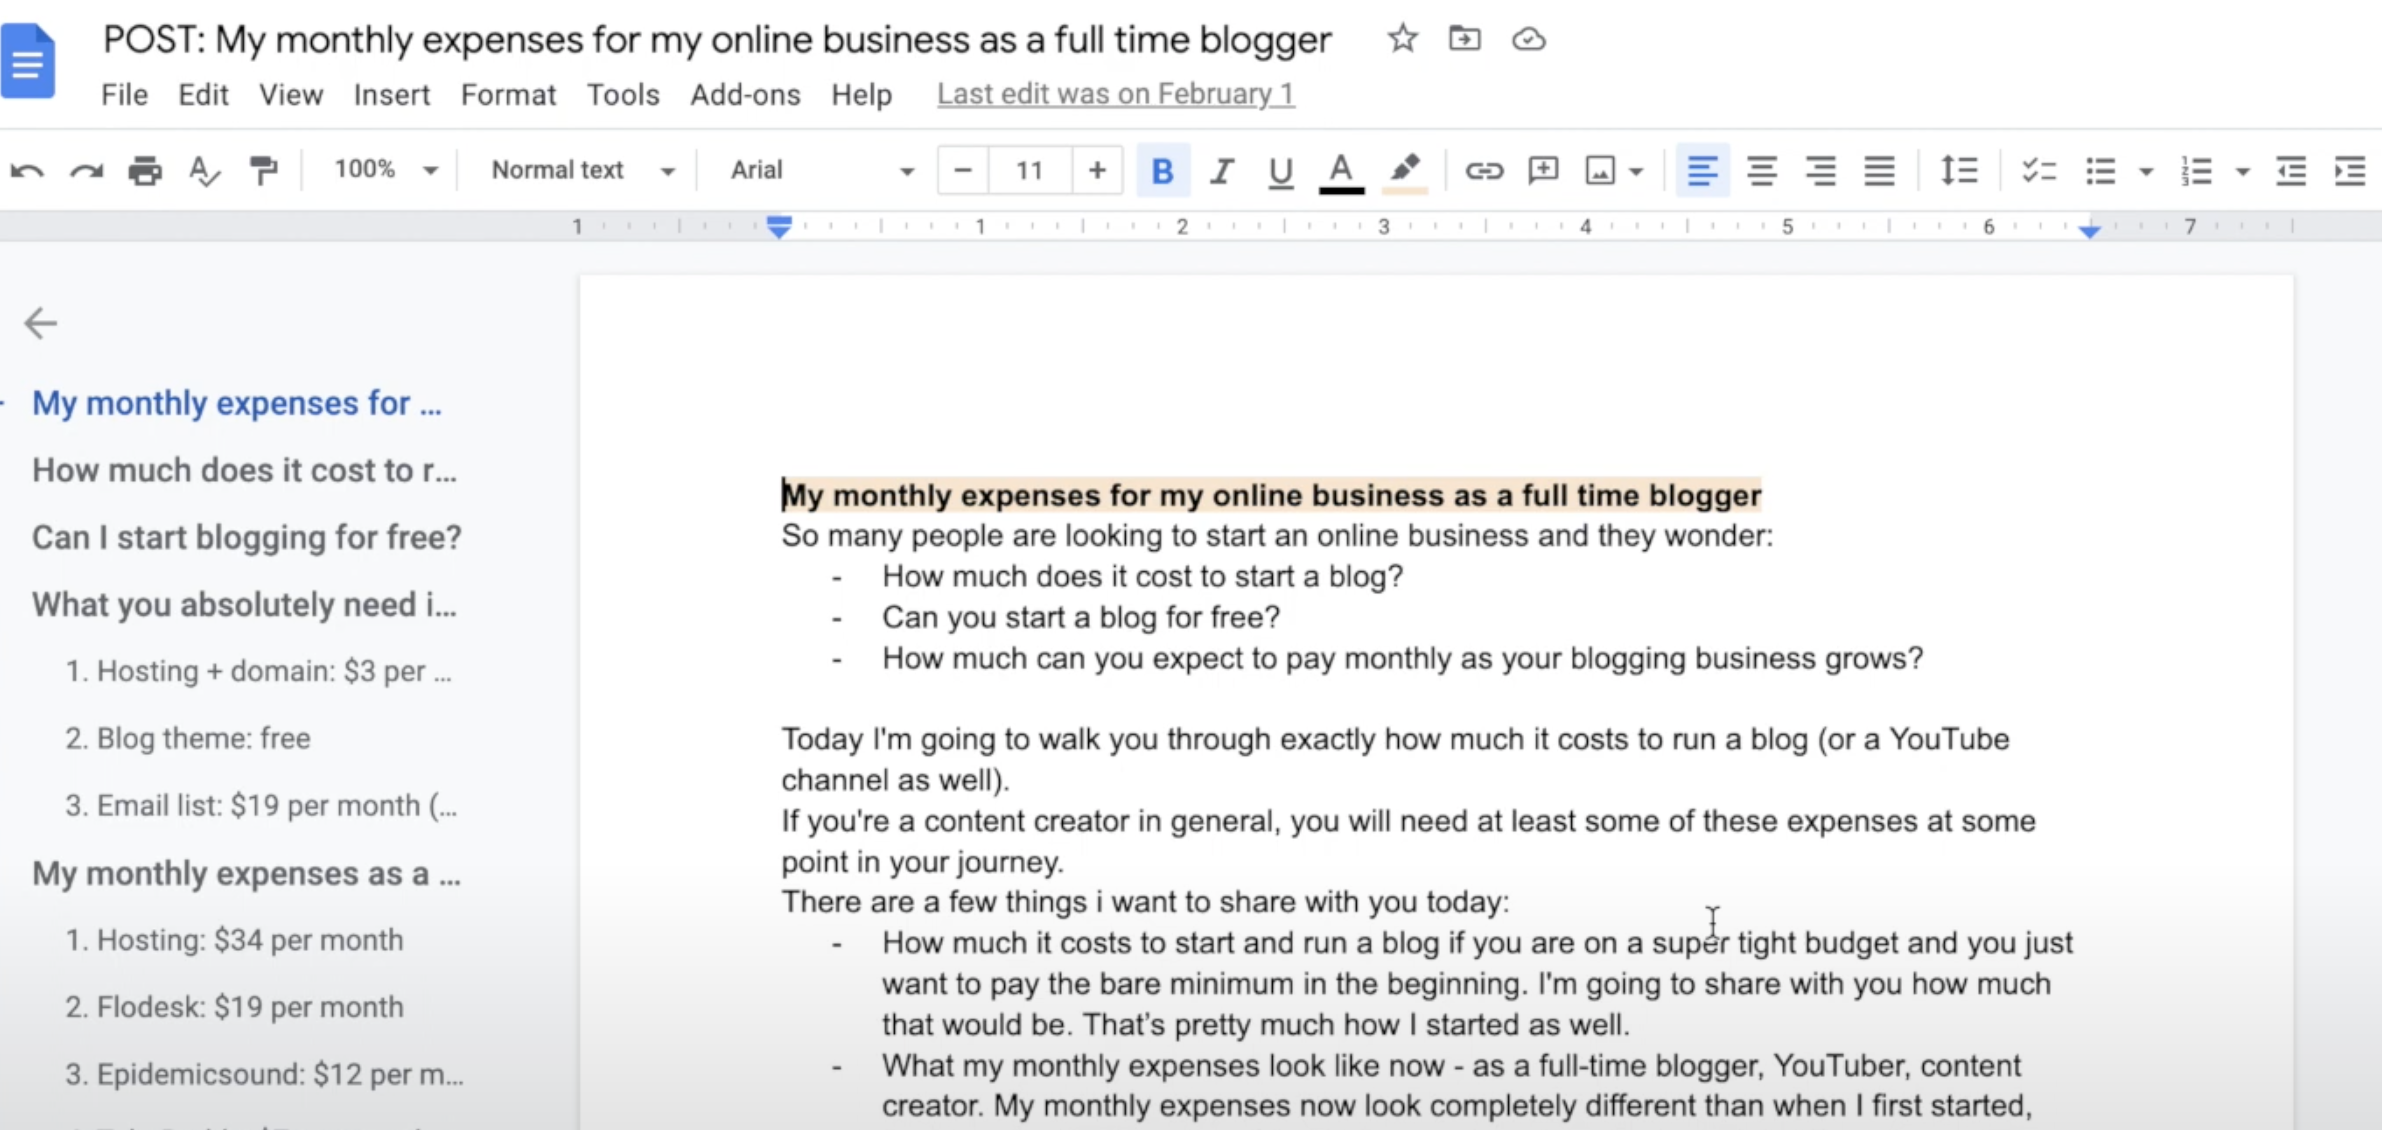
I usually like to add a few things to my blog post, because I do want for example a hook, a different introduction sometimes. I also add things that will helps with ranking in Google search.
Step 8: Add my headings to my text
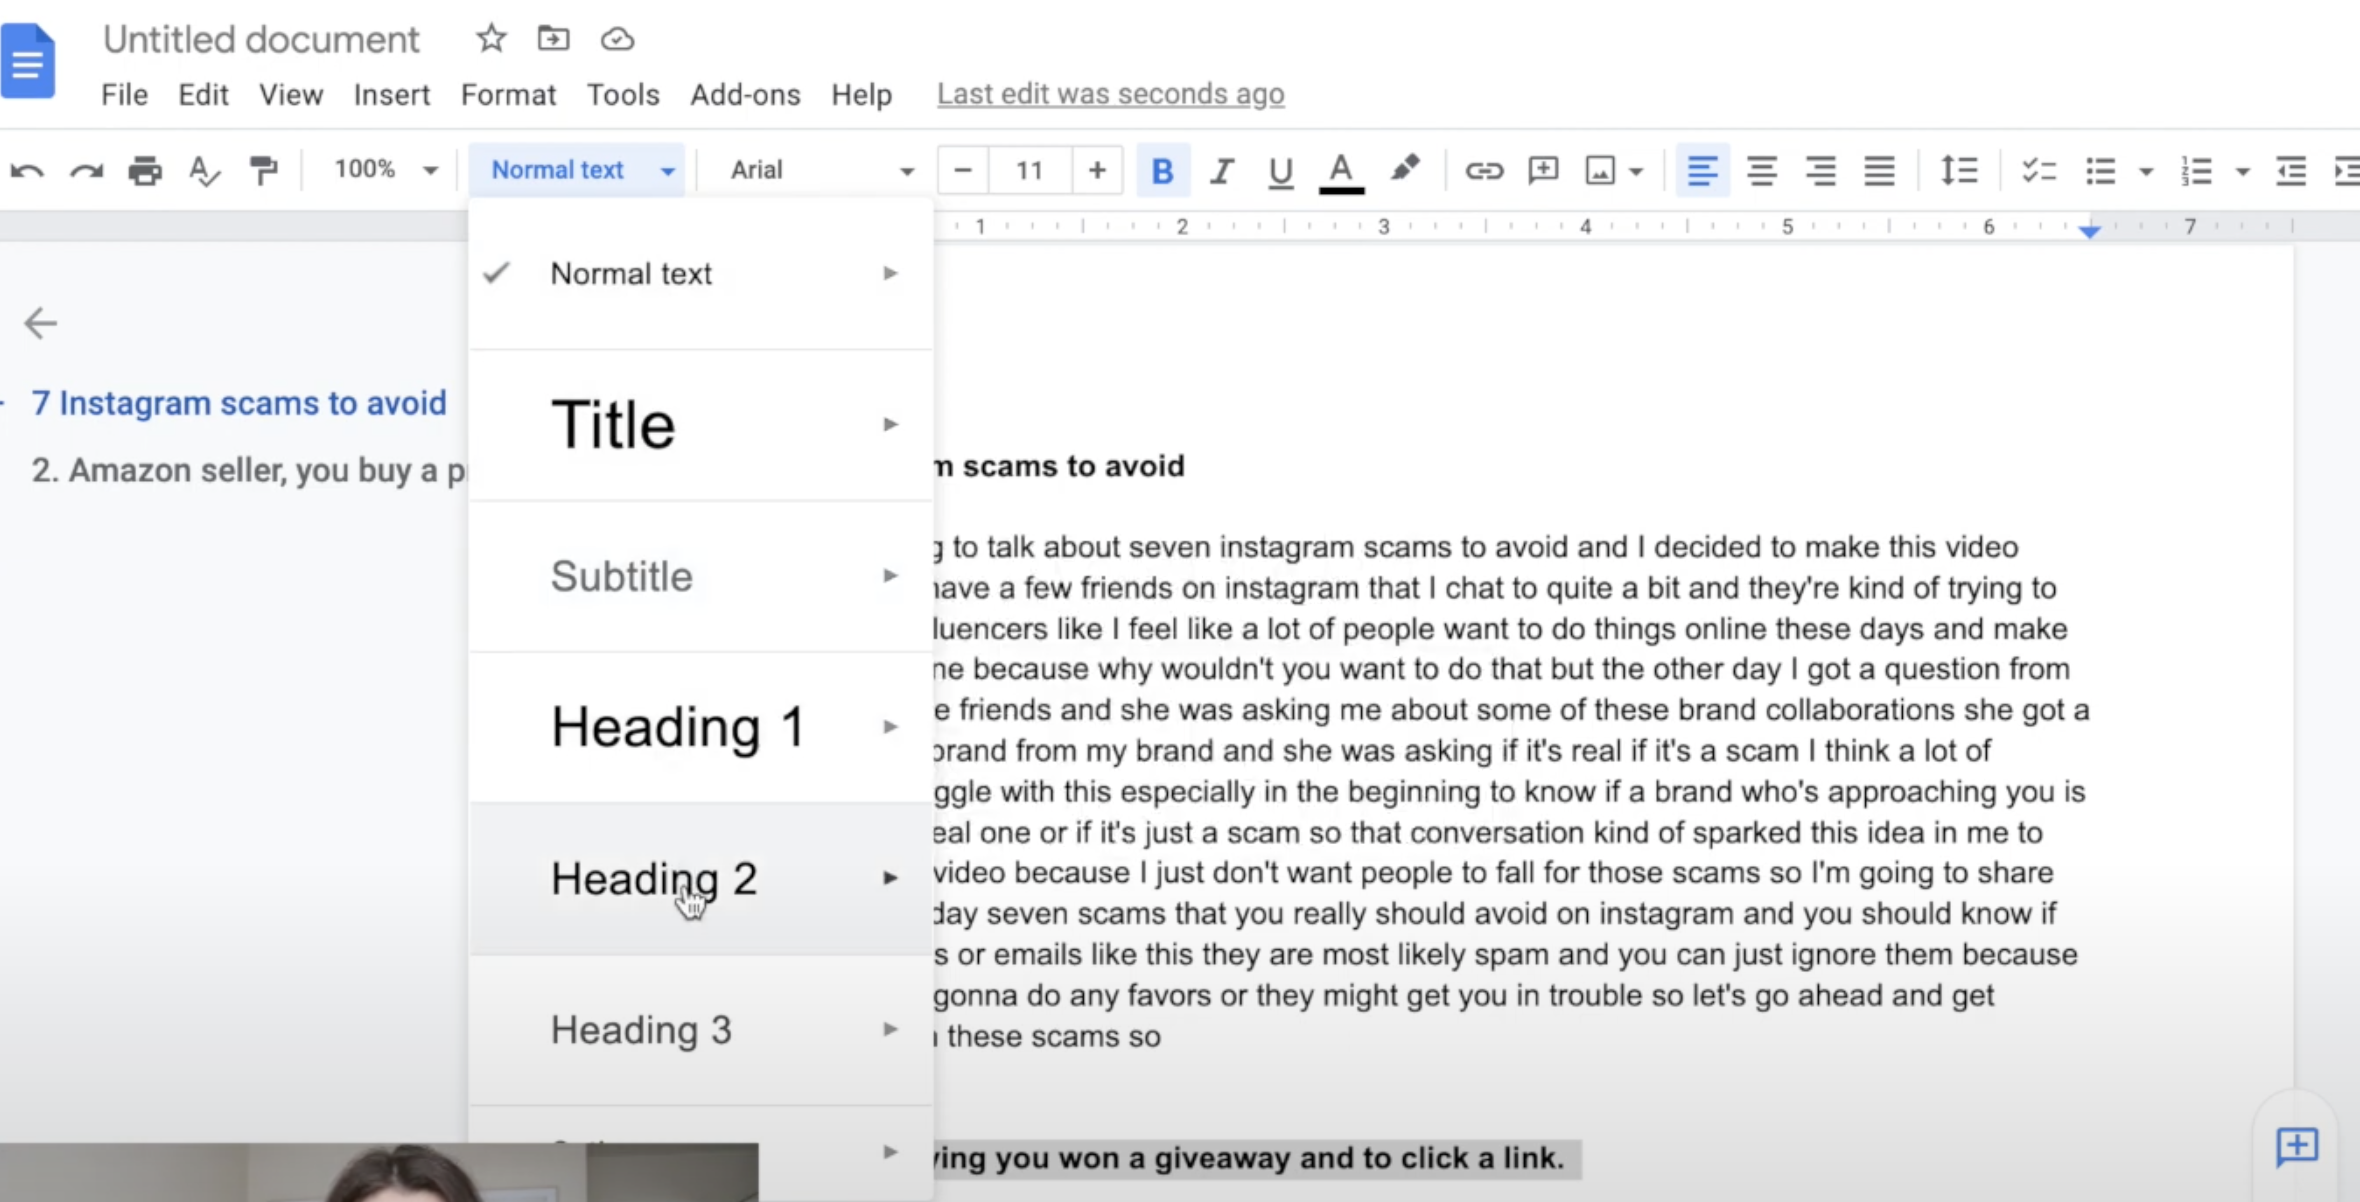
Once you’ve broken it down into sentences, you can go ahead and make sure each heading is properly formatted.
For example, for my blog posts I will use Heading 2 for my main points and then subheadings to that depending on how I want to structure my post.
I also add here any links I need in my blog post.
I will give it another quick read at the end to make sure it all makes sense.
Step 9: Copy-paste into WordPress
Once that’s all done, you can select it all, click copy and then go into WordPress (or the platform that you use for your blog) and paste it into a new blog post.
Then I usually do some final edits, if that’s necessary.
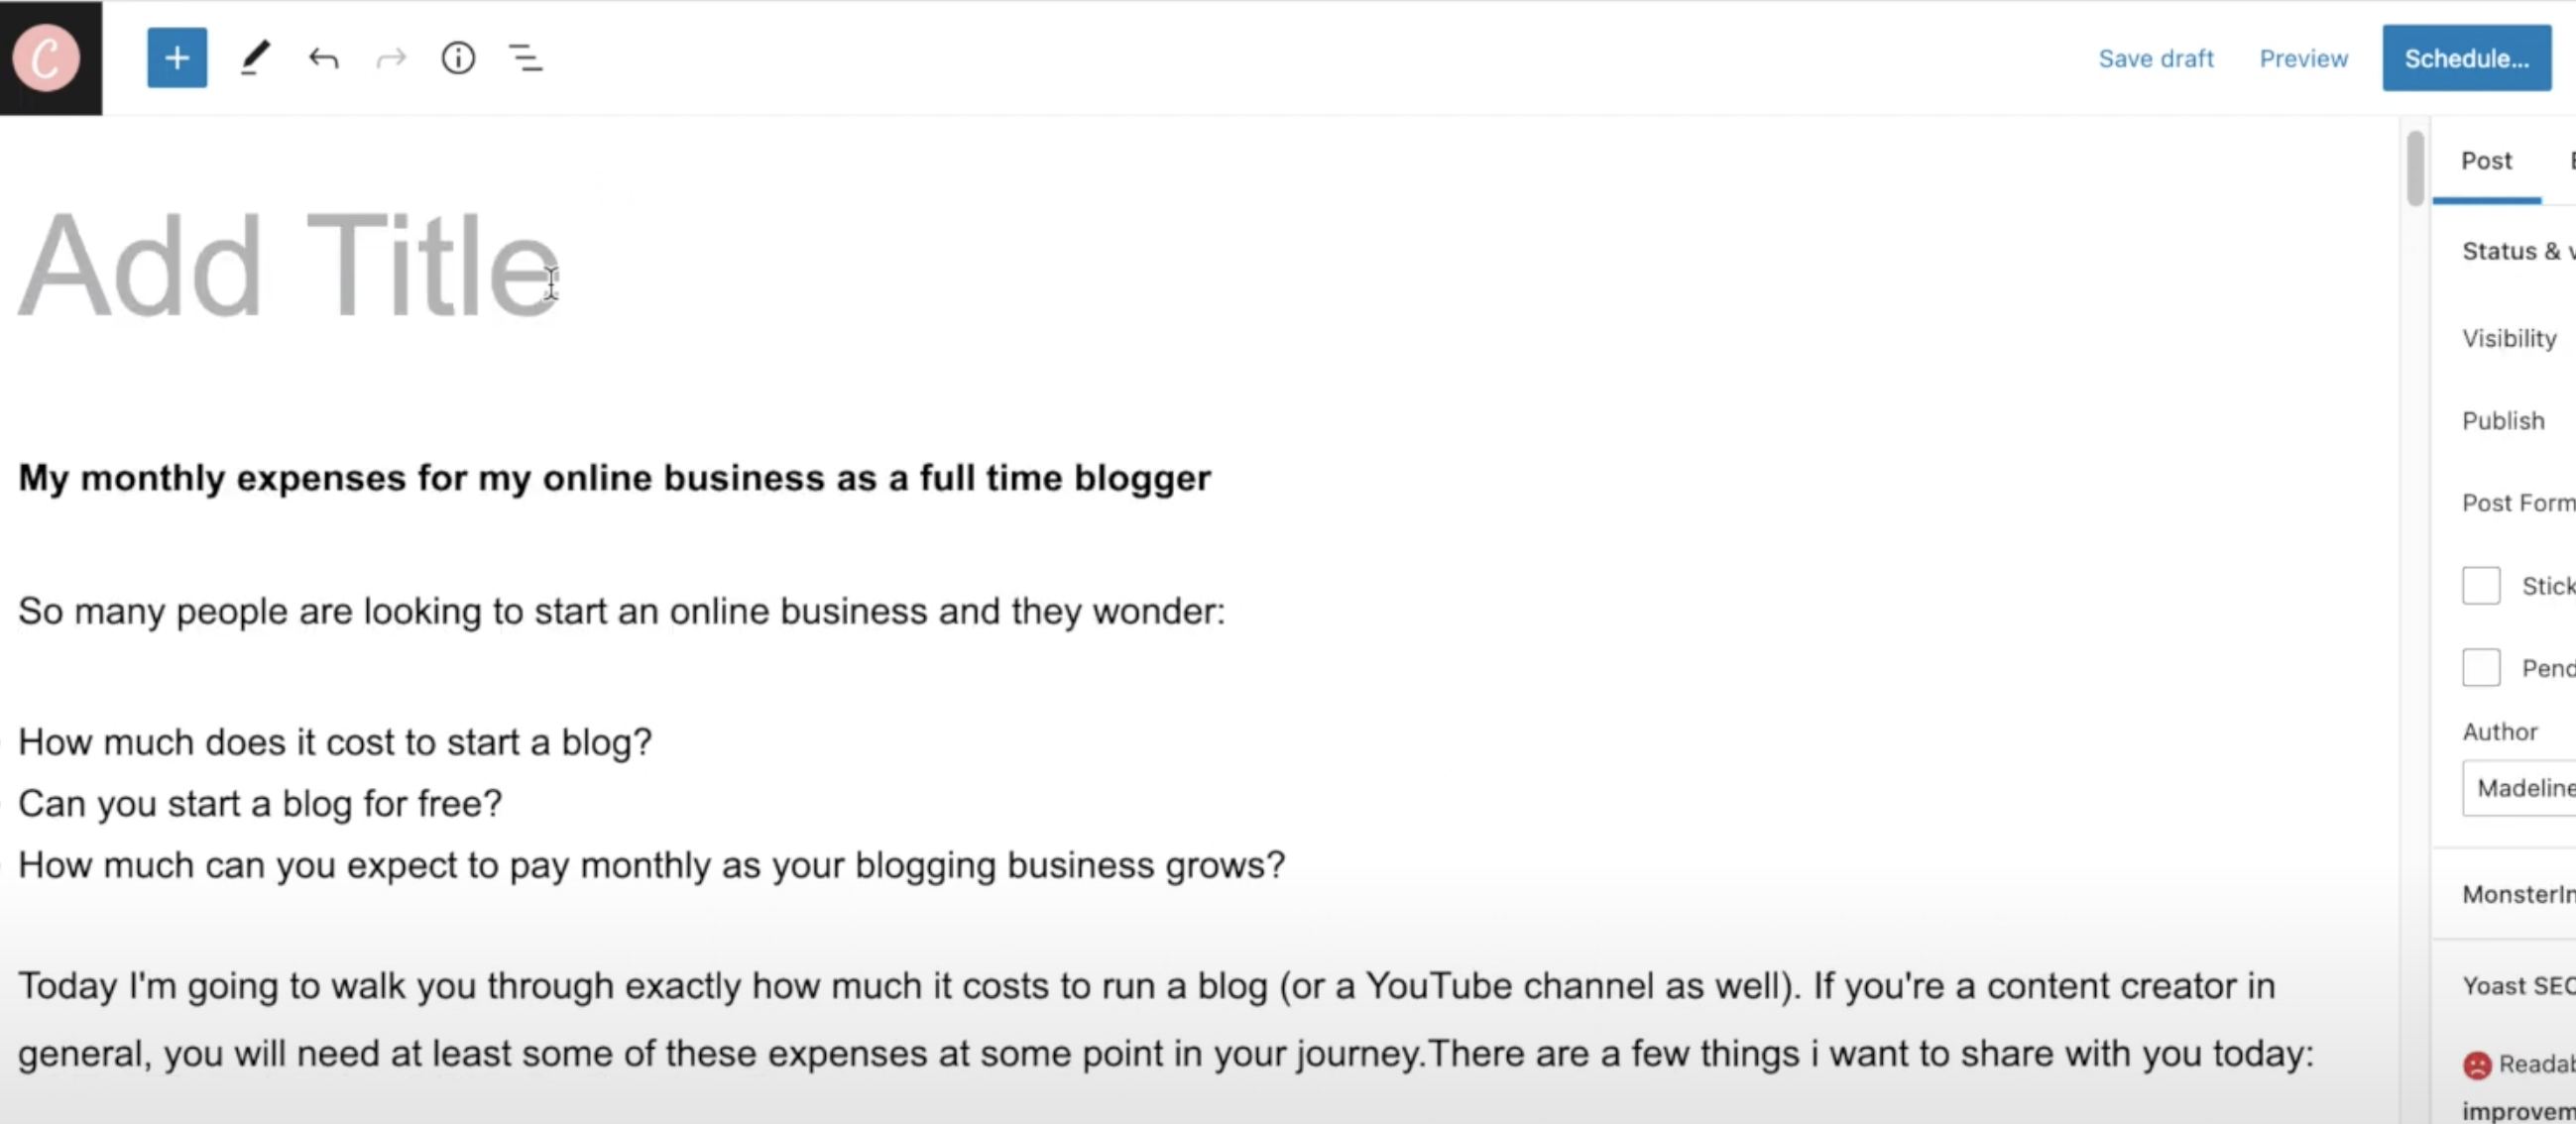
And that’s my blog post done!
That’s how I turn a YouTube video into a blog post easily and really fast.
It obviously still takes time to go through and edit the rough text of the transcript into a nicely formatted blog post. But it does take a lot less time than writing it all out from scratch.
Did you find this helpful? Let me know in the comments!

I’d love to hear how it works for you if you give it a try!


I found this incredibly helpful! I didn’t know about that add-on, and it’s a game changer! Thank you so much!