
This post may contain affiliate links, meaning I make a commission if you purchase through my links, at no extra cost to you. Disclosure here.
Are you struggling to create beautiful pins without spending hours at it? Then you will love the Tailwind Create tool that helps you create pins for Pinterest easily.
In this post you will get a full tutorial and review of Tailwind Create, so you can have a better grasp on how to use it for your own pin strategy.
AD: This post was sponsored by Tailwind. However, all opinions are my own. I have been using Tailwind myself since 2019, way before I started to work with them.
In case you’re new to the blogging world, it is highly effective to create multiple pins for your blog posts to promote them on Pinterest and get more traffic back to your blog.
If you’re a beginner, I recommend you create at least 2-3 pin images for each post that you write.
Let’s say you write 2 new blog posts per week. In a month, that would be 8 blog posts. If you create 3 pin images for each of those, that is a total of 24 different pin designs per month.
That’s quite a few pin image designs to come up with. And since Pinterest favours fresh pins with various designs, it is something you really want to focus on in order to see growth on the platform.
If you’re often finding yourself staring at a blank screen not really knowing where to start your pin design, this tool will really help you. Because after you input your brand preferences, it will give you lots of pin images that are almost-ready to use.
Let’s dive into the details.
What is Tailwind?
If you are new to this, you might be wondering what Tailwind is. Tailwind is a pin scheduling app that helps you plan and schedule your pins in advance for weeks at a time.
It is a super helpful tool that I’ve been using for the past few years and that has helped me grow my blog to where it is today. I wrote a full honest Tailwind review here, if you would like to know more details about it.
I started using Tailwind because I was really struggling to be consistent on Pinterest. I was creating 2-3 pins for each blog post I was writing, but when it came to actually pinning them to Pinterest, I was really lacking in strategy.
And that’s because:
- I was not posting them at the best times for my account.
- I was posting them randomly to boards, but then I couldn’t remember which board I had already pinned them to when I signed in the next time.
- I was not pinning daily, because I simply could not fit that into my daily schedule as a busy mom.
Tailwind just made sense for me, so I decided to give it a go. I started on the free version, but then soon after I moved to a paid plan, so that I could really work on my Pinterest strategy more intensely.
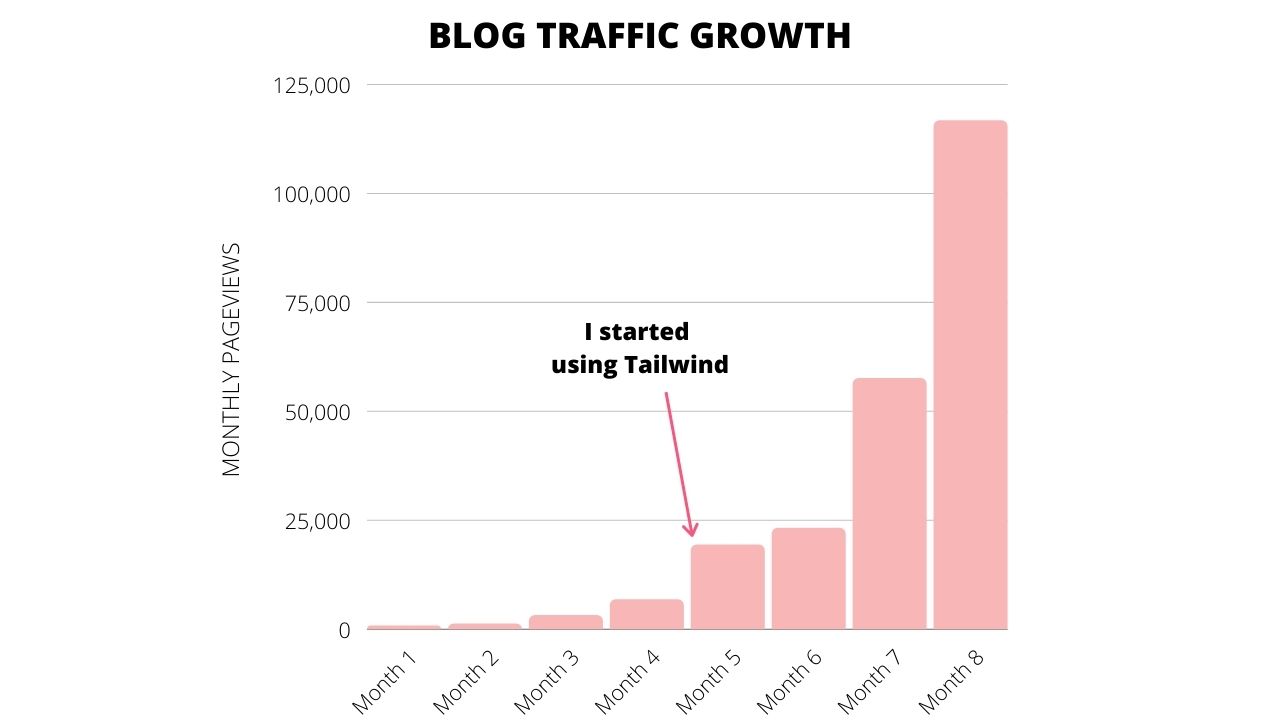
It really paid off because after a few months of using it consistently, along with quality blog content, I reached over 1 million monthly views on Pinterest.
And as a result of that, my blog traffic increased by 80,000 pageviews in just 3 months.
It is such a powerful tool that saves so much time and is so convenient if you just cannot fit in daily pinning into your schedule.
Please note that your results might be different depending on your content, niche and strategy, but here are some typical results you can expect from using Tailwind.
Can You Create Pins on Tailwind?
Yes, aside from being able to schedule your pins for Pinterest, you can now also create your pins straight on the Tailwind platform. This is something that can save you even more time as a content creator.
What Is Tailwind Create?
Tailwind Create is a feature you get access to once you sign up on the Tailwind app. You can sign you for their Forever Free plan first, so you can test it out for yourself. This free plan comes with 20 posts per month, which is a great place to get started.
After you create your account, you can then use Tailwind Create to make pins easily on the platform.
The way it works is:
- You input your brand information: your blog name, fonts, colours, logo.
- You choose the pin title and photos you want the pin design to contain.
- Tailwind Create instantly creates lots of pin designs for you.
- You go through them and select the ones you like. You can also edit the pins if there’s anything you’d like to change.
- You then schedule your selected pins straight to your Pinterest from there.
How cool is that? I was honestly so impressed by this feature when I discovered it.
Now let’s see step by step exactly how this process works.
You can either read all the steps below or you can watch this video to see the process click by click:

How to Use Tailwind Create
Use these steps to guide you from start to finish on how to make pins for Pinterest with the use of Tailwind Create:
1. Sign up or log into your Tailwind account
Start your account with Tailwind here today. Again, you can start on the Forever Free plan if in the beginning steps of your blogging journey. If you already have an account, then simply log in.
On the left menu, you will see a paintbrush icon. Click on that icon and it will take you to the Tailwind Create screen:
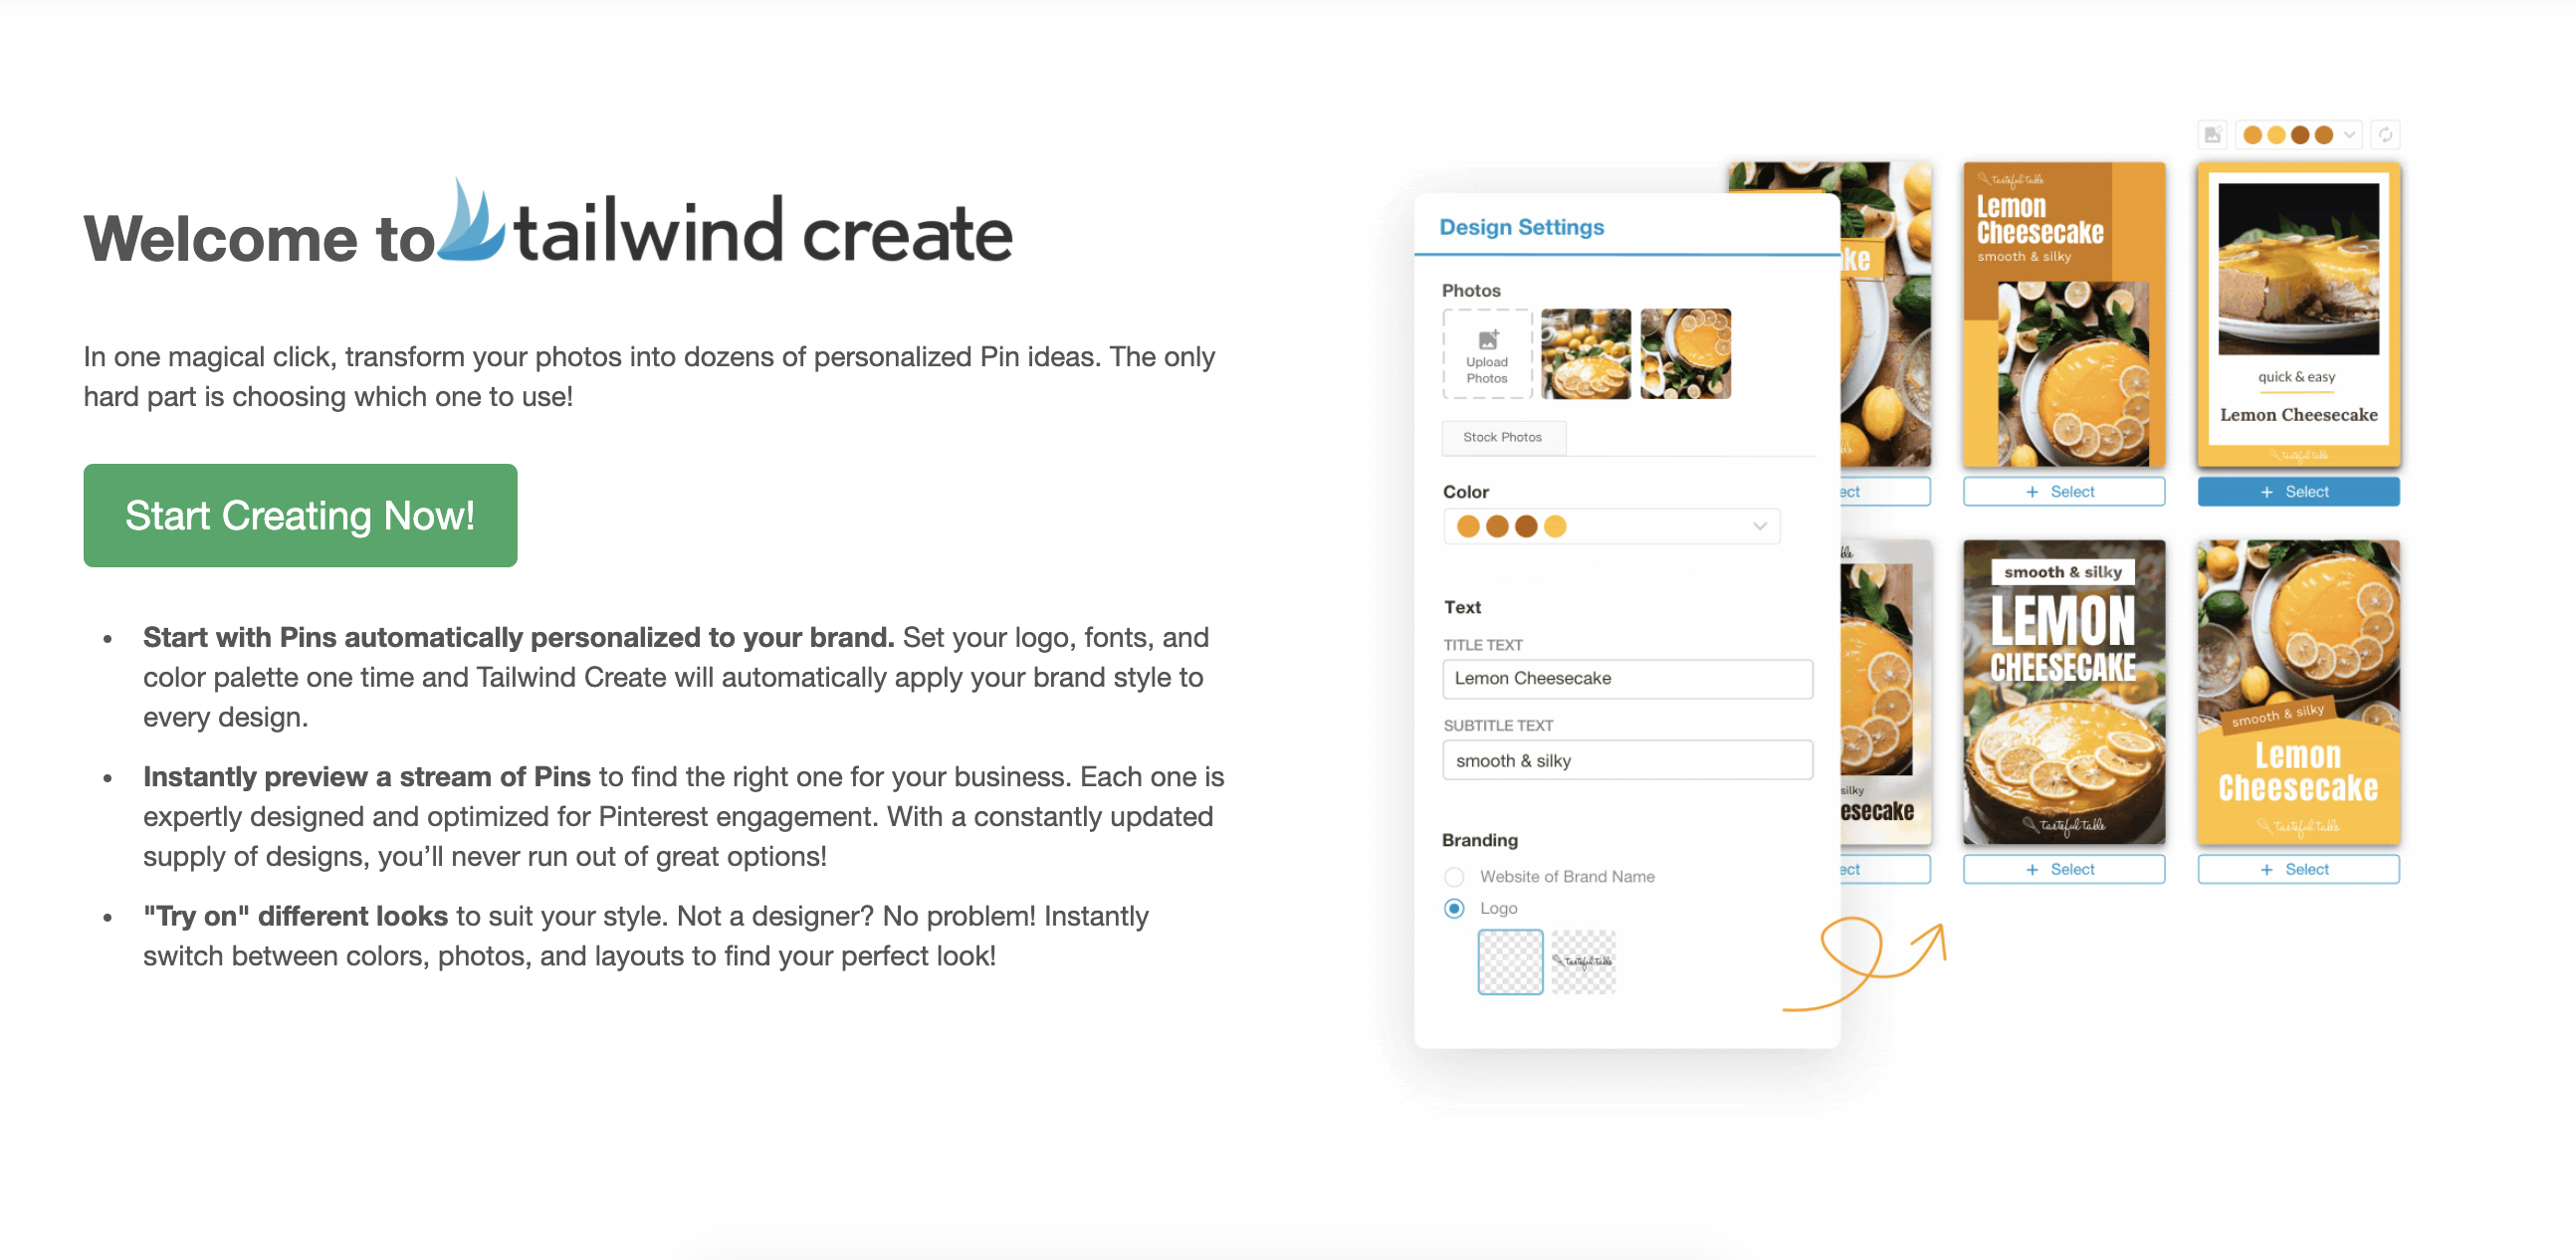
Click on Start Creating Now!
2. Personalise your Tailwind Create
You will now fill in these details to personalise your Tailwind Create dashboard. This is something you only have to fill in once and will be saved for you for any future designs.
Don’t worry if you’re still unsure about your specific brand details, you can always come back to edit these if needed.
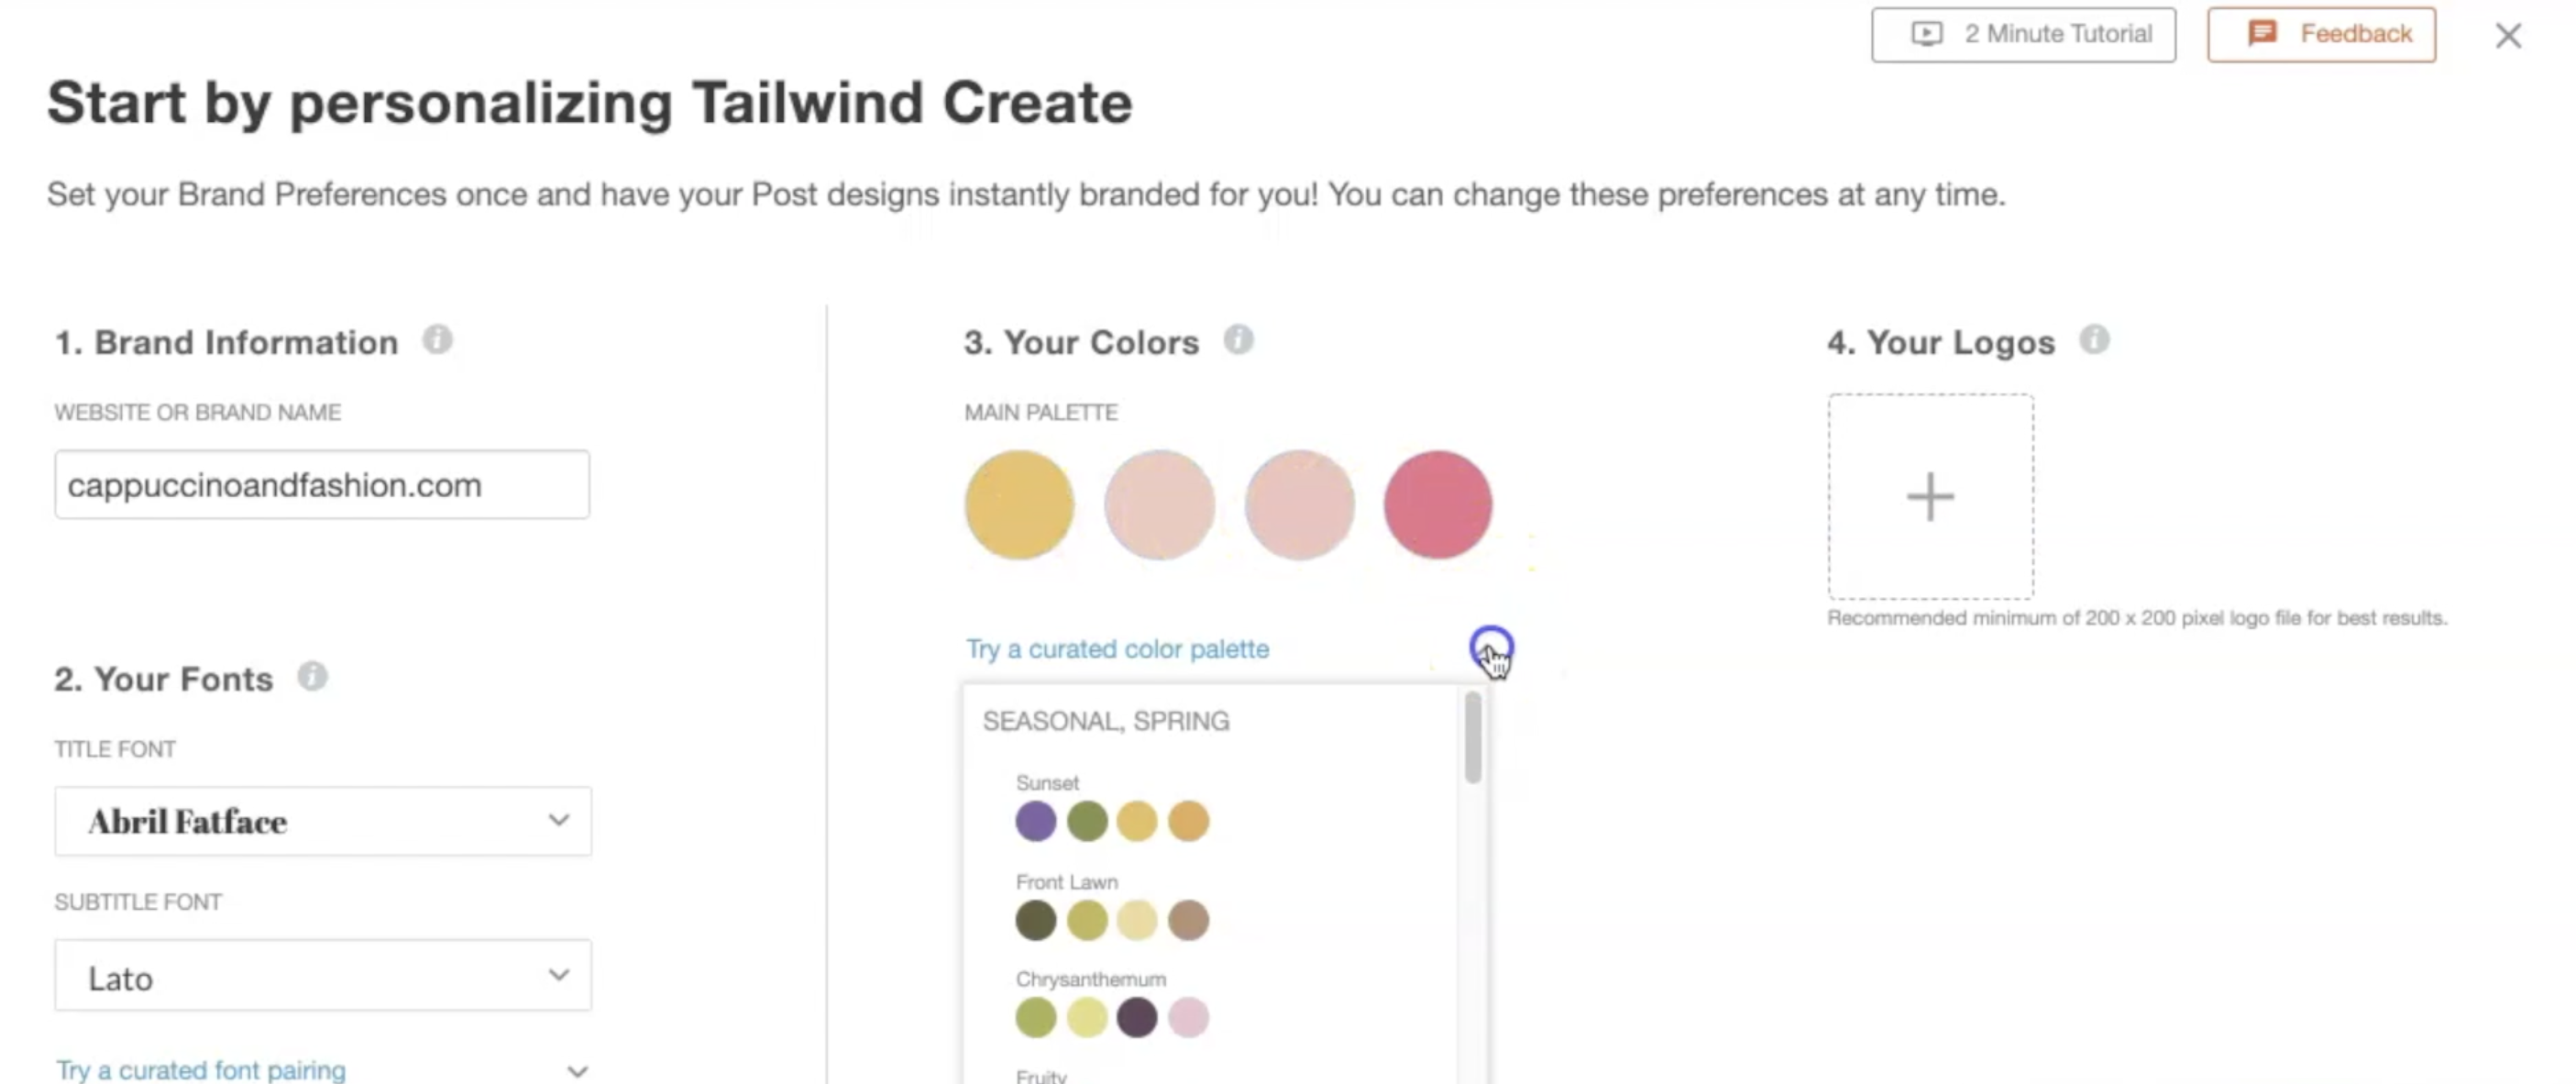
What to fill in here:
- Brand Information – Type here your website URL or your blog name. For example, I type in either: Cappuccino and Fashion or cappuccinoandfashion.com
- Your Fonts – You can either choose your own two fonts, or you can go through the list of curated font pairings. This list contains lots of pairings that work well together, so you can simply select one of those if you are not feeling very inspired.
- Your Colours – You can add here 4 colours that you want to use for your branding and your pins. If you already have a set of colours that you use for your blog, you can insert their hex codes here like I did. Alternatively, if you’re unsure of what would be some good colour combinations, use the curated colour palette to pick from the ready-created palettes one that you like.
- Your Logos – This is where you can add your blog or brand logo, if you have one.
3. Add your pin Details
Now you can go ahead and create your pins.
On this page you will fill in your pin details for this specific post, page, product etc.
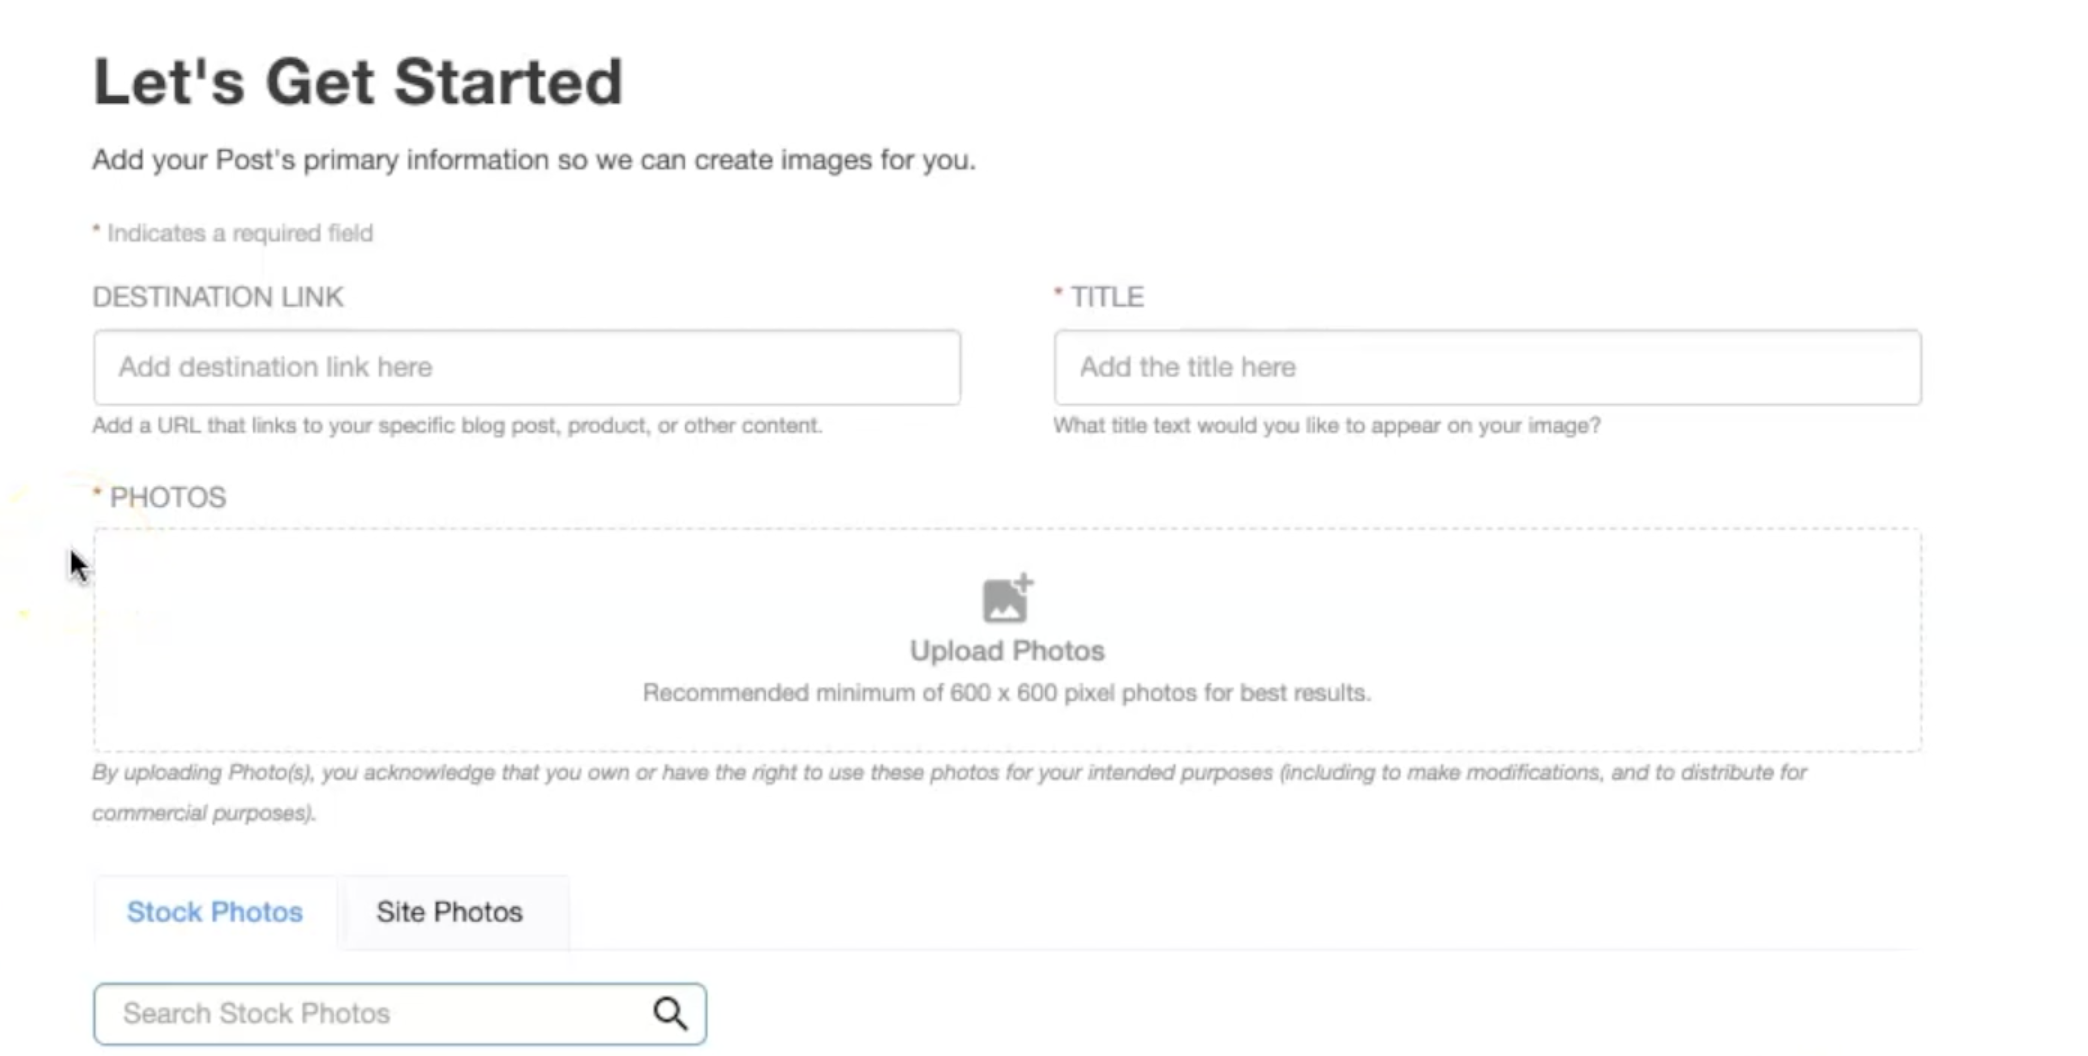
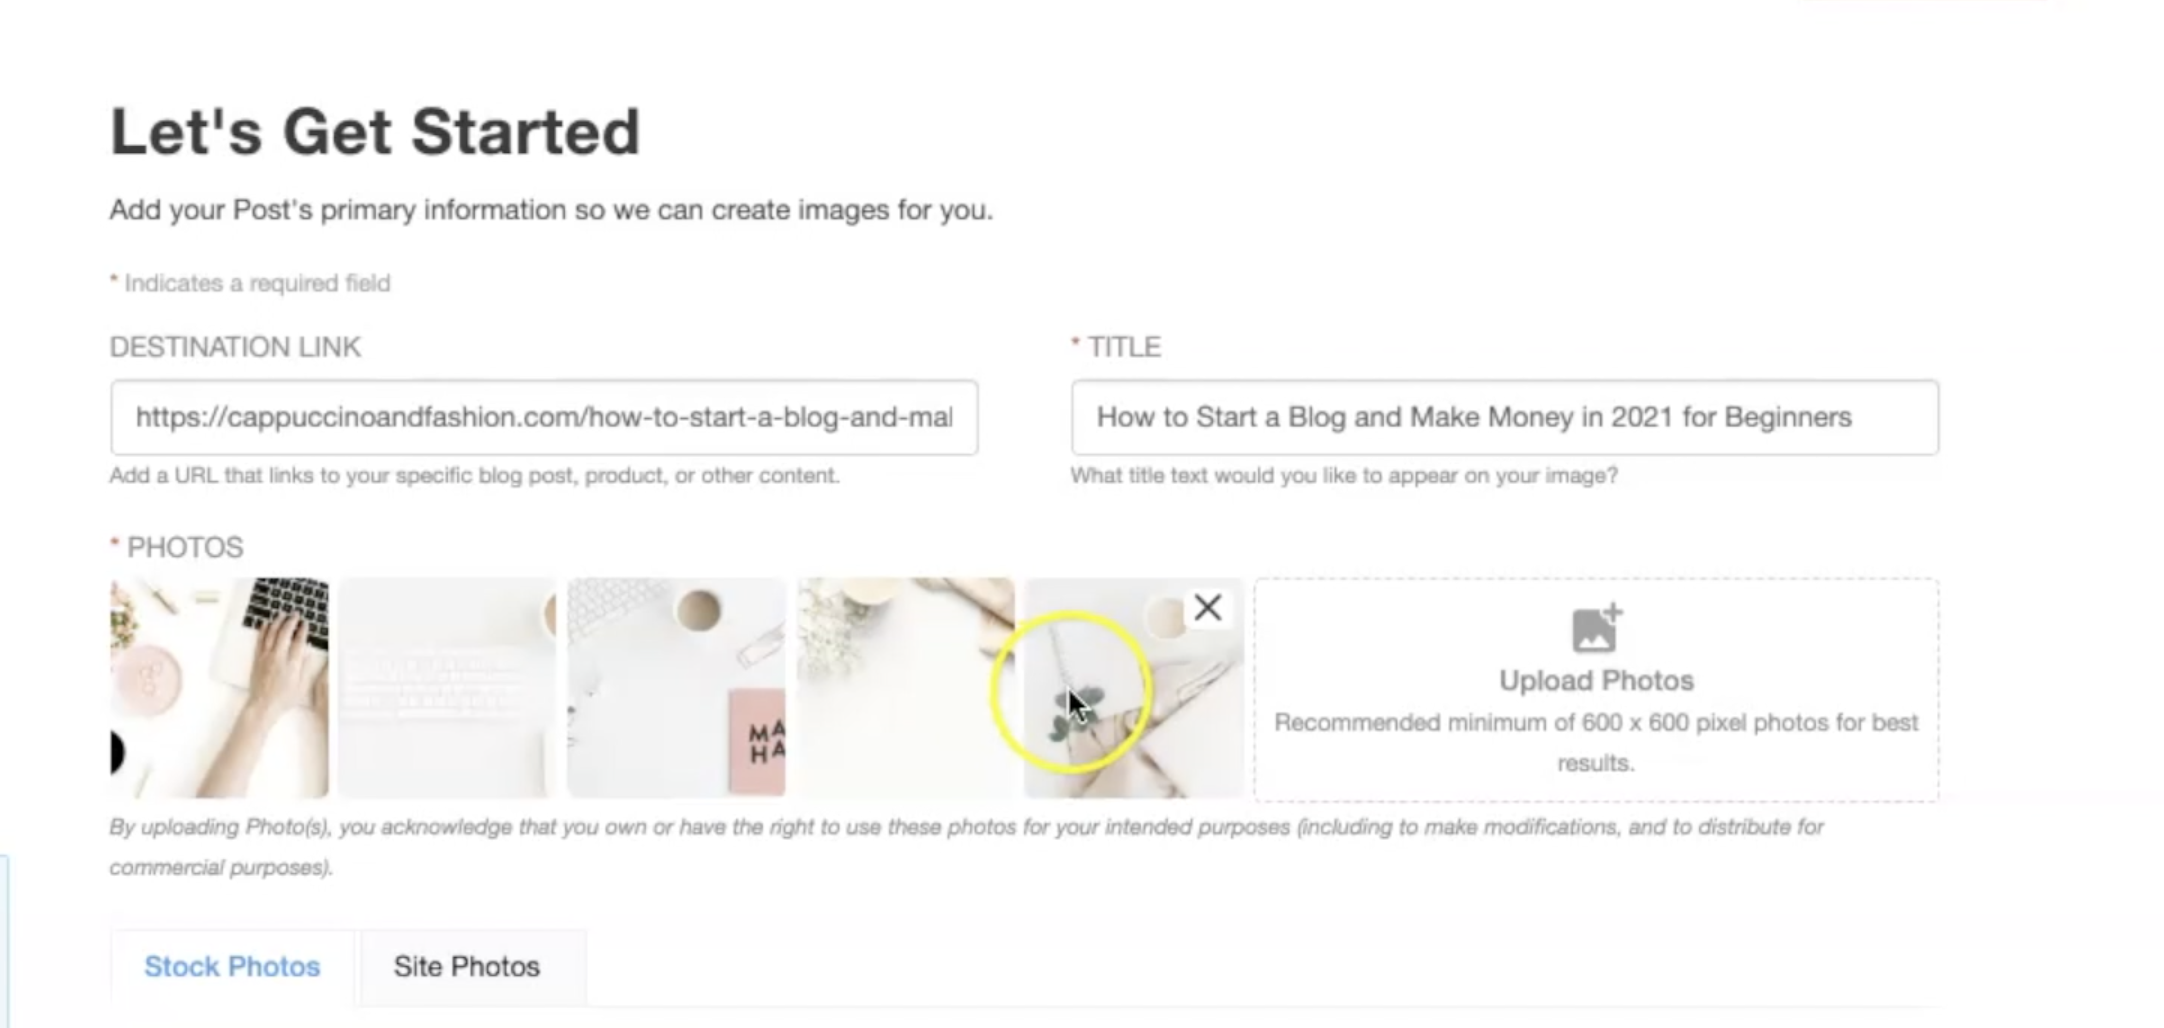
- Destination Link – You will first fill in the link where you want these pins to go to. For example (below): I have included the link to one of my blog posts. You can also add a link to a landing page for one of your freebies or for one of your products, for example. You can add a link to one of your YouTube videos, you can link to any piece of content you want to promote on your Pinterest.
- Title – Tailwind will automatically pull in the title of your post here, but you can also type it out yourself if you prefer. This is the text that will appear on your pin image. I recommend keeping it short and eye-catching. Think of something that will stand out in a feed of pins.
- Photos – Here you can add a few photos that you want on your pins. Make sure they are either your own photos or they are free stock photos that you have the right to use. You can add different sizes and orientations (horizontal or vertical). And you can insert multiple photos, it doesn’t mean that all of them will appear on all pins.
After you finish filling in all these details, click on Create Images.
4. Go through the feed of pins ready-made for you
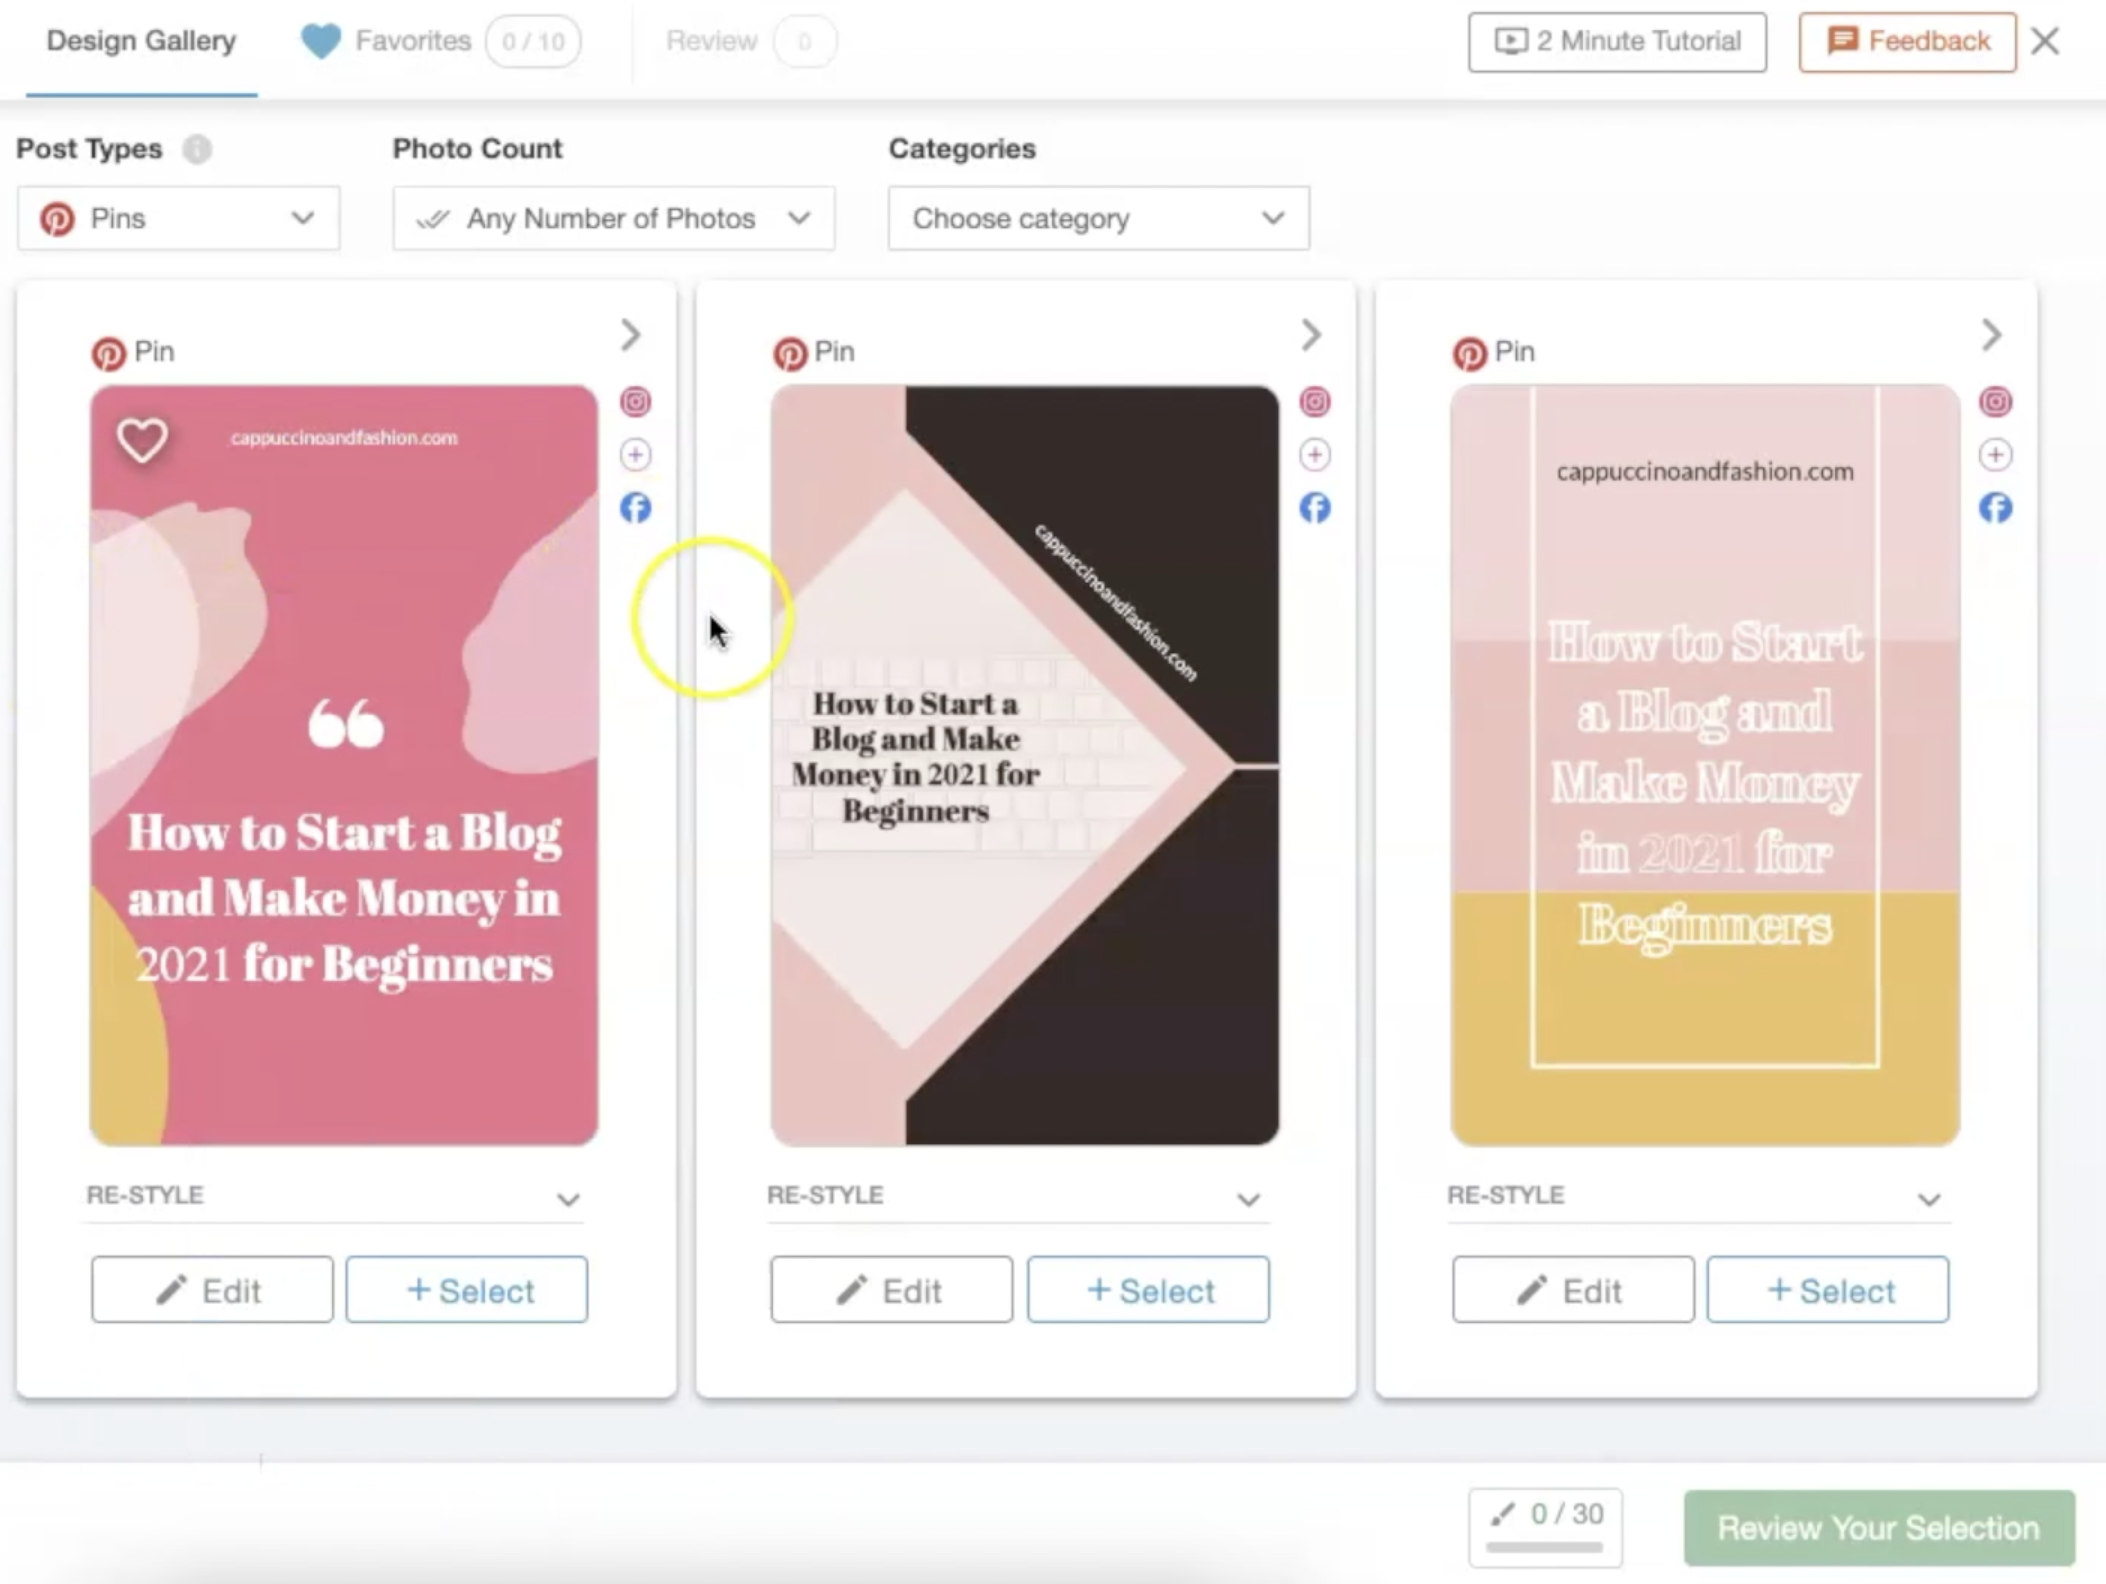
Tailwind has now created a full feed of pin designs for you to choose from, all with your specific details.
If you want to see some different designs tailored more to the type of content you want your pin to link to, then select Categories at the top and from the dropdown menu choose your category (for example: blog post, product, how to, type of industry etc).
If you want to change any of your initial settings, like your branding, your colour palette, your fonts, you can do that here in the menu on the left:

5. Click on Select to add a pin to your selection page
When you find a pin your are happy with in this feed, click on Select.
This will add that pin to your selection, which you will be able to review on the next page before publishing.
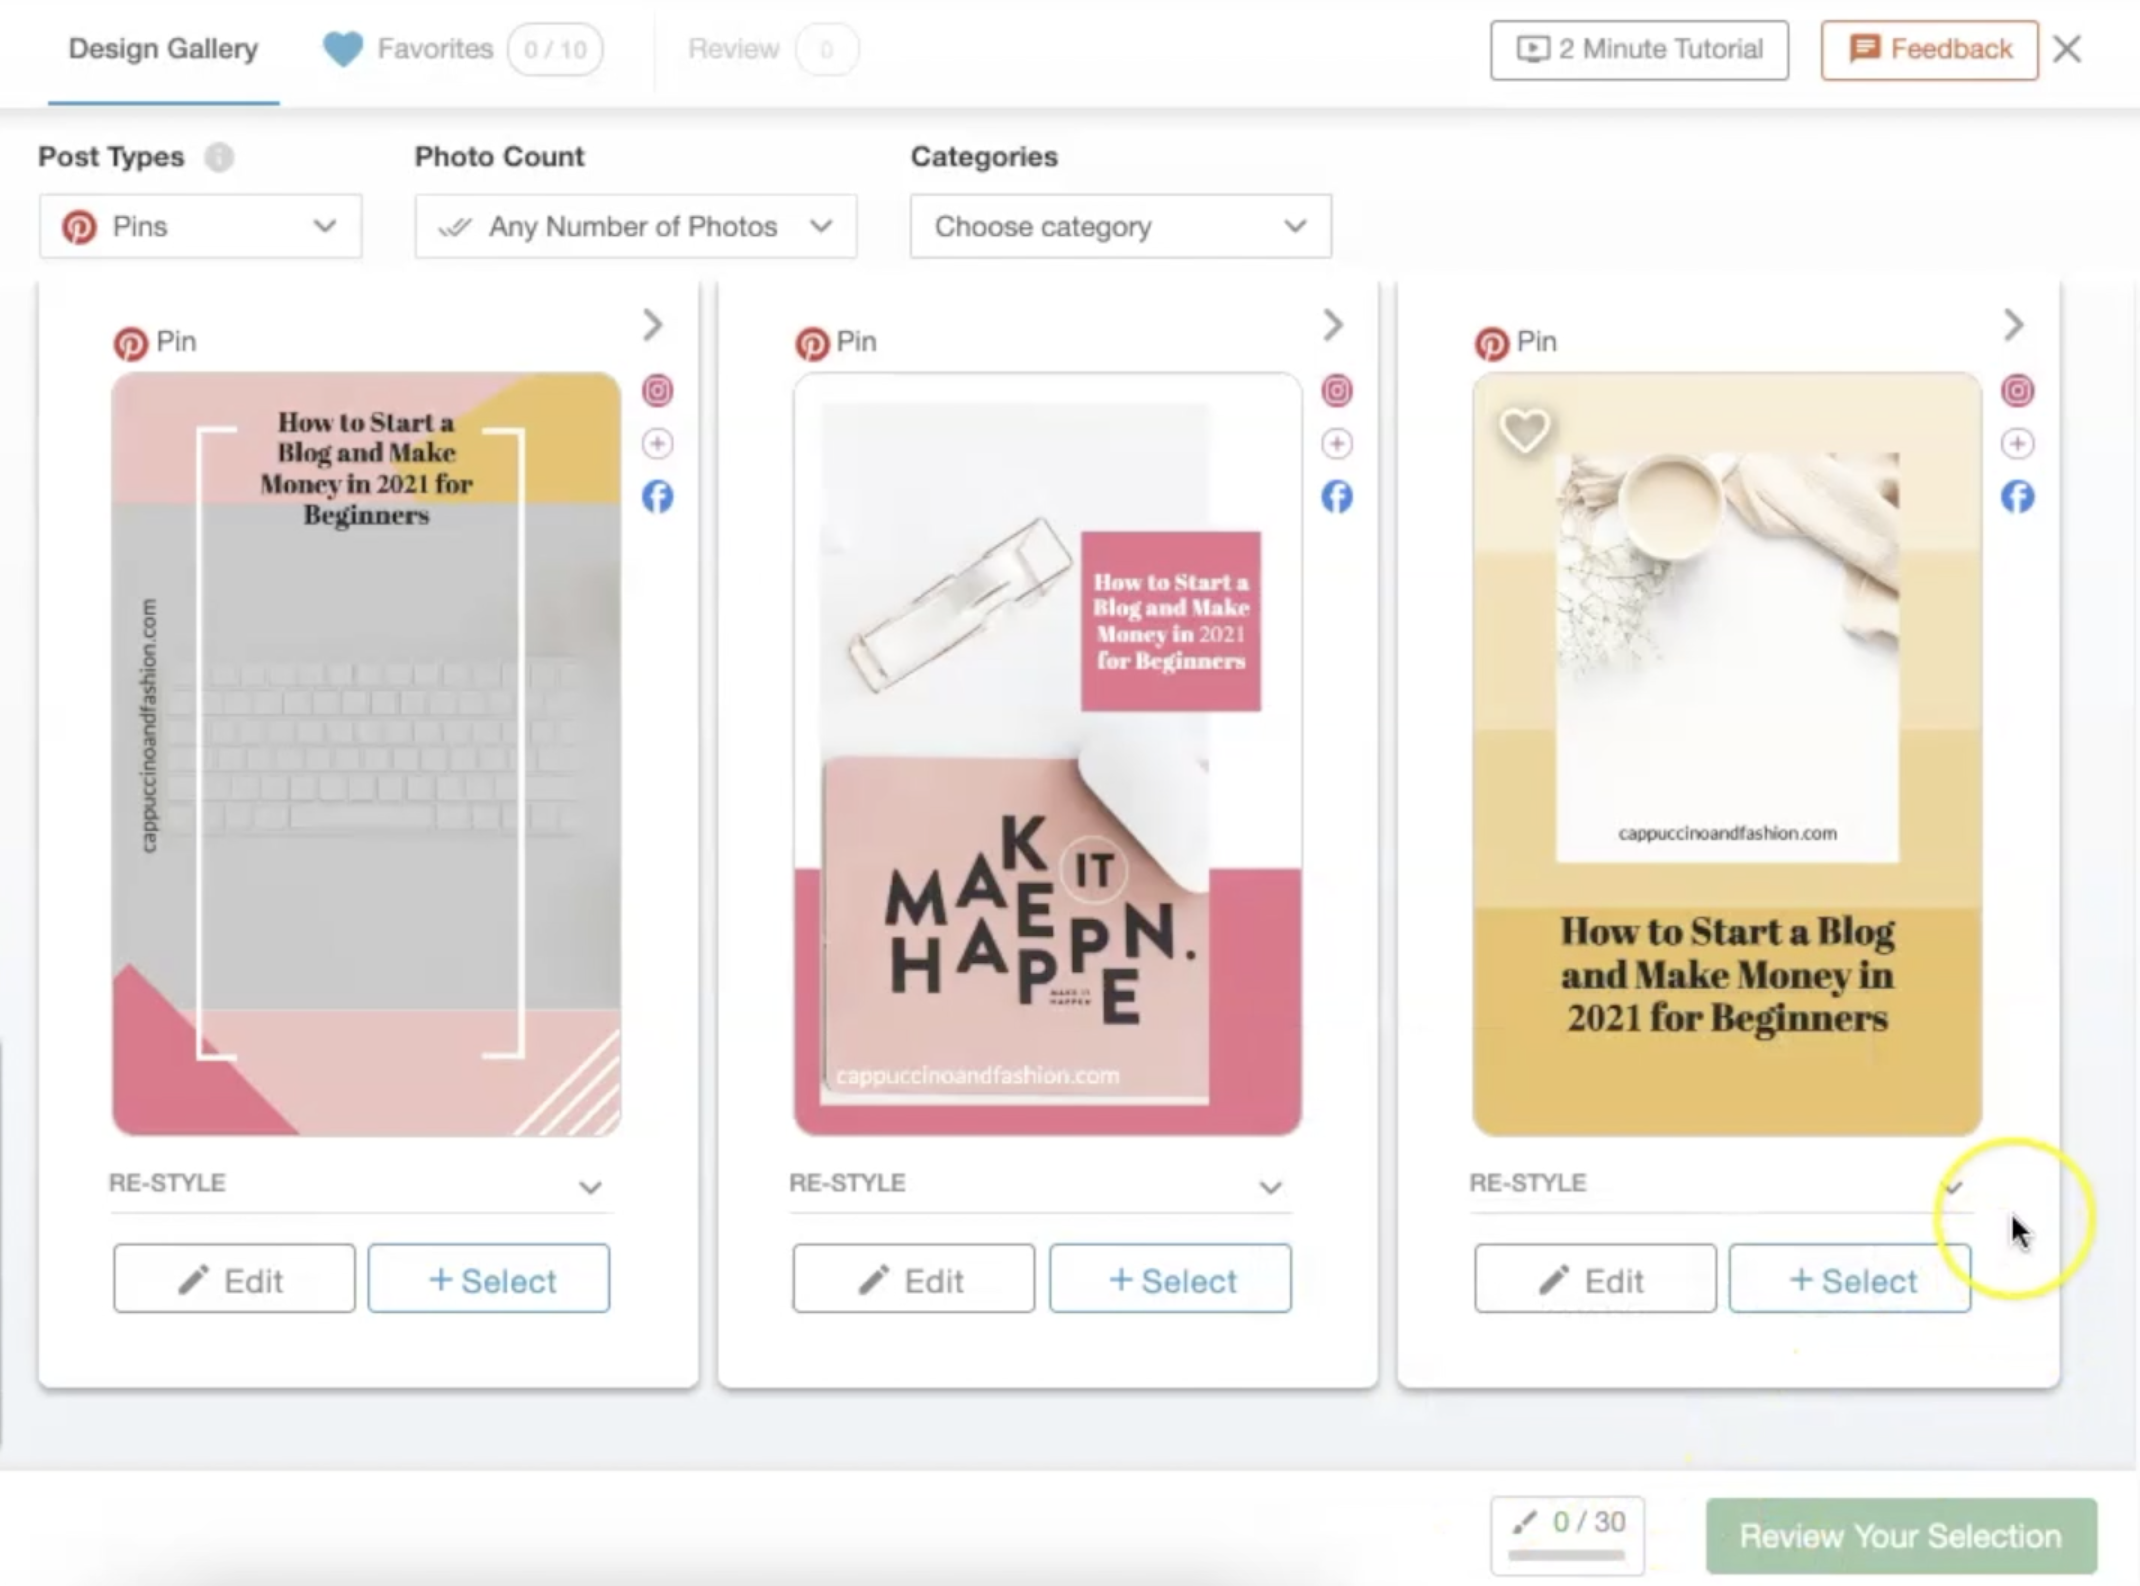
TIP: Tailwind Create is not just for Pinterest pins. At the top of this feed, you can select Post Types and see the dropdown menu. You can create Instagram feed posts, Instagram stories or Facebook feed posts as well.
If you select any of those post types, the images will be automatically resized and optimised for the specific platform you selected.

6. Make any edits you need to the pins
If you find a pin design that you like in this feed, but would maybe need some changes in order to make it perfect for you, click on Edit.
This will open up a page for that specific pin design, where you can edit any of the details on it. You can change fonts, sizes, images, colours etc.

After you are finished making your edits for this pin, click on Save and Go Back.
7. Review Your Selection and Add the Pins to your Schedule
After you’ve selected the pin images you like and made any edits as needed, you can then click on Review Your Selection.

You will then be able to see the pins you’ve selected, make any final edits or remove any if you’ve changed your mind.
After you’ve reviewed your final pin designs, you can go ahead and add them to you schedule in Tailwind.
They will then be published straight to your Pinterest according to the schedule you’ve set up.
Is Tailwind Create Free?
Yes, you can get access to the Tailwind Create tool for free. You can start on the Forever Free plan and get 20 designs per month included, as well as 20 posts scheduled per month and access to 5 Tailwind Communities.
This is a really great plan for you to get your feet in the water and see if it’s something that fits you and your current blogging needs.
Is Tailwind Worth the Money?
Yes, Tailwind is worth the money. For me as a blogger, Tailwind helps me save so much time on my Pinterest strategy because I can batch create my pins and schedule them to go out for the next few weeks or even months.
I usually sit down for about 2-3 hours to create all my pins for the next few weeks, or whenever I have a new blog post coming out and I want new pins to promote that. I then go to my Tailwind dashboard and schedule all the pins I have created, to go to different boards throughout the next few days or weeks.
Tailwind has been a massive time saver for me.
If you’re a bit unsure, you can find out here if Tailwind is worth it for you, as I wrote a full review of all the features you can use as a blogger.
If you’re ready to take your pinning to the next level, get your Tailwind account started here and see how it works for yourself.
I hope this Tailwind Create review and tutorial was helpful! Have you tried this tool yourself?


Leave a Reply